I said “with”, not “by”. Traveling by (or for that matter, on) a bike is awesome, or at least can be, from time to time.
However, schlepping the damn thing through airports, train stations, packing in rental cars, cramming in hotel rooms, and so forth can be a royal pain in the ass. Fortunately, there are some tricks to make this somewhat easier on your wallet, spine, and psyche.
First off, you could just rent a bike at your destination. Prices range from the low $20s to over $100 per day, depending on location, bike type, build level, and so forth. Check with local bike shops, Google “bike rental” in the town you’re visiting, and off you go. Since you’re probably already taking shoes, you can easily toss in your pedals and maybe even saddle. This stuff is easy to pack and takes up less space in your bag than your helmet (also rentable, but eeeew).
Since I mentioned shoes, let’s give a bit of thought there. If you have road shoes, place them carefully back where you store them at home and grab your mountain bike shoes. If you don’t have mountain bike shoes, buy some. Clip-clopping around tourist destinations in road shoes sucks, as you skid across coffee shop floors with your toes higher than your heels, and those hard carbon soles you ponied up for are awful for walking in. Get some mountain bike shoes with soft-ish rubber soles and a tiny bit of flex, and you can walk around comfortably and reasonably safely on slick floors.

Now the bike. It turns out that having a bike on hand is a significant component of traveling with a bike (otherwise it’s just called “traveling”). For the purposes of this rambling post, we will assume the bike is yours and you wish to take it to some exotic destination. Let’s address the obvious: bikes are unwieldy, large, hard to pack, difficult to carry, require a modicum of mechanical acuity, and can be expensive due to excess baggage fees.
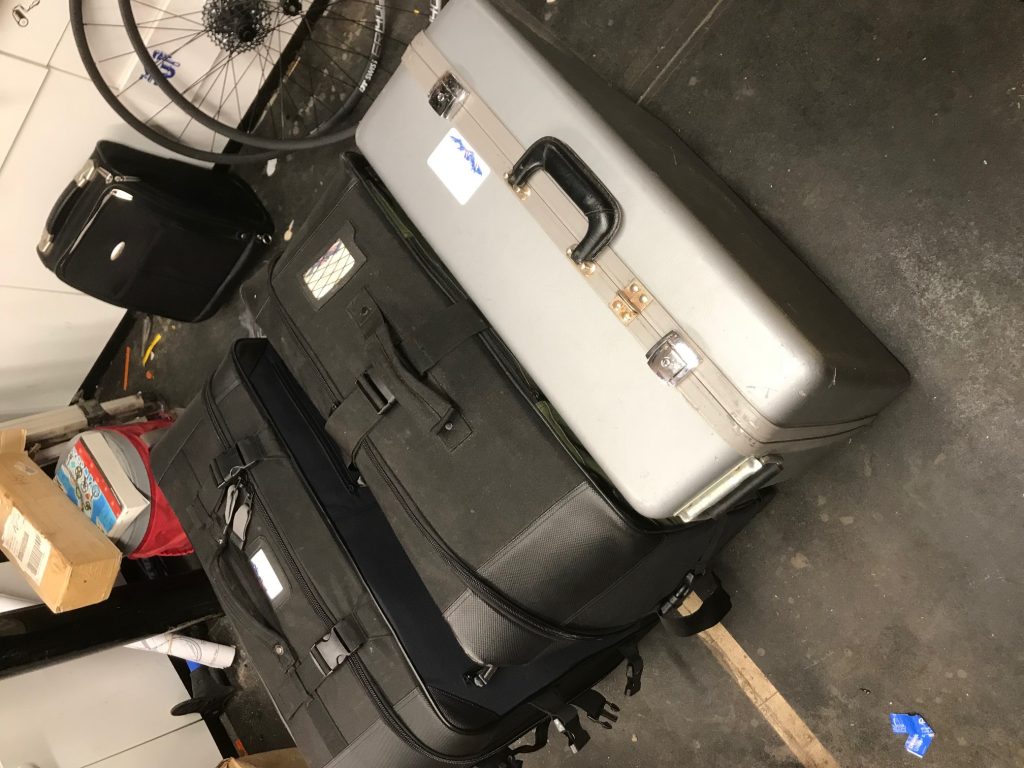
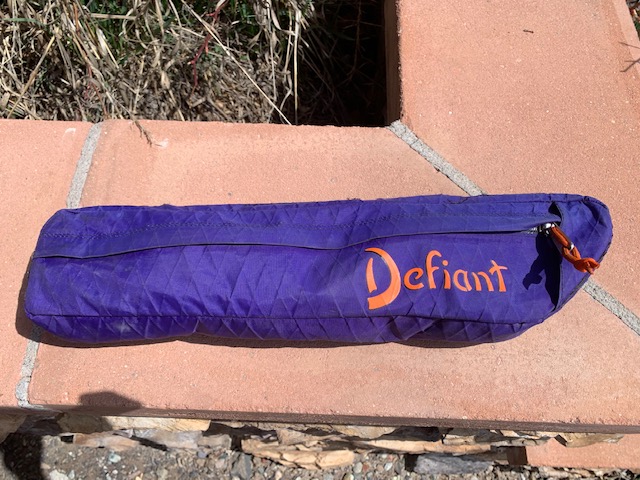
There are many pages which discuss the merits of cardboard boxes vs hardshell cases vs softshell cases vs breakaway/S&S cases, but we will not be going too in-depth on that here. Instead, let’s discuss the relative merits of size, material, wheels, and carryability. Then, dear reader, you can go dig up a case. They pop up regularly on eBay, Craigslist, local stores, loaners from friends, and so forth.
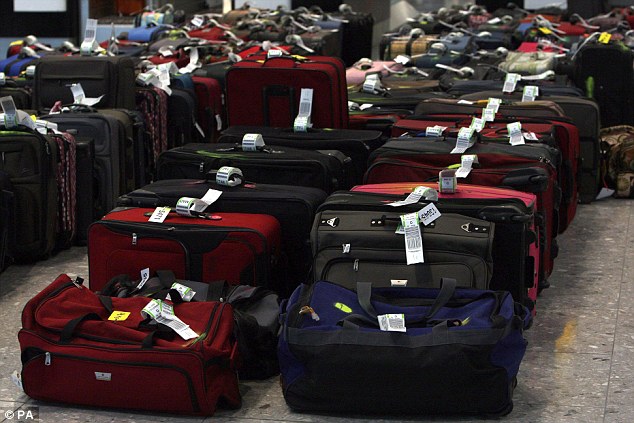
Hardshell cases are pretty bombproof, but are large, and more importantly, slippery. In my alternative career as a ramp agent for a regional airline, I have seen plenty of slippery plastic cases of all sizes and shapes slide down the loading belt at speeds comparable to Olympic bobsledders, but with more abrasive stops. These cases are also a real bitch to fit into a rental car. If I’m loading the airplane, these cases make a great base for other bags (read as: I’m putting it on the bottom of the pile). These have wheels but rarely straps, so they will roll, but carrying them sucks out loud. Also, there is no way in hell the gate agent isn’t going to flag it as a bike. Get out your wallet, it’s about to become lighter.
Full-sized softcases such as Evoc, Scicon, Douchebag, and the like have a grippier fabric surface and a variety of padding systems inside. Generally, these are obviously bikes and tend to be fairly light. Most have wheels, making it easy to push through an airport, but they require suitcase-juggling skills when you have to carry them. If I’m loading the pit, this is going against a wall or on top of the whole stack of bags. These also scream “BICYCLE!” at the gate agent, which can lead to baggage fees. In fact, many have bicycle logos or the word “bicycle” printed in large, friendly letters so that the gate agent is sure to charge you.
Mid-sized cases like eep are smaller than the biggies, and again, are made of a belt-loader friendly Cordura-type fabric. They are not obviously bikes, are lumpy and funny-shaped, and I’m putting it on top of other bags as it is not a sturdy base. These only shout “BICYCLE!” at the gate agent, and if you are very, very polite and try to change the subject often, you might get away without an additional fee. These don’t have wheels, just shoulder straps, so you may be using carts in the airport and missing them once you’ve left that building.
Stealth cases like Orucase and the like are pretty sneaky, easier to carry, and are the smallest option for a non-breakaway bag, but tend not to have wheels, instead offering carry straps. If you have a rollaboard-sized suitcase, it can be hard to carry both. Again, this bag is not a great stacker, so I will put it on top. These cases only mutter “bicycle” at the gate agent, and if you’re not wearing any obvious bike stuff, like say, your helmet, it will probably travel without fees.
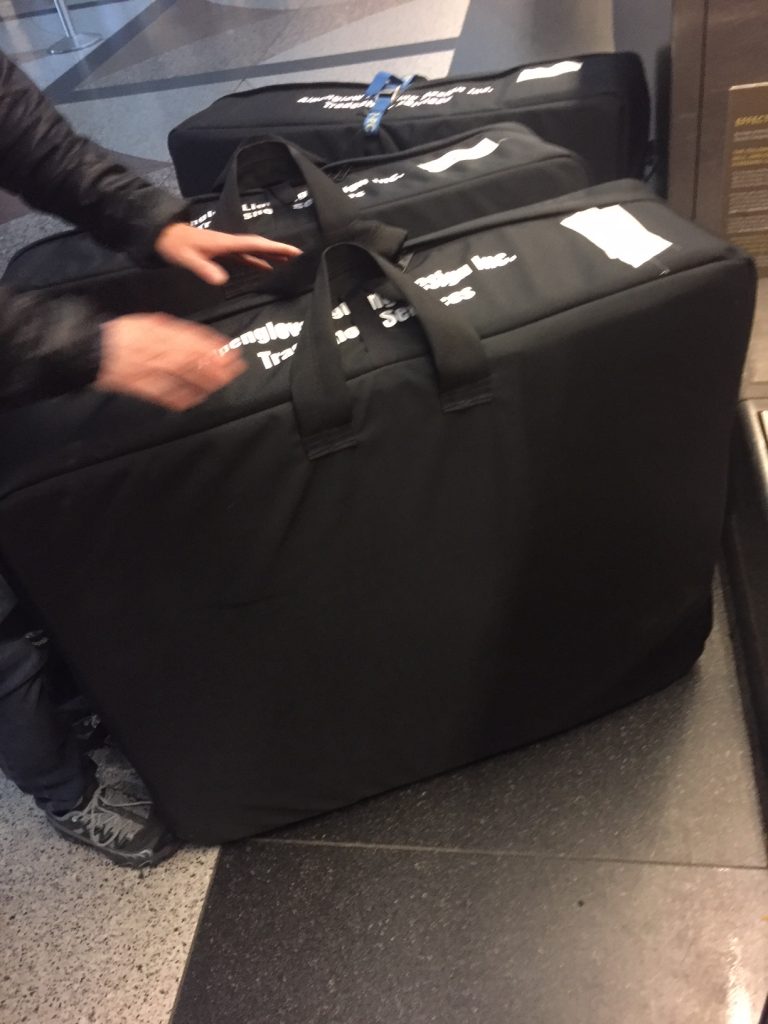
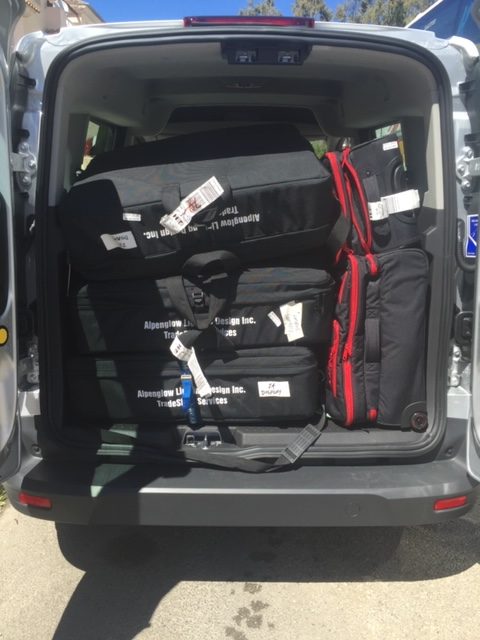
Finally, cases for breakaway-style bikes are the size of the largest legal suitcase, but their dimensions are a bit funny compared to most suitcases, which are rectangular. These are square, 26″x26″x10″ or thereabouts. There are really only 3 variants- Co-Motion, Ritchey, and S&S. These might well pack on the bottom of the airplane’s pit due to their suitcase-size dimensions. The Ritchey soft case does not have wheels, but the others do. I am considering modifying my Co-Motion Copilot cases to have smart casters so I can push/drag/wheel the case in any orientation. Sometimes dragging it ‘square’ behind me leads to clipping my heel on it, getting it caught on corners, etc.
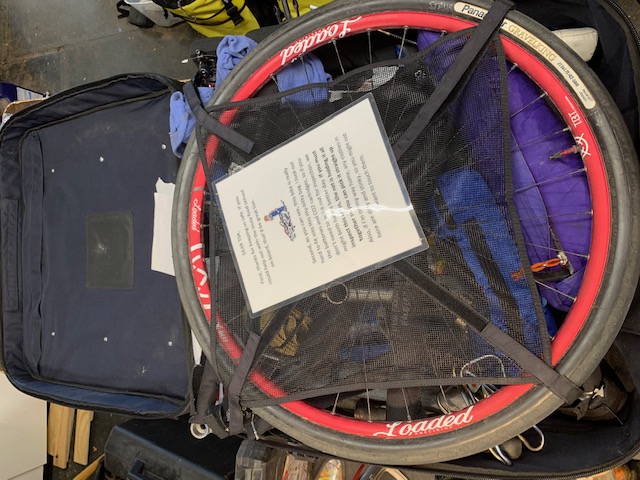
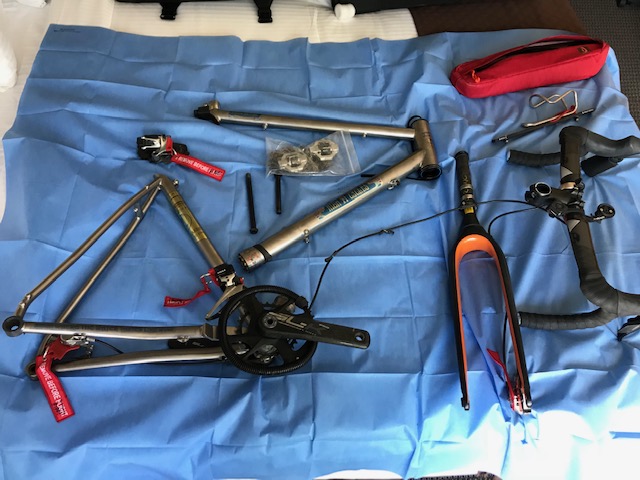
Since you’ve now selected the case, we will move on to the actual packing of the bike. You will need to remove wheels, pedals, bars, saddle, and possibly more. For God’s sake, practice this a few times. Allow several hours and a significant amount of beer to figure out how to get your bike into that case. Pack, unpack, re-arrange, pack, repeat. Once you’ve figured out this puzzle, take photos with your phone. Print one, get it laminated, and put it in the case. This helps as it’s larger and easier to see what you have done to pack, and solves the problem of packing with a dead phone battery.
There are some things to consider as you stare at the bike before tearing it apart the first time: will you take the bars off at the stem faceplate or the stem off the steerer tube? How dirty is your bike? How about the chain and cassette? Do you know which way to turn the wrench to remove pedals? (Hint: if your wrench slips and you rip your flesh on the chainring, that’s the right direction. Next time keep the chain on the big ring.) Does your chain have a master link? Have you gone online and downloaded install guides for your bike parts (derailleurs, shifters, etc.)? Are you comfortable fussing with the bike to make sure it’s running correctly? There are some bike mechanic apps and guides available if you feel you need a bit of digital advice. They are worth it and can make a big difference out there on the road in an unfamiliar place.
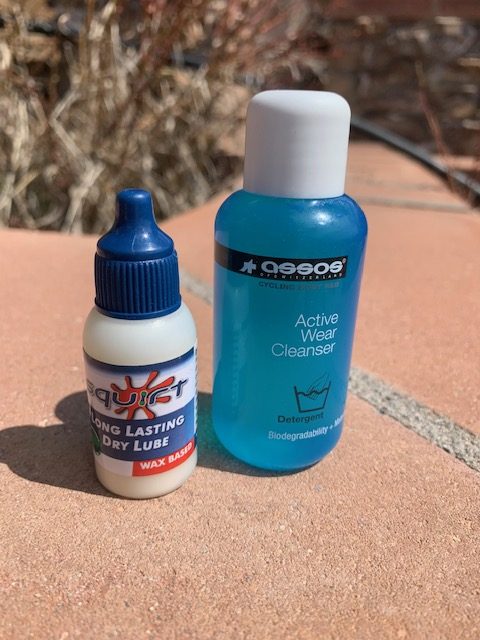
I wax my chains in a small crockpot and simple white paraffin wax. Generally, I can get 500 miles or so between applications, but more significantly, my chain and cassette are shiny clean and do not get black grime on everything. Before any trip, I clean and re-wax my chain. In case the wax breaks down on my trip, I apply Squirt at night and allow it to dry. I place one drop on each link, spin the chain to let it work in, and it seems to work well in conjunction with the paraffin. Once dry, Squirt does not pick up dirt and grime.

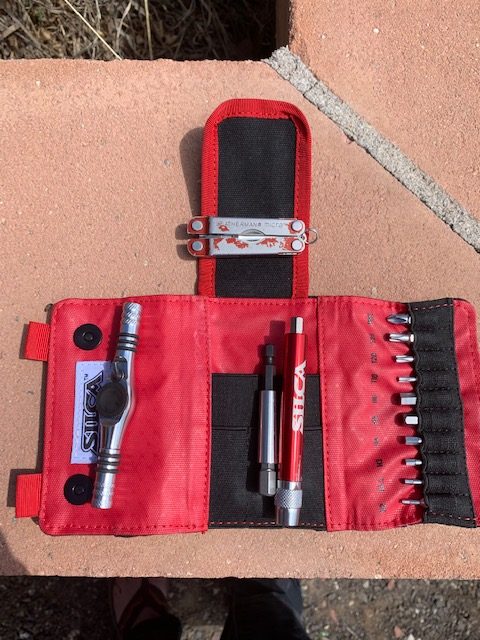
In order to do this process of disassembly and re-assembly, you need tools. There’s a very high-quality, well-thought-out tool kit, and you should cough up the considerable money to have one for travel. The Silca Ti Torque kit is fantastic. It’s tiny, fully functional, deals with torque for carbon parts, and is incomplete. I love that it’s basically wallet sized, has high-quality hex bits from 2mm-6mm, Torx bits, and the ratchet is awesome. You have to be careful with the ti-torque as it does not click like a standard torque wrench, but chances are you’re only doing a few bolts, so just look carefully at the lines as you use it. Missing from the kit is an 8mm hex bit, which is pretty common for pedals. I also added a Micra Leatherman for a knife, flat blade screwdriver, and scissors.
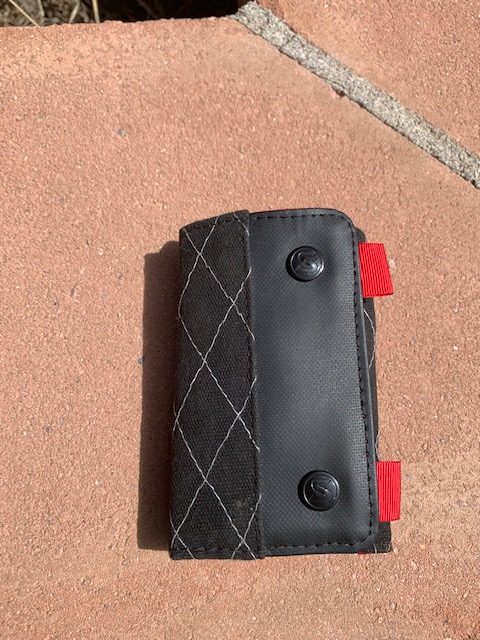
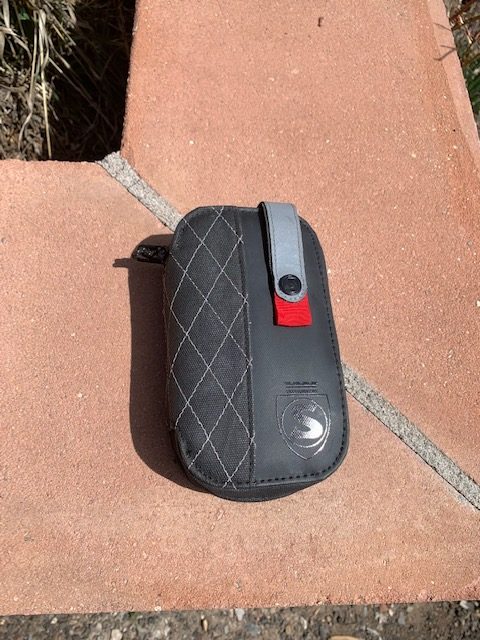
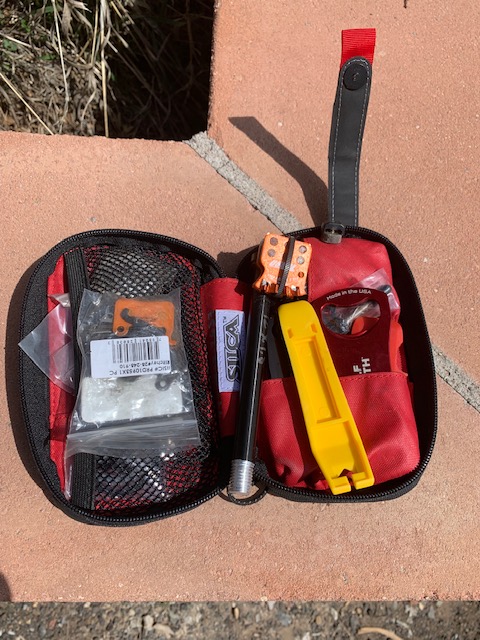
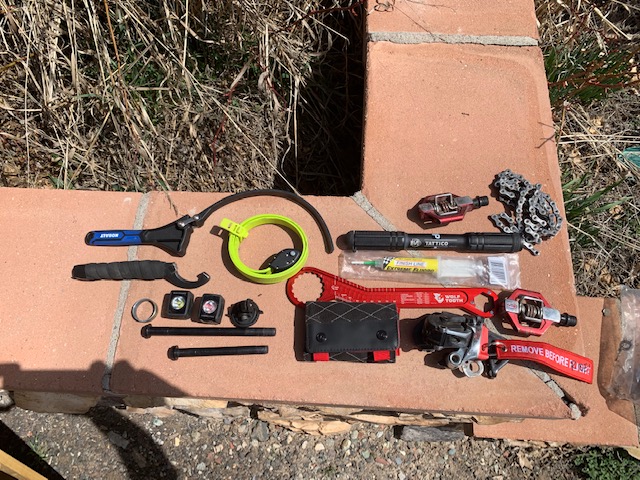
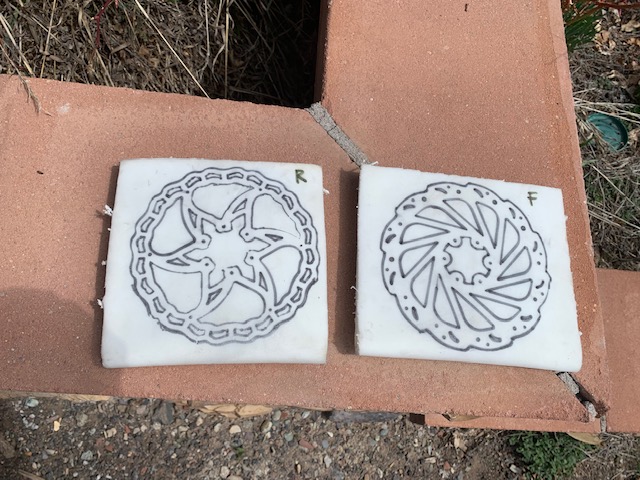
I’m also a fan of the Silca EOLO Wallet, not for use on the bike, but for additional spare parts, tools, etc in my travel case. In my opinion, it’s too big on the bike, and I don’t like how it feels in my pocket. I grew up spending a lot of time in the backcountry, mostly backpacking. I learned to carry spares, because when you’re out in the woods and something fails, you can be seriously fuct. In my EOLO wallet, I pack a pair of spare brake pads, zip ties, cable clips, spare axles (I’ve seen threads on thru-axles get galled and become useless), a pair of Wolftooth chain pliers, Wolftooth rotor tool, spare tubeless valve stem, spare derailleur hanger, cleats, and a Stein Cassette Tool. As my bike is coupled, I also carry a coupler wrench. My bike has disc brakes, and I use Center-lock rotors for fast install and packing. I’ve traveled with 6-bolt rotors, and it’s a pain in the ass to deal with all 12 bolts, but the Silca ratchet is really helpful here. For my centerlock rotors, I use the Wolftooth Pack Wrench – it’s expensive compared to stamped steel versions, but a fraction of the weight and allows for modular attachments. All of this stuff is less than a pound, and may be difficult to find at a local shop, particularly if it’s late at night and you’re in a hotel room in a strange city (or even a normal one).
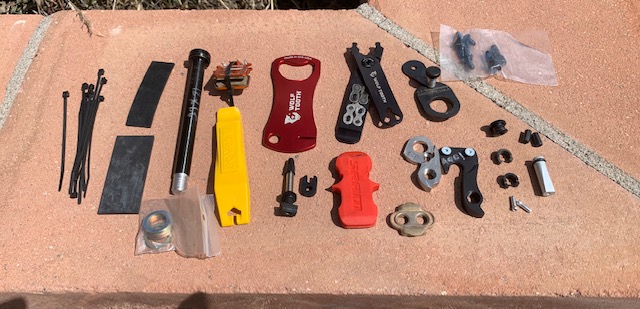
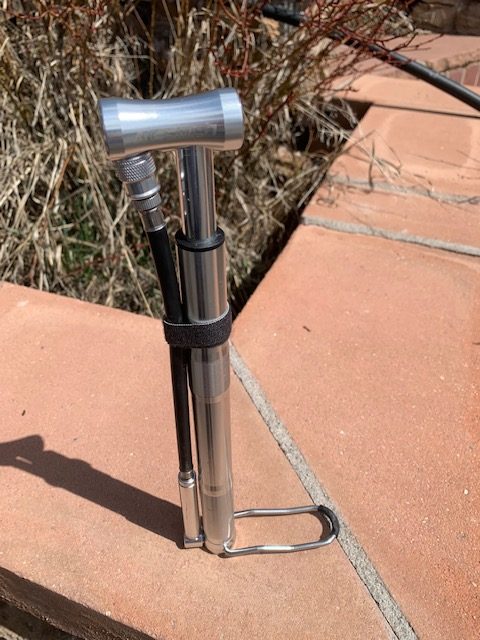
I also pack a lightweight drop cloth and spare shop rag. I carry a 15ml sample bottle of Squirt lube and a 2OZ bottle of Assos Kit Wash, as well as a small tube of Finish Line teflon grease for my S&S couplers. Other critical items are an on-bike pump (Silca Tattico) and mini floor pump. My travel bikes have toptube bags, and these bags are super handy in the packing process. I can put chain, pedals, derailleur, tools, and so on inside the bag, and reduce the amount of small crap floating around inside the travel case.
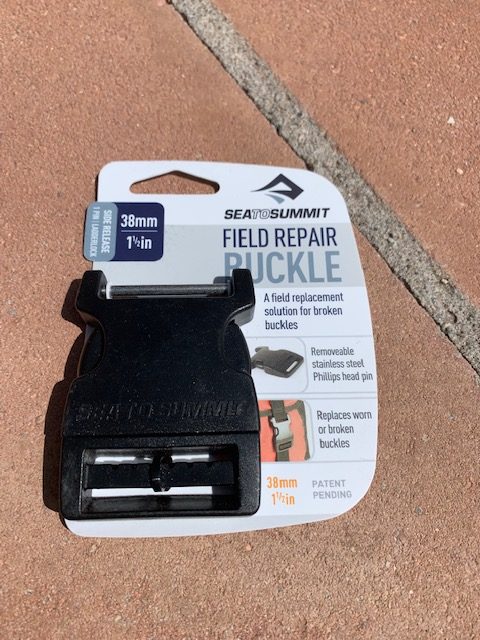
Along with the bike and its goodies, I also include a spare repair buckle for the case. On its second trip, one of the side buckles was damaged, and keeping a replacement part inside the case is easy and takes up no space.
NRS cam straps are also really handy to have. I keep one in the travel case, it allows me to strap bags together.

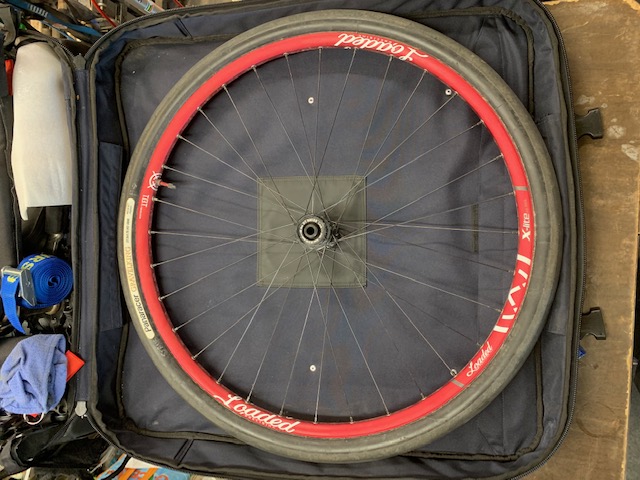
My travel wheelset is 650b (27.5″) disc, and my bikes can handle both 650b x 50 and 700c x 40 wheelsets. I like the 650 wheelset for a couple of reasons: first, they fit in my Co-Motion bag without bulging the sides, second, the 650×48 Gravel King tires (either slick or small knob, depending on trip) set up tubless ride super smooth. These tires are durable, roll great, and can handle anything you throw at them. They also seem to last forever, whereas my Donelly MSOs wear smooth quickly, the GKs have thousands of miles and still look great. If you’re running a tubeless setup, add fresh sealant before packing.
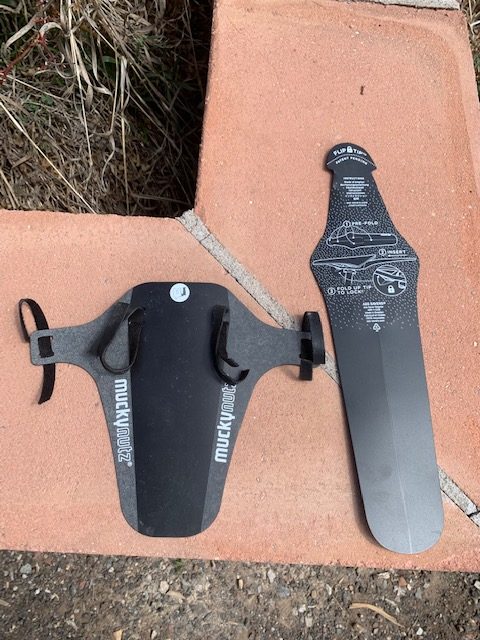
Fenders are pretty critical, and the flat plastic ones from Ass Savers, Mucky Nutz and the like are easy to travel with. They live permanently inside my travel case, are inexpensive, feather light, and take up no space. There’s really no reason not to include them.
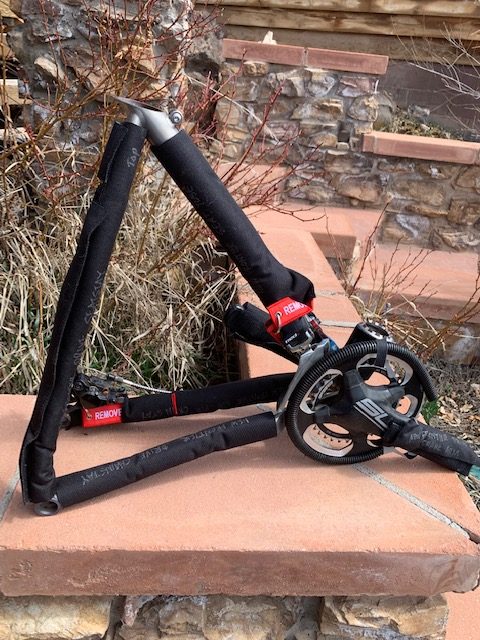
When you pack, practice disassembly with your travel toolset. Also, I strongly recommend removing your rear derailleur, or better, hanger and derailleur together. If you are lucky enough to have SRAM eTap, this is super simple as the whole thing comes straight off and tucks away. Prior to removing the battery, put the derailleur on the lowest cog, and use the battery covers that came with it. If you break off the battery lock tab, the derailleur is now a paperweight as they are not replaceable. With a cabled system, you can use velcro ties and attach it to the inside of the chainstay. On my coupled bikes, I use cable couplers for the brake cables. Combined with eTap, I can completely separate the bars and stem from the frame, which makes packing much easier. A locking headset spacer keeps tension on the headset bearings, making it easier to remove the stem and top cap. I use a silver marker to make a line on the steerer tube, so that re-assembly and alignment of the bars is easier.
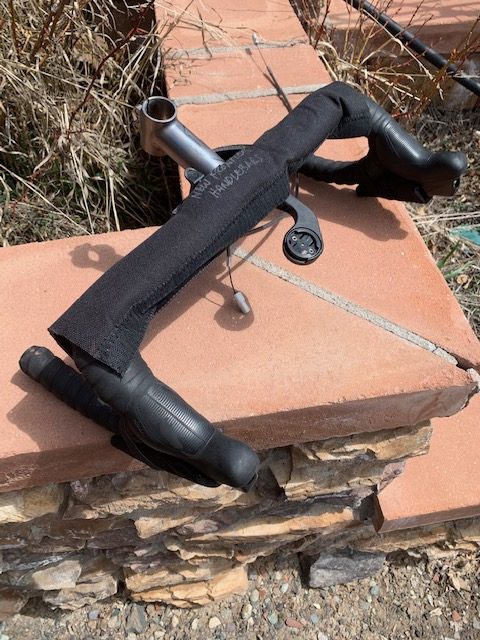
Depending on your bike and its material, you will probably want to wrap the tubes to protect it. Foam pipe insulation is easy, inexpensive, durable, and bulky, but it is probably the best solution for carbon or steel frames. You can buy it at any hardware store, but look for the version without adhesive strips. Use that on actual pipes, it’s super sticky and basically permanent. For my titanium frames, I’m not worried about cracking or denting a tube, so I use S&S neoprene pads. These are thin and have velcro, and each is custom cut and labeled for the tube. Regardless of your solution, take your time setting them up and label them clearly. It makes re-packing much easier.

Modern cycling also requires power- as in chargers, batteries, computers, lights, and so on. I have a separate kit for this. I like the Anker 6-port USB power supply (check Amazon, there’s always a new version available). I carry this in an Amazon Basics case, with a Euro plug adapter, Micro-USB cords, Lightning Cords, USB-C cords, and a single eTap battery cradle. This kit covers charging of my Garmin, my Bontrager Ion 200-series front and rear lights, phone, tablet, and so forth. This kit goes in my suitcase, not bike bag.
Let’s discuss those lights a bit- I love them. As discussed here, I know a lot about lighting, and I won’t get on the bike without these. They are bright, automated, synch with my Garmin (most XX20 or XX30 series Garmin Edges can use the Bontrager app to select light settings, plus they auto-start and stop with the computer). Many of the Bontrager lights are compatible with the app, it’s really convenient to have the systems tie together. I know they do not physically protect me, but they make me super visible to cars, other cyclists, pedestrians, and maybe even the ISS. I feel like I have a bubble of protection around me. I wouldn’t ride without them, any more than I’d ride without my trusty orange Poc Octal helmet. I love the orange color and the venting on the Poc helmet, and even though I ride with a cycling cap to keep from sunburning my scalp, the helmet vents very well.
Once the bike is packed, you now have to deal with your suitcase. That’s where you put all the crap that wouldn’t fit into the bike case.
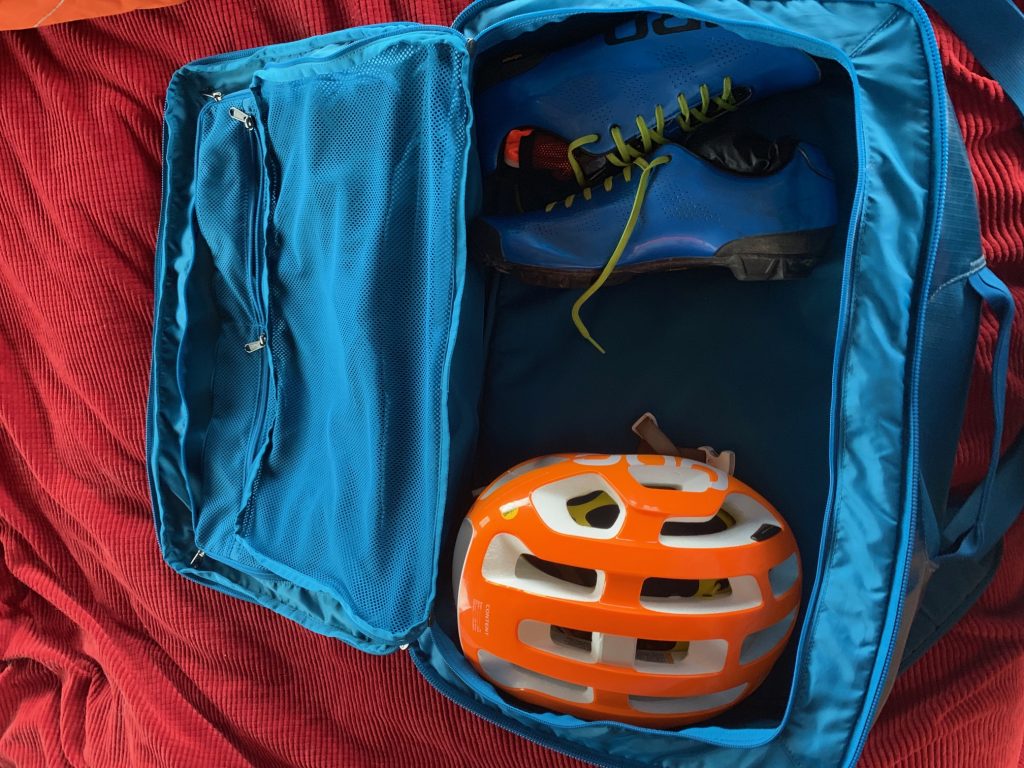
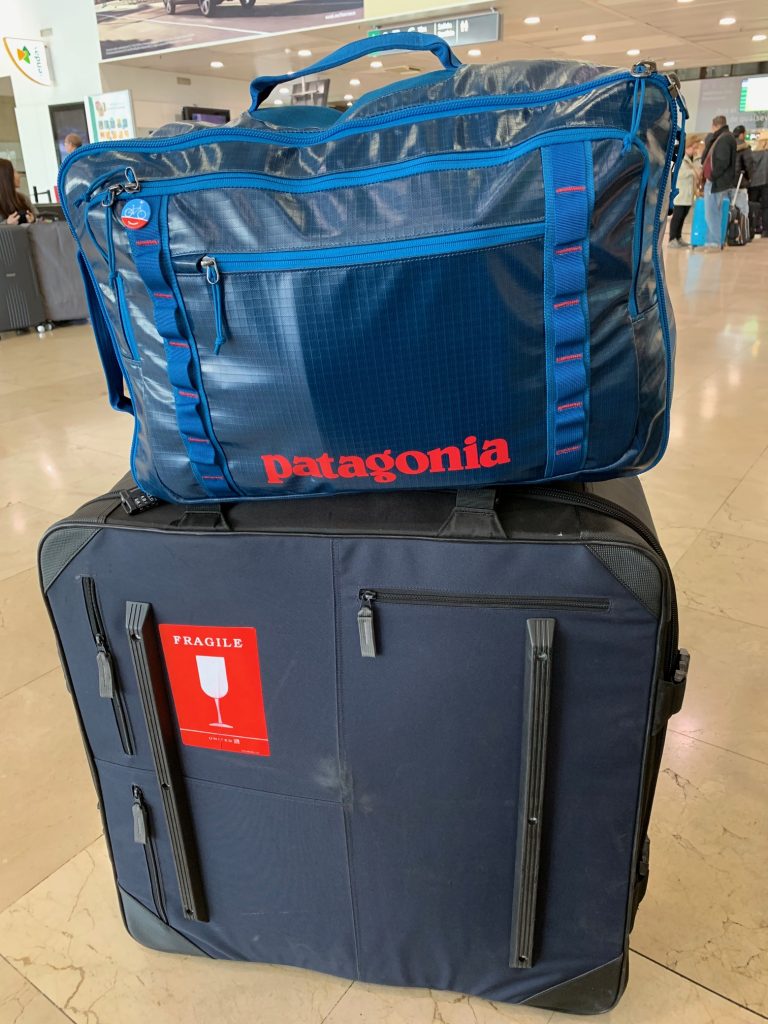
I am a fan of Patagonia Black Hole bags, specifically the MLC and 45l duffels. The fabric is bombproof, and importantly, sticks well to belt loaders. When loading airplanes, we often use Black Holes to hold hardshell cases in place. The MLC is a bit more briefcase-like, and holds technology stuff as well as a helmet and shoes, plus clothing and kit. I like packing cubes inside to help compress and sort clothing, and the MLC has plenty of pockets and zippered compartments for serious OCD packing. The MLC also has a sleeve that allows it to drop over a suitcase handle, but this can change the balance point of the base case and make the whole thing feel heavier. The Black Hole duffel, on the other hand, is just that: it swallows gear, traps light inside, and once stuff goes in, it’s hard to get out. At about 5l larger than the MLC and effectively shapeless, it will carry a huge amount of gear, but you have to use cubes inside or you’ll never find anything. My tablet doesn’t really fit in the only zippered pocket, but that’s not a dealbreaker. Both the MLC and Duffel offer backpack straps, which makes balancing and carrying them over longer distances more comfortable.
Between my MLC and my Co-Motion Copilot, I can get a bike and all my clothing into 2 bags for 7-14 days of travel. I take 2-3 chamois and jersey combos, and each night wash the day’s kit in the Assos soap. A small capful in a hotel sink washes chamois, jersey, socks, and cap just fine. I rinse them in the shower with me, then roll them up in a towel and wring them out. They are typically dry by morning. On gravel trips, I am a fan of fly-fishing shirts over traditional jerseys, and these do double-duty as casual shirts. Similarly, Club Ride overshorts work both on and off the bike. I take merino wool t-shirts, which wash easily, dry quickly, and don’t stink, wool socks, and one pair of Carhartt pants. They are cotton, but are indestructible and comfortable.
So, this looks like a huge amount of stuff to carry and to pack. To an extent, it is, but careful attention to packing makes it actually pretty simple and easy. Once packed and loaded, the tool kits and spare parts kit stay ready to go and are easy to permanently store inside the travel case as you really don’t need them at home. As I’m a very experienced bike mechanic and designer, I don’t give much thought to using them while traveling, and probably take more than I need. However, I can’t imagine traveling without proper tools and spares. Similarly, the spare buckle, mini floor pump, fenders, shop rag, and drop cloth are also permanently stored in the travel case with the frame pads. Then, when it’s time to pack up, all I have to do is break down the bike and pack it. Since I’ve done my homework and practice, it takes only about 1/2 hour to pack.
My Co-Motion case weighs about 17lbs empty. When the bike is in, plus cages, tools, spare tire, water bottles, and spare parts listed above, it’s still only about 46-47 lbs. This keeps it below the 50 lb overweight charge, and all things considered, isn’t unreasonable. The case is too tight for my helmet and shoes, but those go in my carry-on sized suitcase. If my bike gets lost, I can rent. The carry-on with clothes, helmet, shoes, kit, toiletries, electronica, book(s) and so forth is around 20-25lbs, so I am at about 75 lbs for everything. While this is a lot of weight to drag around, the small-ish size of the bike case and small suitcase make it fairly easy to navigate airports and train stations.
2 Replies to “Traveling With a Bike Sucks”
Comments are closed.