Recently, my wife and I purchased coupled frames for travel. Although we had traveled several times with standard bikes and had no issues, having smaller cases is always easier. Our first forays into travel with our bikes was in 2004, when we rode from Vienna to Venice with REI travel. We used hardshell cases- the Serfas and Sunlight cases, both purchased used. Packing the bike sin these cases was easy, requiring little disassembly of the bikes.
However, these cases are sizeable, and do not fit well in either a rental car or tiny European hotel room. While walking down a narrow street in Venice, the Serfas, which rolls “flat” behind you, jammed between the walls of the buildings as the street narrowed. What I had assumed was simple perspective turned out to be a tapered street, and the walls literally closed in on me. After a couple of trips with these plastic battleship-sized cases, I went in search of a better solution.
Orucase and Gavilan offer smaller, borderline-maximum-suitcase-sized cases, but both require more disassembly in order to fit a standard road bike into 62″. Ruster is a similar solution, but results in two bags.
Being a designer, I studied the Orucase and Gavilan products, then decided that I wanted to make some changes to suit my own needs and settled in for some AutoCAD time. Fitting into the 62″ maximum outside dimensions is no easy task, and 700c wheels pretty much dictate a 26″ minimum dimension. My design ended up being 67″ in total dimension, but to date, I have not been charged for oversized bags.
The Oru, Galivan, and my case are all soft-sided, which significantly reduces weight- my case weighs about 8lbs. I used 2 layers of high-density foam plus sheets of Coroplast (corrugated sheet plastic- just like cardboard in structure but lighter and stronger. All 3 case designs place the wheels on the outside of the bag, and require removal of the fork.
Aheadset-style stems make fork removal easy, simply by removing the top cap and stem clamp bolts on the steerer tube. A long piece of velcro or removable ziptie can be used to hold the headset races together through the head tube, and road caliper brakes are easy to remove from the fork.
I wrapped the frames in foam, and created foam discs for the chainrings. My wife sewed small fleece bags for derailleurs, pedals, forks, etc., and there was ample room in the bag for helmets, shoes, kit, bottles, and so forth. Our bikes are steel, so we were not super-concerned about frame damage, although I think that it would take a serious impact to damage a carbon frame inside the bag. The wheels act as additional padding, and spokes are easy to replace if necessary.
It’s at this point that you discover the genius of SRAM eTap wireless shifting. The rear derailleur is untethered and easy to remove, and if you use cable couplers for the brake cables (either caliper or cable-disc), removing the bars completely is easy. Hydraulic brakes, however, still don’t have a quick-connect system available.
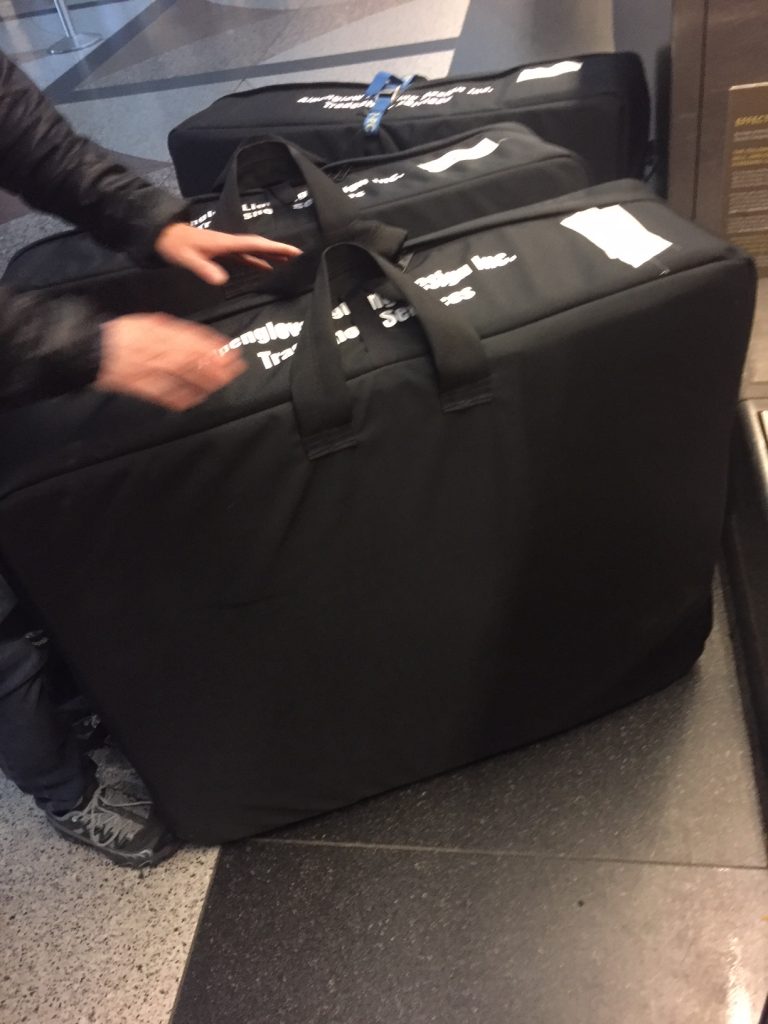
Even fully loaded, the cases were about 45-46lbs, well under the 50lb maximum, and no red flags were raised. My design is 27″ x 32″ x 8″ (67″). The gate agents never batted an eye, and one even complimented me on the bag design. They also fit nicely in the back of the rental car, and we were able to fit 3 cases behind the middle seat in our rented van.
Basically, this design (Oru/Gavilan/mine) works extremely well for a non-breakaway frame. Although we now own a couple of breakaway frames, I am keeping these bags for loaners and when I travel with a different bike.
The regular reader of this site (I know that one guy is out there) knows that I like to ramble around a bit before actually arriving at the point of the post. This is a privledge of advanced age, junior, so deal with it and learn something in the process.
Coupled bikes allow you to fit everything into a 26″x26″x10″ (62″) case, which is the maximum airline standard bag size. As mentioned above, the wheels determine the mimimum dimension. While researching cases, I looked at S&S Hardshell cases, which on first inspection, look to be a good bomb-proof option. However, they seem to have a reputation for being damaged, with the rim extrusions getting bent easily and latches failing. Also, internal stiffeners are recommended to hold the center of the case apart and resist crushing. It’s also relatively difficult to tell on their site if the cases are for sale anywhere beyond eBay.
The Co-Motion Co-Pilot case is remarkable in the complete lack of information online about it. Their own site has a few useless photos and no practical information, and I found only one guy on YouTube who had a review about it. In his video, he seems to have visited a city park to pack his bike, and his descriptions are not very useful. I also wonder how many small pieces he left in the grass.
Fortunately, I was able to visit a CoMotion dealer a mere 200 miles from my house to inspect the bag myself.
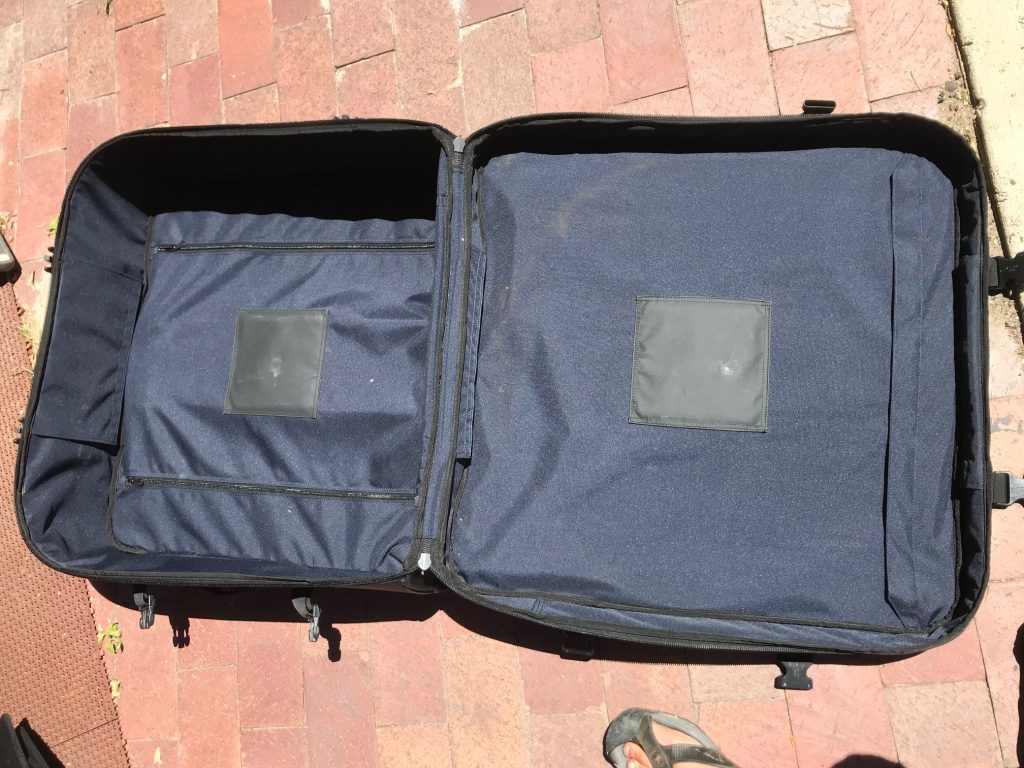
I’m glad I did, because the information online doesn’t tell you anything about the bag in any way. First, it is not a soft case. Instead, it has rigid sheet plastic inside of heavy fabric. Second, it is slightly flexible, allowing for easy insertion of wheels, even 700c x 36, which did not fit inside the hardshell S&S case.
As a side note, I have taken to traveling with 650b wheels on my bike with large tires (38-50c) which not only smooth out road surfaces, but also drop straight into the Co-Motion case.
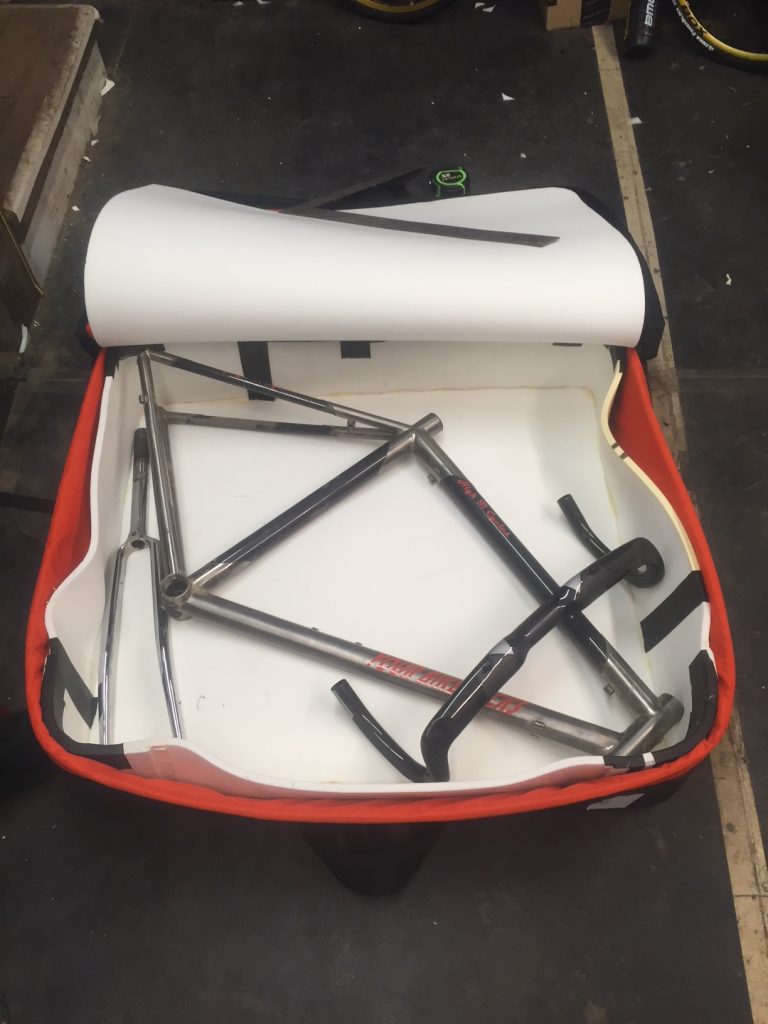
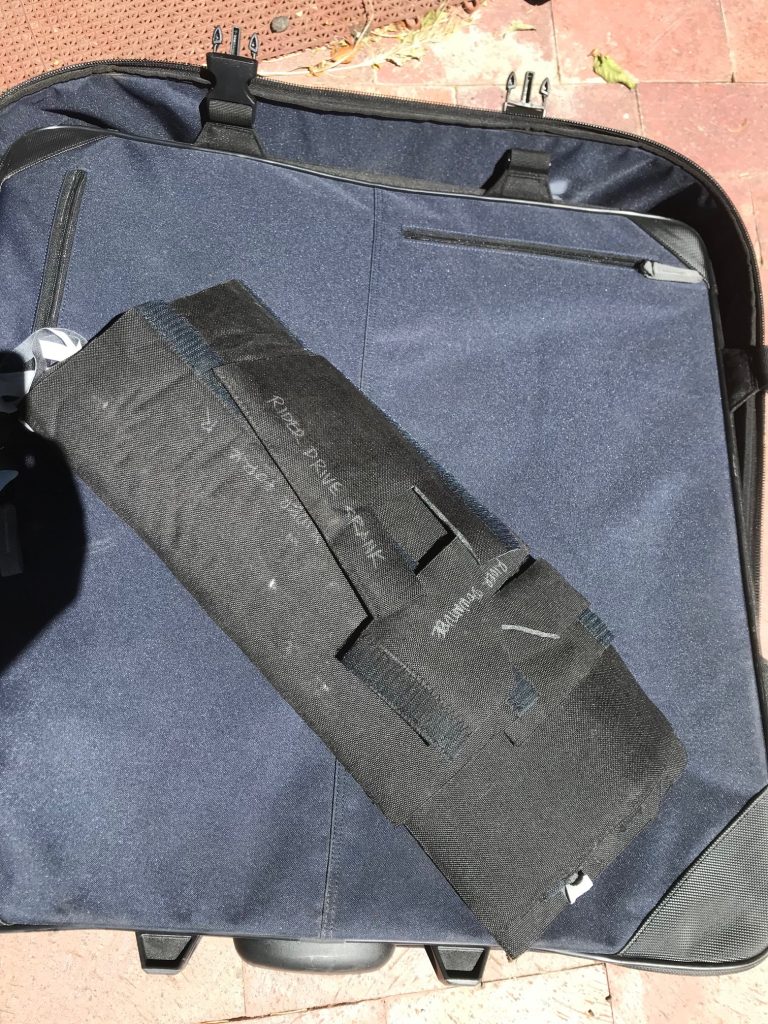
Before packing, I wrap the frame in S&S pads, which are basically neoprene-like foam with velcro. You can buy these from several sites, but measure your frame tubes first and order the correct size. You may need 2 or 3 sizes to cover each tube and the fork legs. The nice thing about these pads as opposed to pipe insulation is that they can be stacked flat and stuck together, and they take up much less space in the bag than foam. Also, if you have a ti frame, you are protecting from scratches as denting is not a significant concern. As you cut the pads for each tube, you can notch them, taper them, etc. to fit. Use a silver Sharpie to label each piece to retain your sanity.
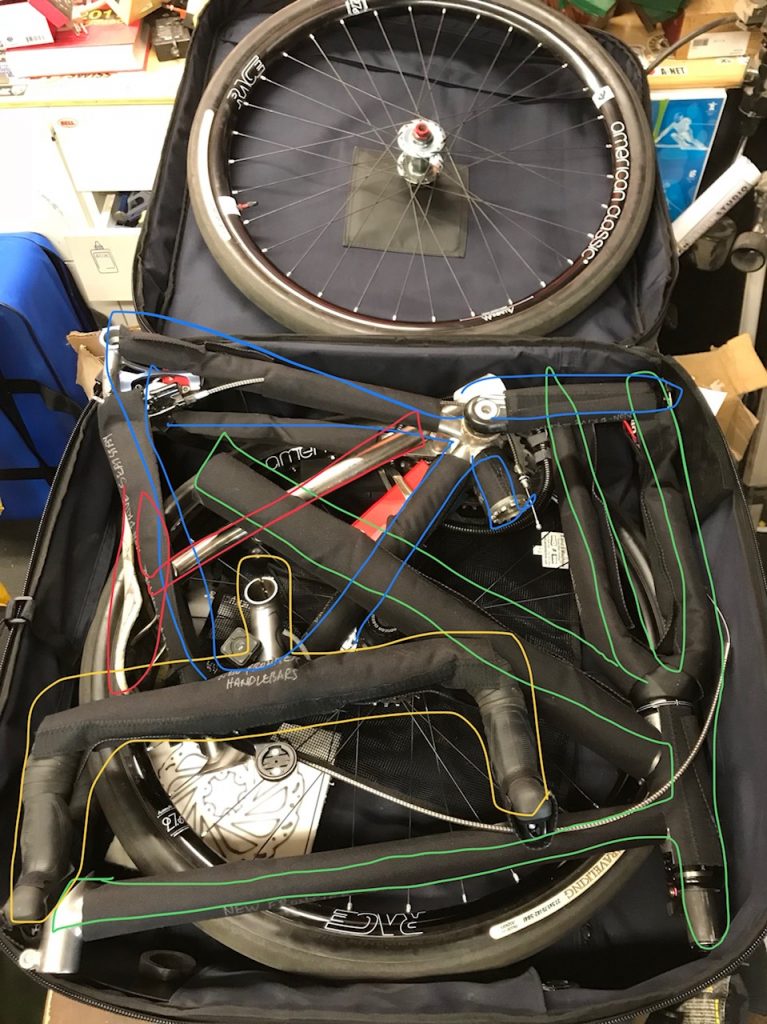
I use the S&S Cargo net, laying one side down in the case with one pair of straps connected, and the others draped over the edge. The rear wheel goes in first, with the cassette nesting between the tracks of the case’s retractable handle. DT Swiss 180, 240, and 350-series hubs allow you to pop the freehub body off easily, but you have to keep track of the ratchets and tapered springs. If your frame is through-axle, this can lower the packing profile of the rear wheel as there is no axle inside the freehub body, but my 11-32 cassette nested nicely and I don’t think removing the freehub is necessary.
The frame halves then nest inside the bag. The first time you do this, allow ample time to figure out the best way to put them in. 2 hours is reasonable, take your time to do it and try lots of combinations to make it work.
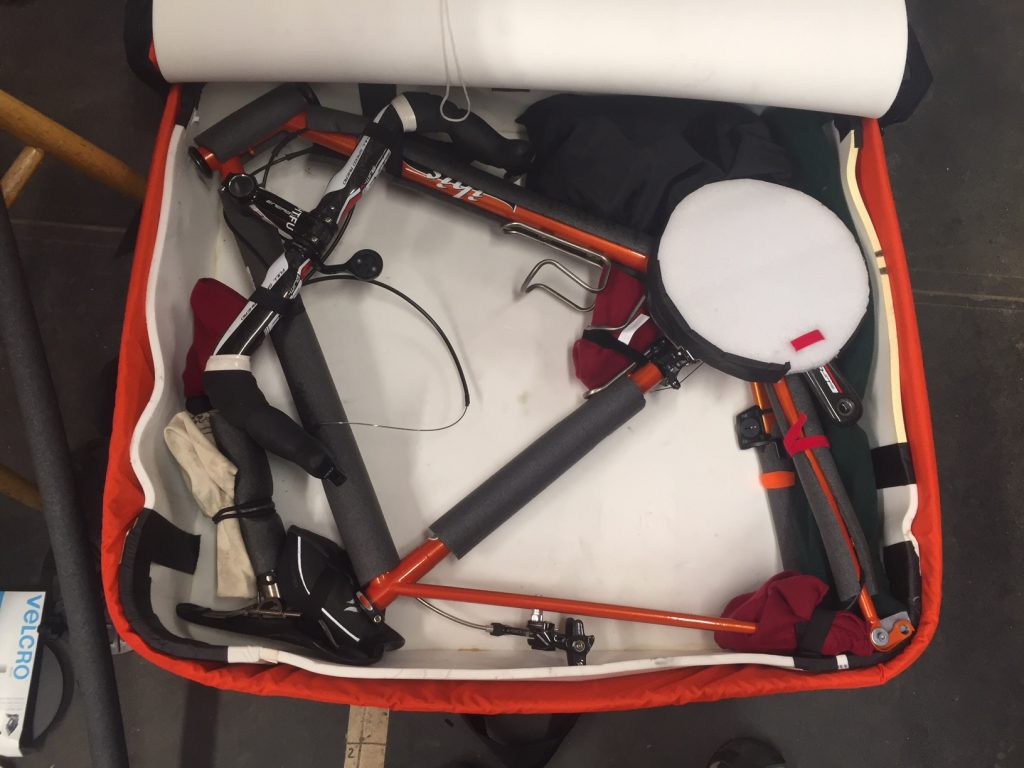
I remove the stem/bars, rear derailleur hanger (with derailleur attached), chain, pedals, seatpost, and rotors. I like toptube bags, mine are about 4″ deep and run the length of the toptube. I put as much small, loose stuff into this bag as I can.
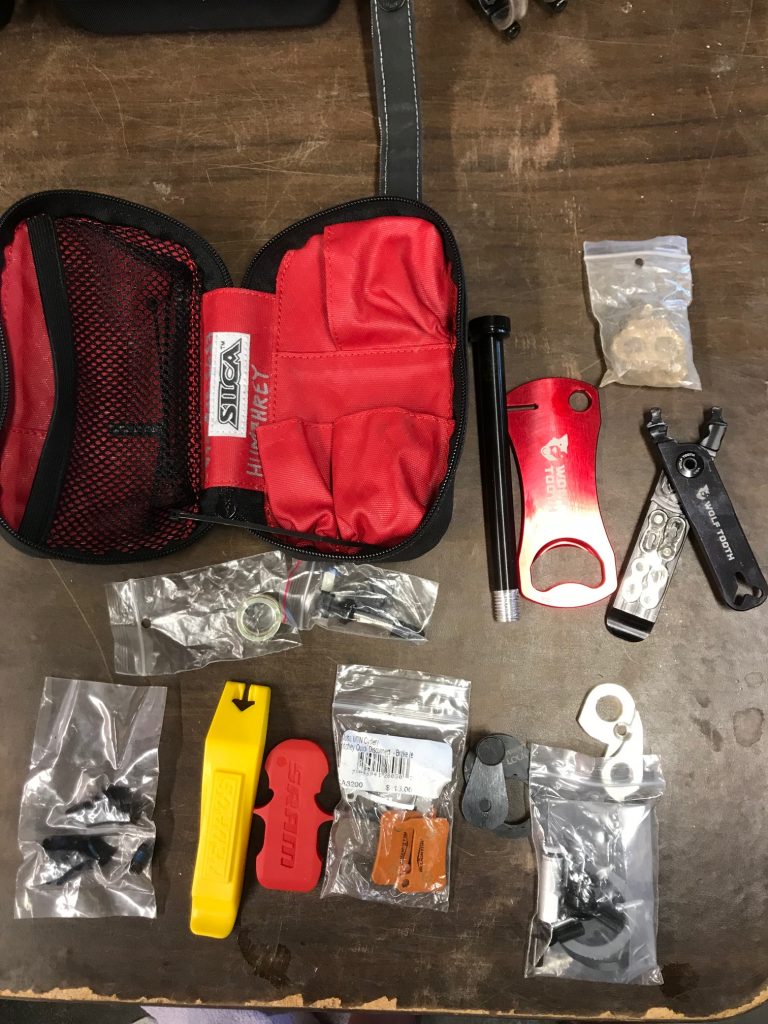
I also use a couple of small, zippered bags for a standard travel tool kit. I bring a Silca T-Ratchet kit, WolfTooth Chain Pliers, and bring a spare shift & brake cable, spare brake pads, spare Garmin mount, spare derailleur hangers, spare front and rear axles, and a range of zip-ties. I also bring a small floor pump, which is much nicer than a micro handpump. There is a flap under the handle on the inside of the bag, and this small pump fits nicely under it.
Depending on the size of your frame, you should be able to fit shoes, bottles, maybe some kit, and possibly your helmet inside. Remember to keep it under 50lbs. In my opinion, keeping it under about 47 seems to make it invisible to gate agents.
Once everything is packed, put in the front wheel, and close up the cargo net. I took a photo of the packing, then traced each part of the frame in the photo app to highlight it. I then printed this, laminated it, and put it in the case. Of course, you can just leave it as a digital copy on your phone, but I think leaving it in the case for the next trip is also handy.
Some of the undocumented features of this case is that it can couple to a matching case, pairing them together for easy transport. Tandem owners may know this already, but there’s no mention of it on teh interwebz. All you do is use the buckle straps to clip the bags together, although adding some 9′ cam straps will help tighten everything together a bit more. really, you need to have a bunch of NRS straps in your life anyway, so just buy a whole pile.
I have 2 of these cases, a first-gen and second-gen. The older case has only one set of buckles, but these line up with the loop handles on the newer case, so I was still able to couple them together. When traveling with a single case, I can also put my roll-aboard suitcase on top and use an NRS strap to lash them together.
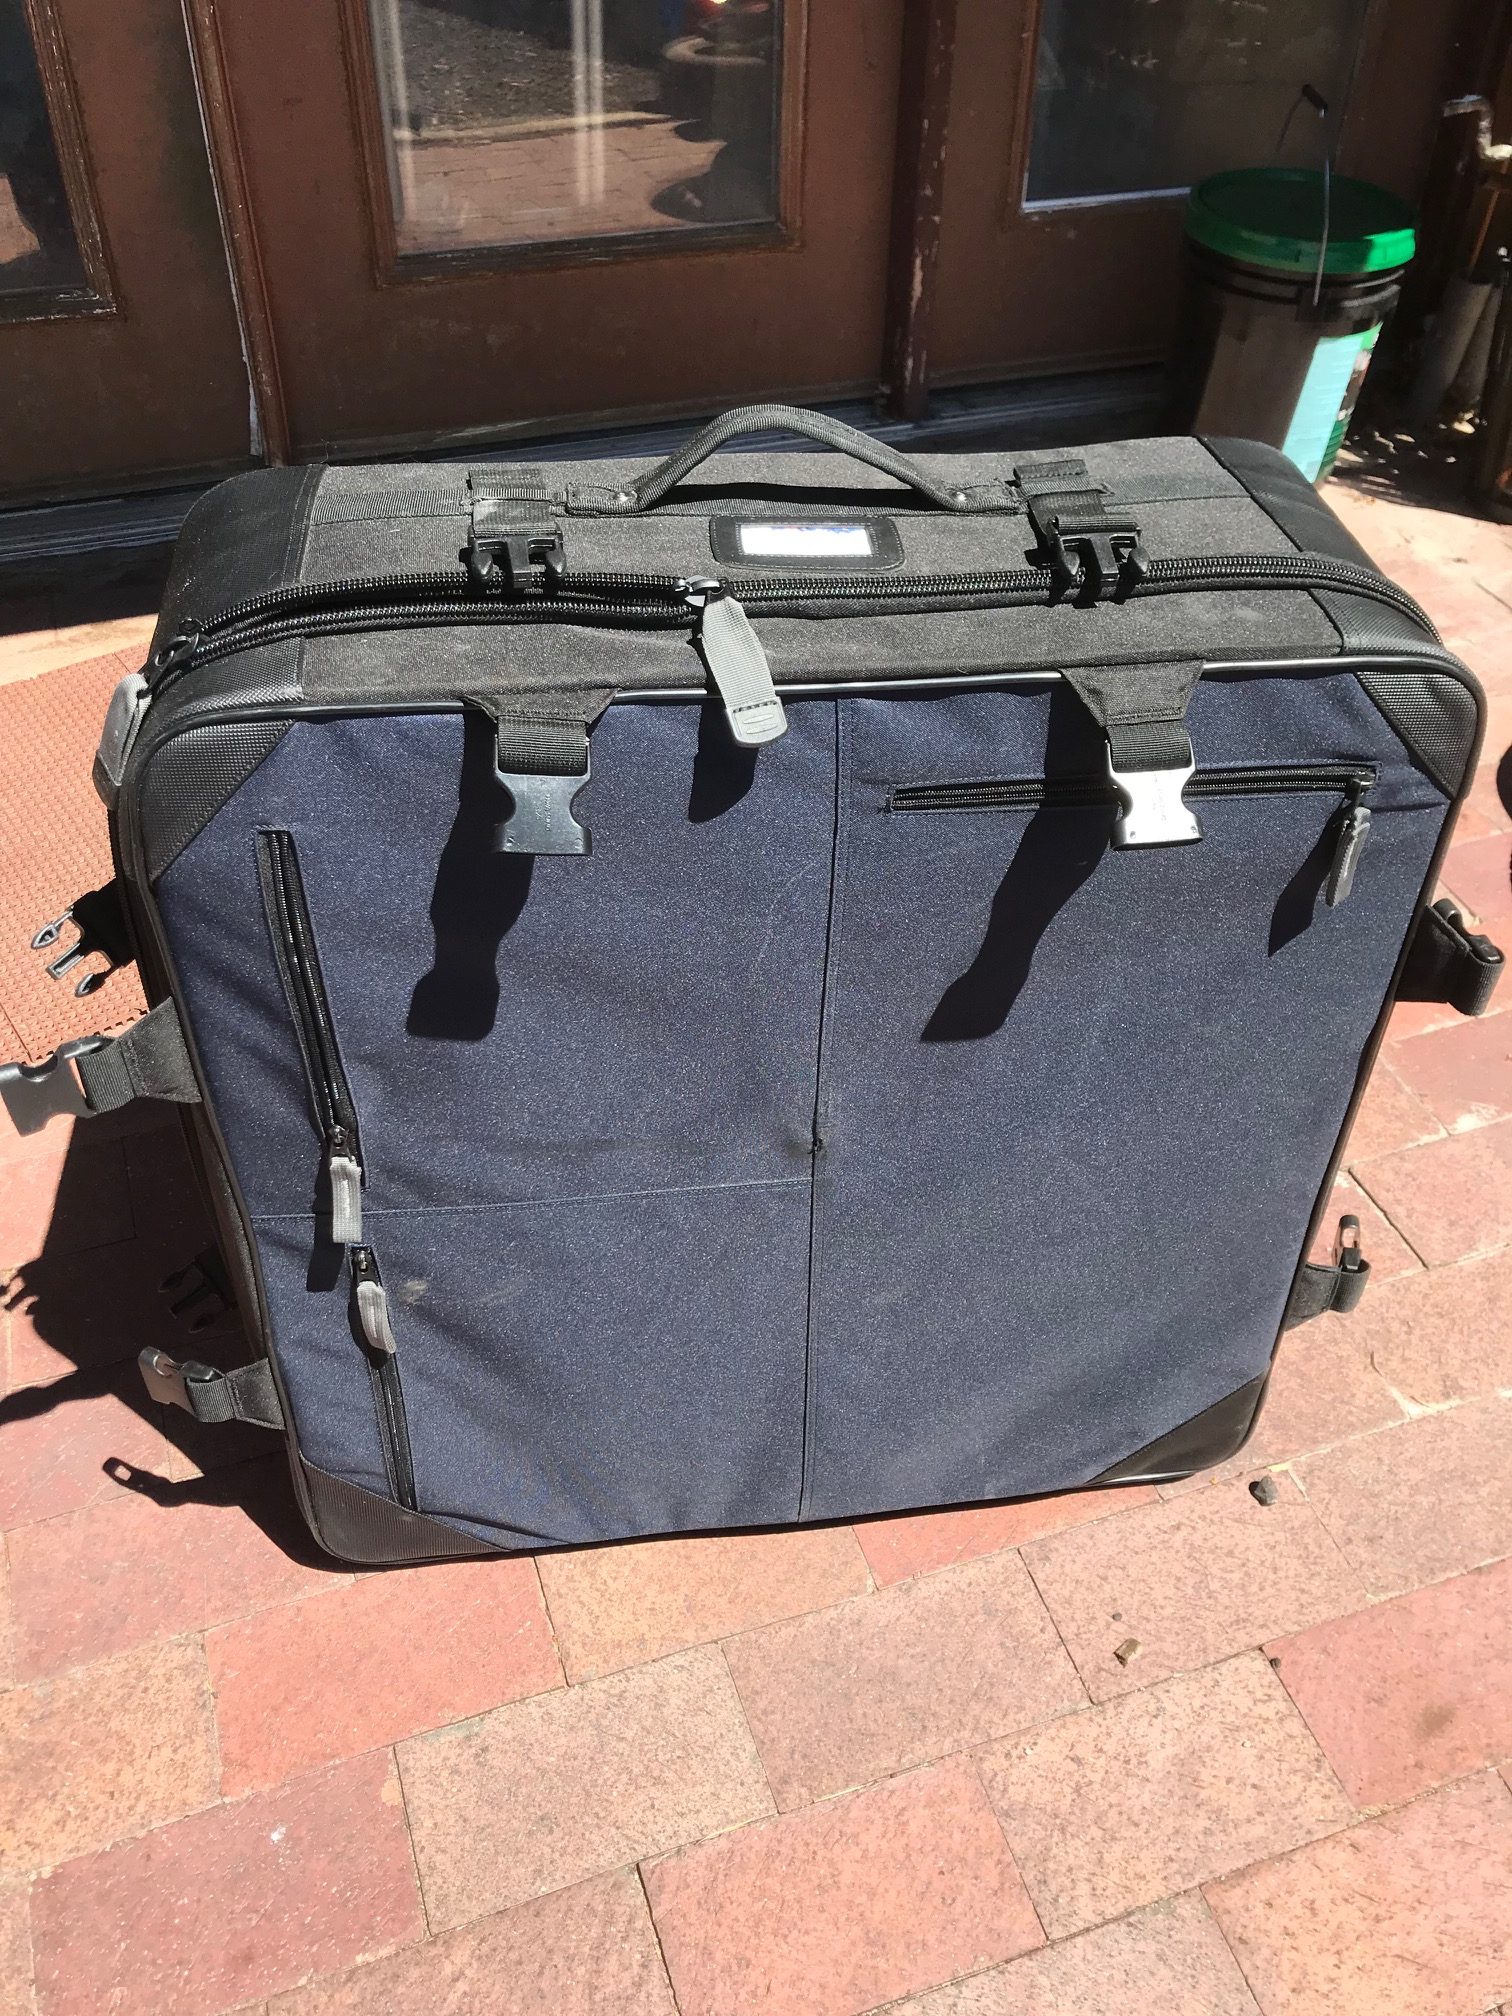
The material on the outside of the case is pretty durable, and has only minor scuffs from conveyor belts. There is a heavier-duty fabric on the corners, and I think it would be great if that was the entire exterior.
Overall, it seems to be a very good solution for travel, although not perfect. Things I don’t like are the 3 zipper pockets on the outside and the dark fabric on the inside. The zipper pockets are large, but flat, and if you put something inside, you can create a bulge which may abrade the fabric on the conveyors. Also, they are quite large, but tight, and I can’t easily slide my hand all the way inside them. There is a seam in the center of the case between the pockets, where the axle pushes outwards, and this has abrasion marks. If the fabric was smooth, this might not occur.
With regard to the interior, dark fabric hides grease and dirt, but also hides small parts. The bags I designed have light-colored interiors, and though they show grime, I can find stuff.
Further, I wish Co-Motion did a better job on their site describing the case and packing. Photos of the exterior don’t provide the info you really need when evaluating a case before purchasing. The case is also somewhat heavy, at about 17lbs, but I suspect that this is due to the plastic sheets which are its structure. Since it’s fairly small and doesn’t allow much more to fit inside than the bike itself, you’re not in much danger of overpacking, but any time you can save weight on a schlep through the airport, it’s a good thing.
Addendum May 30, 2019:
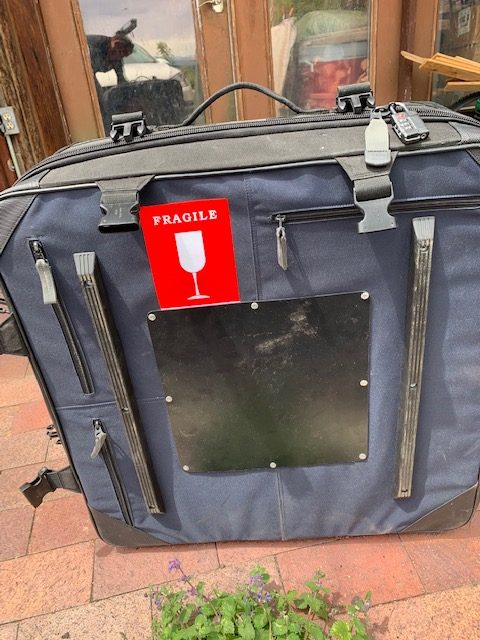
On my most recent trip to Italy, the Co-Motion case got a bit hammered. I have 2 of them, a green one (I think 2nd Generation), and a blue one (presumably 3rd gen). The green one has a heavier-duty fabric than the blue, newer case.
The case got torn on the handle-side, and the abrasion on the lid-side continued. In addition, the zipper shuttle popped off the zipper on the handle. I was surprised that the fabric tore, as it’s backed up by the case’s sheet plastic.
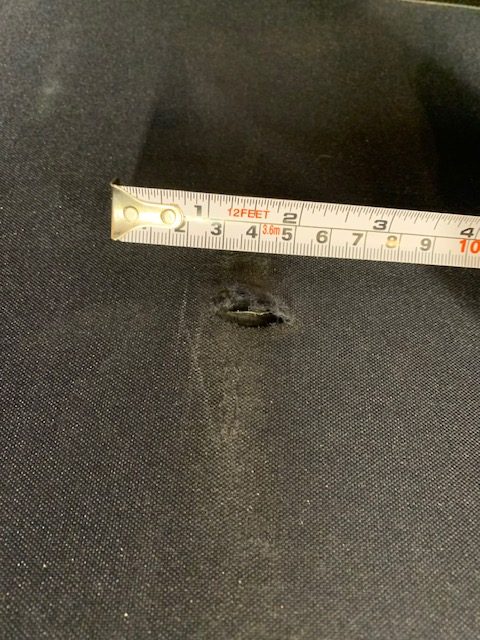
As mentioned above, I do not like the exterior pockets and the seam they create. The thickest part of the seam is on the center of the case’s face, and as this is opposite to the wheeled side, this is the face that will typically go on the baggage conveyors.
I can speak with a bit of knowledge here, as I am a part time Ramp Agent (baggage handler) for a regional airline. We are trained that wheels always go up, both in the pit (airplane’s hold) and on belts. This is standard for the industry, not just our airline.
Co-Motion does not provide adequate protection for their bag on the side opposite the wheels, the “lid”. The gate agent will put the tag on the top handle as you hand it over, and this tag will face outwards as the bag is loaded on carts and in the airplane. Also, this bag, being square, will probably go low in the stack of bags. Since the bag could go either flat or on edge, the “lid” side will most likely be placed downwards, or, if on edge, one of the handles will be down. A bag like the Pika Packworks eep, Orucase, or full size bag like Scicon or Evoc, will probably go against a wall or on top, as you can’t stack on top of them. Obviously, a plastic hardshell case like Serfas or Thule, will also be at the bottom.
Blaming the baggage handlers is common, but in my experience, there’s not really much damage that happens between the baggage cart and the airplane. Bags can fall off the belt loader, but this occurs more with round or oddly balanced bags (especially skiboot bags). The damage this bag suffered is more typical of conveyor belts, the automated systems deep inside the airport that move bags towards airplanes or to bag claim.
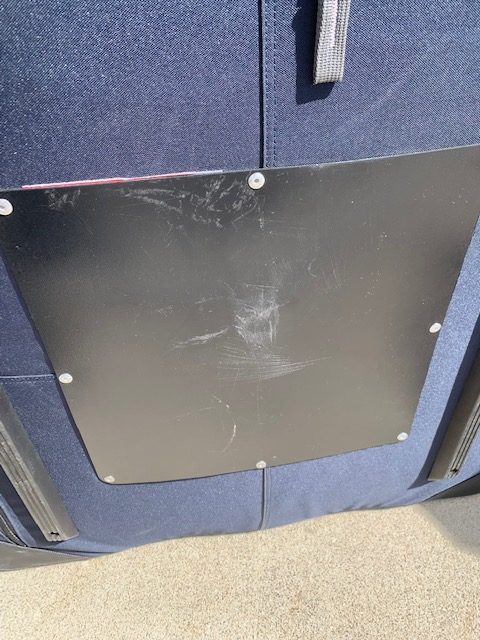
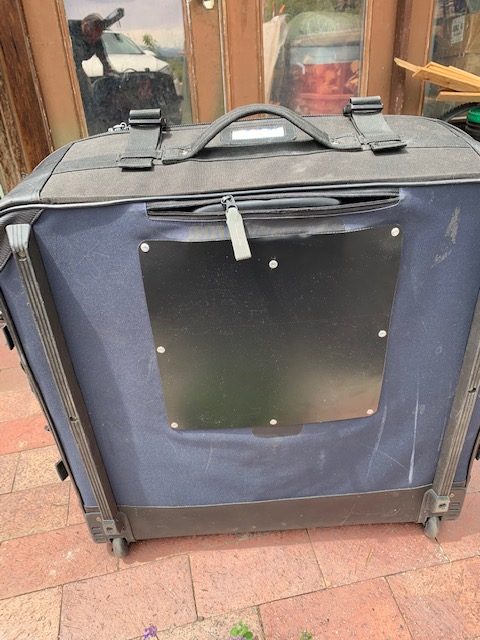
I added a pair of baggage rails to the “lid” of both bags, but in retrospect, I wish I had put them more inboard. I mirrored the position of the rails on the handle side, but if I had placed them more inwards, the center of the bag would be more protected.
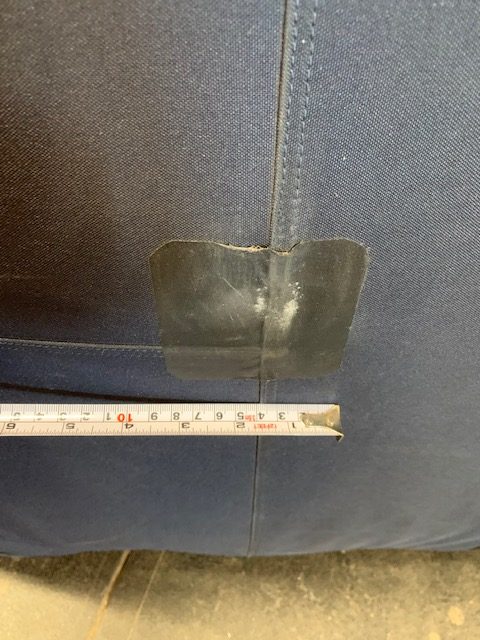
I had also used tent repair tape to try to protect against the abrasion on the seam on the “lid” , but it tended to peel off. After the recent damage, I riveted on a 12″ sheet of .060″ Kydex to protect the bag. Kydex is inexpensive, durable, and has a slippery side, which I faced out.
I also spoke to Co-Motion, and though they were sympathetic, there’s really no way for them to repair the bag. Given that the bag costs $400 and the heavy wear happened in only 4 trips, it’s a shame the bag isn’t more durable. Some damages will always occur, but some of this is directly due to design decisions. Co-Motion said that they have a new version of the bag, but I have no idea how heavy the fabric is or if they’ve done away with the useless pockets on the “lid”.
Personally, I think they need to use heavier cordura-like fabric, eliminate any seams on the outside faces (especially where the bag tends to bulge), add a heavy 6″x6″ patch on that area, and use a heavier-duty zipper on the handle pocket. I’d rather see 4 smart casters than the 2 on the wide face as well, but that’s not as critical as the other items I noted. I will be traveling again and will update this post after that trip to see if my repairs were successful.
UPDATE August 6, 2019
After a round trip to Europe and 9 separate flights, the Kydex addition seems to have done pretty well. The material is pretty durable, and I put the smooth side outwards to discourage excessive friction. I will probably put Kydex on my other Co-Motion cases. It’s kind of a drag I have to do this and that their product design hasn’t really improved over several generations, but overall, it’s a pretty good case.
It’s just not an amazing product, and it’s barely worth the retail price. If you can find a used one, though, grab it if the price is good. Recently, I found one on Craigslist for $75, which I was happy to pay. They’re out there in the wild, but in limited numbers.