Travel is addicting, it freshens your mind, broadens your horizons, expands your world view, adds to your list of cliches, and so much more. It can also break your will, your spirit, your patience, and in some cases, your bike. Does this mean you shouldn’t travel? Of course not, and you should definitely take your bike.
As noted in Part III of this much-lauded series on air travel and bike cases, I am a fan of coupled bikes. I like the smaller cases, and the additional assembly over a non-coupled bike is measured in a minute or two of my time, so hardly worth worrying about. S&S, Ritchey, or Z-Couplers allow the bike to be broken down (I know, this term is not usually used in a positive manner, but free your mind) into a case that is slightly larger than the diameter of the wheels, and will generally fall close, or slightly over, the maximum size of 62 linear inches.
I’ve owned several variations of cases this size (see Part III, Part II, and the Co-Pilot reveiw on this site), and unsurprisingly, I have developed some very specific and significant, not to mention strong, opinions about travel cases. Basically, I have decided that I like rigid cases with swivel casters and internal bracing. I like them small, and I like them to be pretty indestructable.
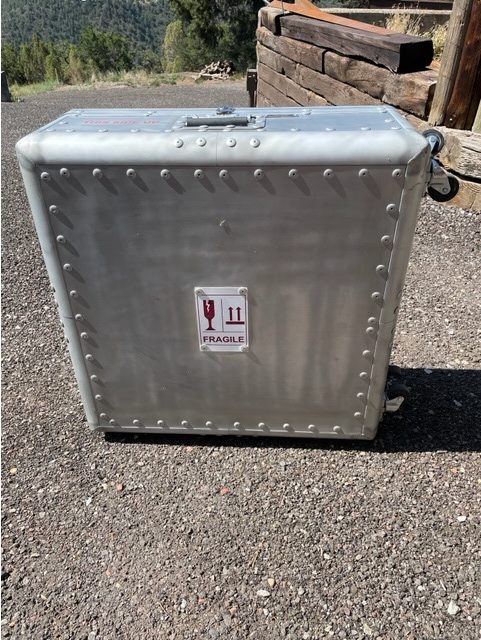
The aluminum case I built in 2021 (the Better Mousetrap in Part III) has flown many times, and despite a couple of good dents, is really holding together quite nicely. It’s been to Yerp 4 times, and has flown domestically another 4. When I first built it, Mrs. MAMIL said she preferred the Co-Motion Co-Pilot, but after a trip in 2022 she tried the Mousetrap, and decided she preferred it. Her bike packs easily inside, and she has no problem doing all her own mechanical work for assembly and disassembly. She likes the way it tracks next to her while walking, as opposed to the Co-Pilot, which is dragged behind. I think she also likes the industrial asthetic of the case because she looks like a bad-ass while pushing it though an airport.
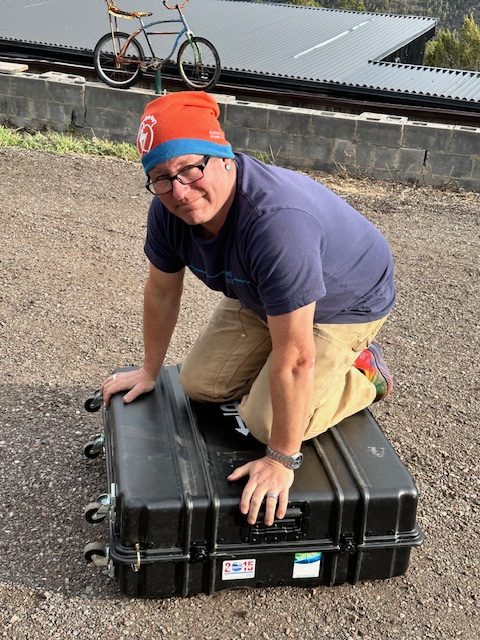
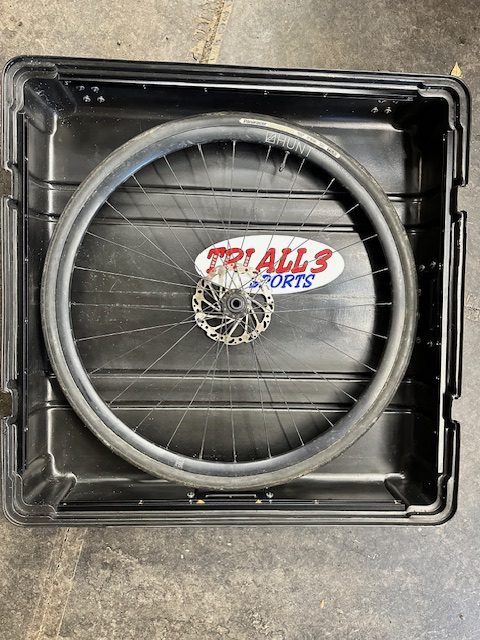
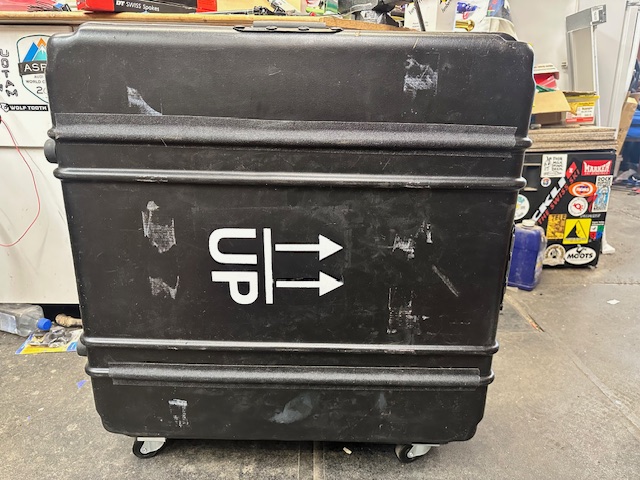
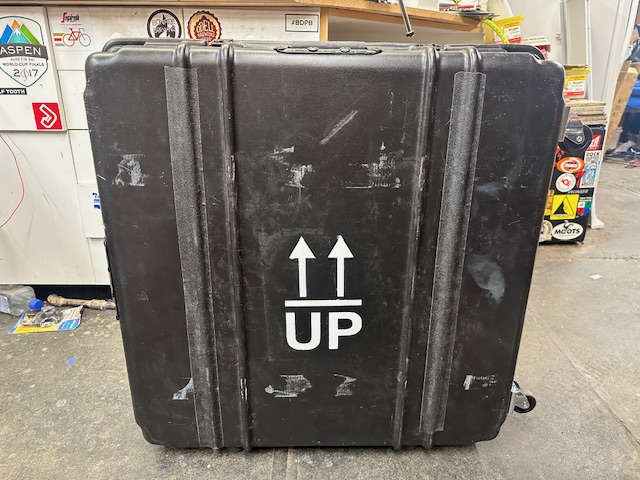
Since she adopted my case, I decided I needed a second one based on the same basic design. One day, while surfing Craigslist instead of doing productive, billable work, I stumbled across the TriAll3 Sports Clamshell Wheel Case. This is a molded case, made from ABS, and measures about 27″x27″x 11″, or just slightly larger than my Mousetrap case. I contacted the guy on Craigslist and he said he needed to find a box to ship it in, then paused when I pointed out it was a shipping case, and would be just fine with a label taped on. A day or two later, it arrived, none the worse for wear, despite UPS’s best efforts.
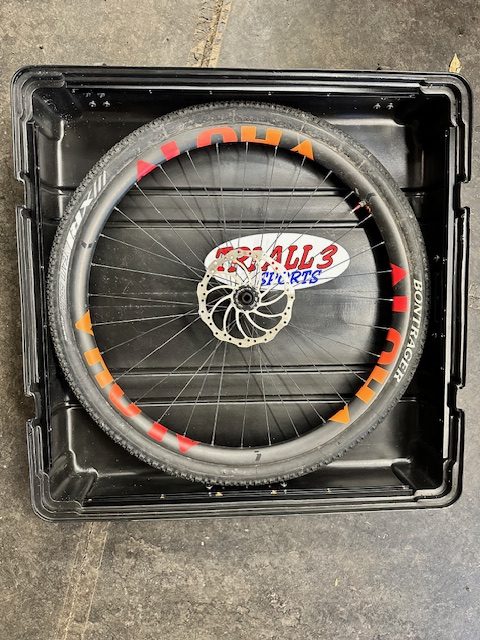
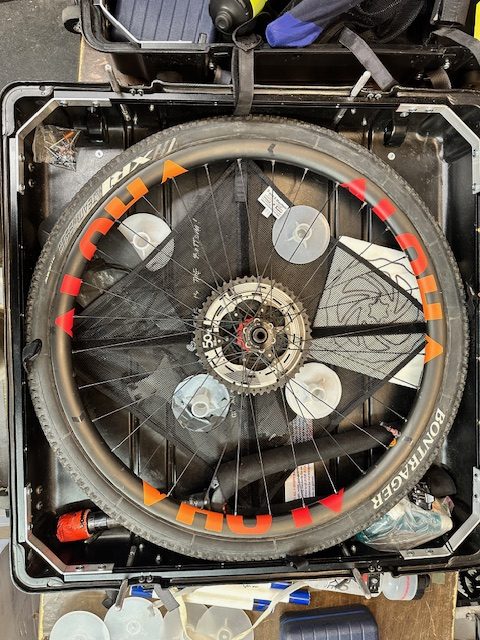
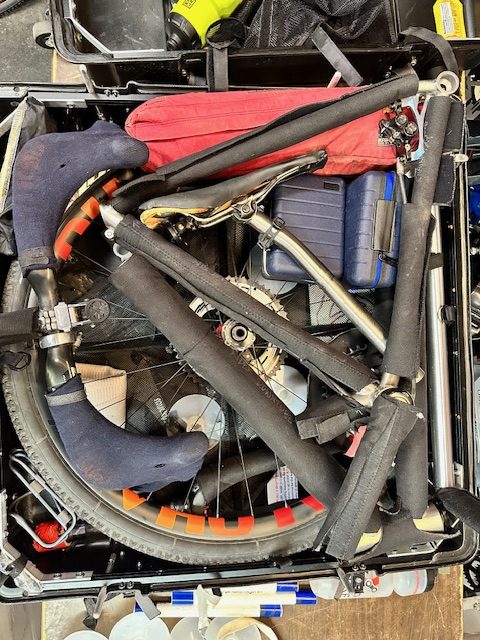
Once I had the case inside MAMIL HQ, I opened it up, removed the foam, then took a break and had a recovery beer. It’s important to pace yourself. I placed different wheels inside. 650b x 42 gravel wheels fit with huge amounts of room to spare, and even my 700×50 gravel wheels slid in easily. I could tell right away that my money was well-spent.

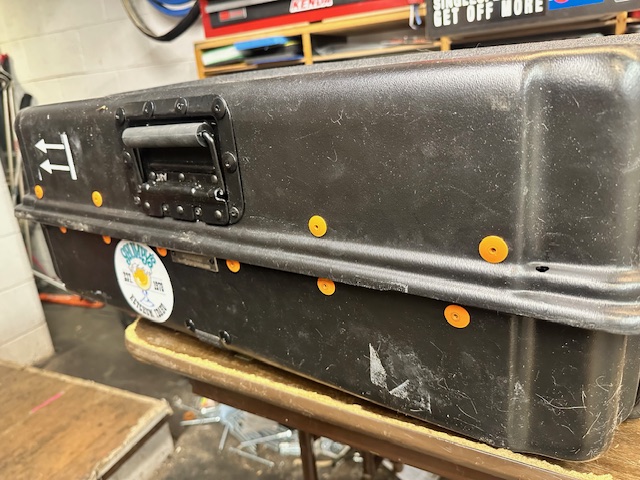
The molding process and nature of the material meant the sides were kind of wavy, so I turned to two old friends to help me: pop rivets and aluminum extrusions. I selected 24″ T-Tracks, commonly used in wokbenches, as stiffeners for the sides of the case. These extrusions are 3/4″ x 3/8″, and are designed to capture 1/4-20 bolts for workbench jigs and clamps. They are also pre-drilled on 4″ centers. I riveted these into the 4 sides of both the top and bottom clamshells, which significantly stiffened each side, as well as straightened them. As before, 3/16″ large flange rivets worked very well, and this time I used black rivets. I also added orange rivets on one side to help identify which sides need to match, but in the end, because of the caster plates, this was not really necessary.
On one side of the case, I again used Reliable Hardware caster plates and casters, and some 4″x6″ spring-loaded handles.Unlike the Mousetrap case, the seam on this one is on the centerline, so the casters ended up with 2 plates on each shell rather than 4 on one shell. This widened their stance slightly, makeing it more stable when rolling.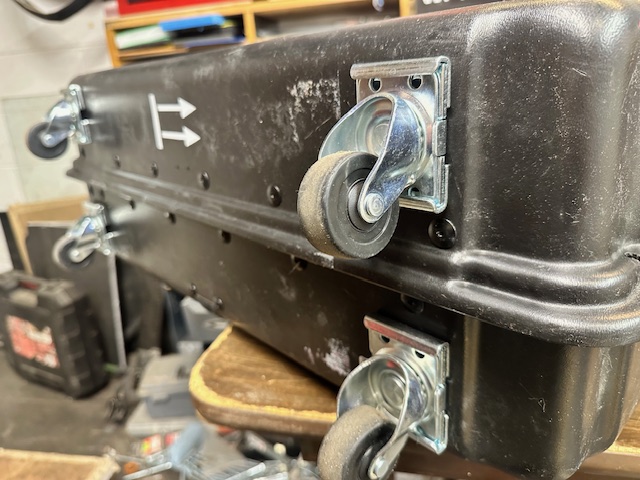
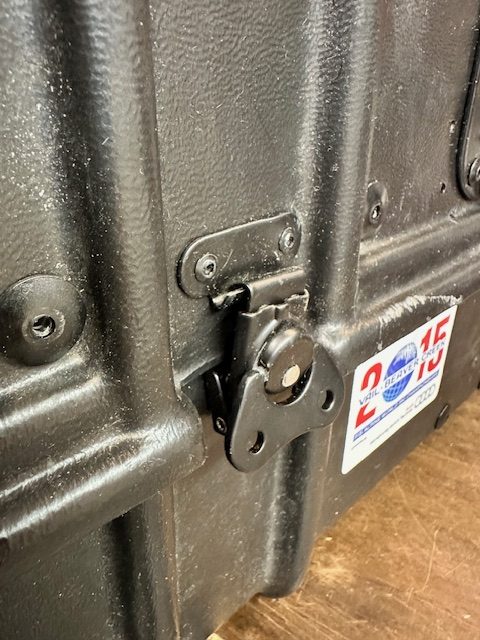
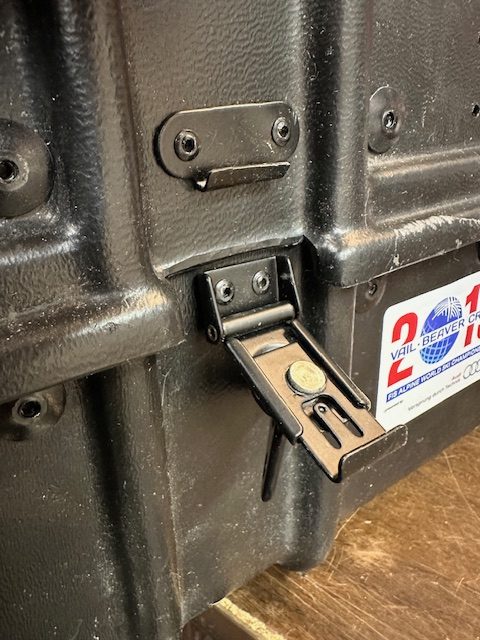
I also bought narrow butterfly latches for closure. The case included two velcro straps and 2 wraparound buckle straps, although these were missing on my used case. Using a new utility knife blade, I trimmed the plastic in the channels to allow the butterfly latches to clear.
I then installed the T-Tracks and latches, and cut through the case sides to inset the handles flush. Using a pair of pliers, I slightly curved one flange on the handle to match the curve of the plastic case.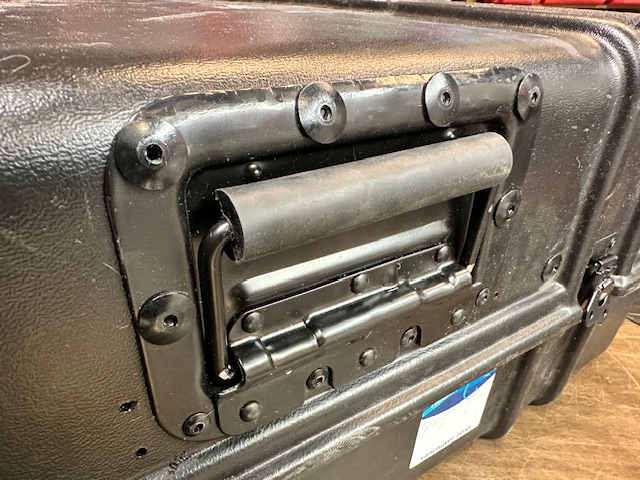
Similar to the Mousetrap case, I used footman straps inside to hold the TSA net. Since the inside is smooth plastic, I decided not to use any foam lining. This saves a bit of weight and a lot of hassle. While I like it in the aluminum case, it is a bit of a pain to make and install.
Also, based on the mousetrap design, the side handles are at 90 degrees to each other, and there are rubber feet on one side of the case for standing it on end.
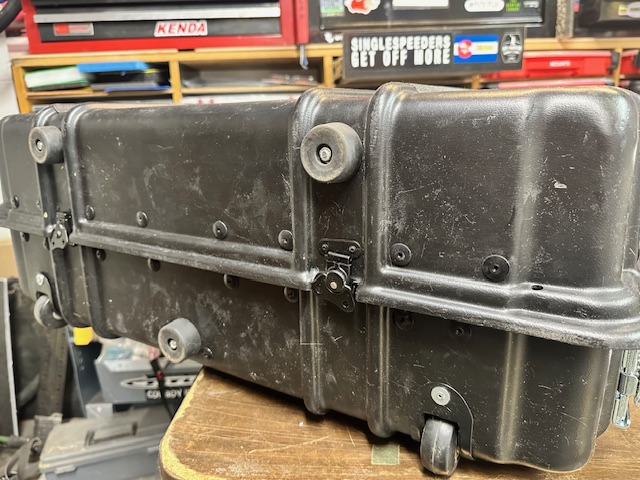
I painted very optimistic UP arrows on the side and called it good; this had taken far less time than the aluminum case, and was much easier.
The inaugural trip was to Tucson, where Mrs MAMIL was working for a week. My son (Future MAMIL) and I flew down to meet her, then we headed off to Tour of the Gila, where he would be racing. Given that this was a test flight, the ramp agents in Denver stepped up and did their level best to damage the case: it arrived slightly open, but the TSA net inside had held everything nice and tight. Once we got to Silver City, I did what all MAMILs do upon reaching a new community- namely I headed off to the hardware store to spend quality time searching for stuff that could help me keep the case positively closed.
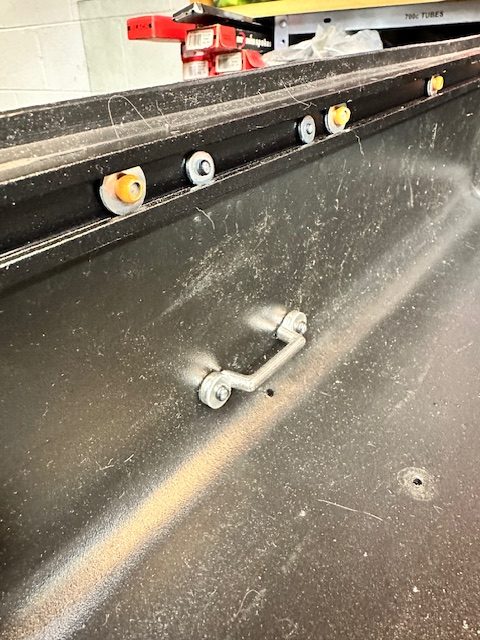
I had made the mistake of removing the velcro straps, and I think there was still enough flex in the case to pop open the small butterfly latches. I rooted around at the hardware store and found more footman straps, a couple of cam straps, a small collection of bolts, and a hex-shank drill bit. I then put the footman straps into the grooves on the case, 4 per shell section, and threaded one through the loop at the cam, thereby anchoring the strap. The straps then went around the case and held it tightly closed, but there was a bit of flex still in each side. However, this solution seemed to work on the next flight, which was to Spain.
The original design of this case included a pair of casters inset into one side, and a D-ring with strap so it could be towed behind you. Thee was no reason to remove these, and they actually made it easy to move the case if the removeable casters had already been taken off. For the flight to Spain, I had packed the casters in my duffle bag rather than open up the clamshell. Upon arrival, the cam straps had done their job and the case was secure, but the duffle was still in Denver. The original casters did their job, though, and even though it was a pain dragging the case behind me and kicking it with every stride, it was better than no casters at all.
Once home from the trip, I applied a few modifications based on what I had learned. First, the velcro straps went right back on, then I also added 1/8″x3/4 flat alumimum bar as corner braces for rigidity between adjacent T-Tracks. I also added 3/8″ aluminum rods as guide pins inside the molded channels for the straps. The pins slid behind the T-Tracks as the lid was lowered, and significantly stiffened the sides of the case, supporting the butterfly latches. At this point, the case was pretty much at its final version.
A subsequent trip to Spain then showed that TSA tried to open the case as if one side was hinged, bending one pair of guide pins. I gave this some thought, and considered adding hinges to that side, but the offset of the shell would require a Z-bend in the hinge plate. My solution was to simply change the cam straps from an 8′ strap that wrapped all the way around to 4-foot straps that wrapped 1/2 way around, which means that you have to undo 4 buckles, then see 4 butterfly latches which have to be opened.
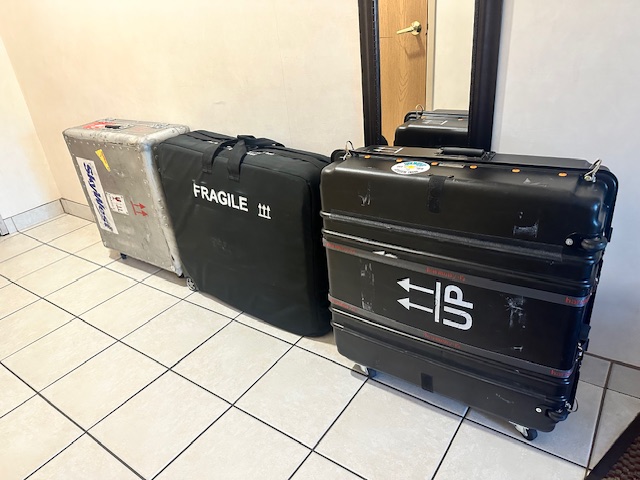
In summary, the case actually workes very well for a coupled bike. I had no difficulty fitting large gravel tires inside, and even though it’s about 15lbs empty, I can keep it well under the 72lbs allowed for international flights. To stay under 50lbs for domestic flights, a few items need to go in the duffle, but that’s hardly an issue, assuming it actually leaves Denver. Since the case is plastic, it won’t dent, and though the slick ABS can be a problem on belt loaders, but a bit of friction tape on the case solved that easily enough.
If you are considering a DIY project, this one is pretty easy and can be done in under a 6-pack. There’s not a huge cost in the materials needed (T-Track, rivets, handles, casters, latches, cam straps, etc)., and it assembles pretty easily. A couple items to note- since the cam straps are the ‘thickest’ part of the case’s profile, I used NRS straps. This brand is very high quality, and a 4-pack of 4′ straps is reasonably priced, but the major difference is that their buckles are very low profile. Don’t skimp on the spring-loaded handles, and orient them so that they are close to centerline when open. T-Tracks are availble in several anodized colors, as are rivets, so pick what you like. I also put a small baggie with spare rivets inside the case, because the odds are fairly good you can borrow a riveter wherever you are if you need to do significant repairs. The 1/4″ hex shaft drill bit also fits inside most bike tools (such as the Silca T-Ratchet or Feedback Reflex), and though it’s not fast by any means, a hole can be drilled using these tools. Keep in mind that the 24″ extrusions need to be cut, but you need to cut equal amounts of each end of each section to keep the mounting holes centered. This will help with rigidity by keeping the rivets on each end closer to the corners.
One Reply to “Traveling With a Bike Sucks, Part VI: Another Mousetrap”
Comments are closed.