One thing about packing your bike is that you have to protect it inside the case (duh). Neoprene pads, pipe insulation, clothing, cat hair, whatever. Something has to go in there to protect that bike.
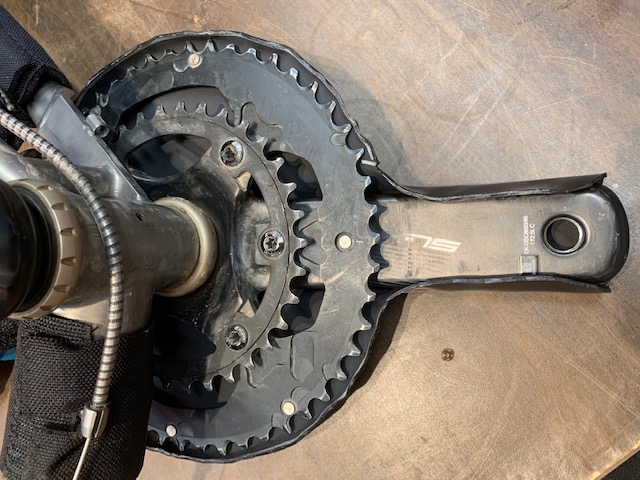
However, what can be missed is that you also have to protect your bike case from your bike. Most of the parts are rounded, but the chainring is like a large, circular, serrated blade that wants to shred the inner lining of your rather expensive travel case.
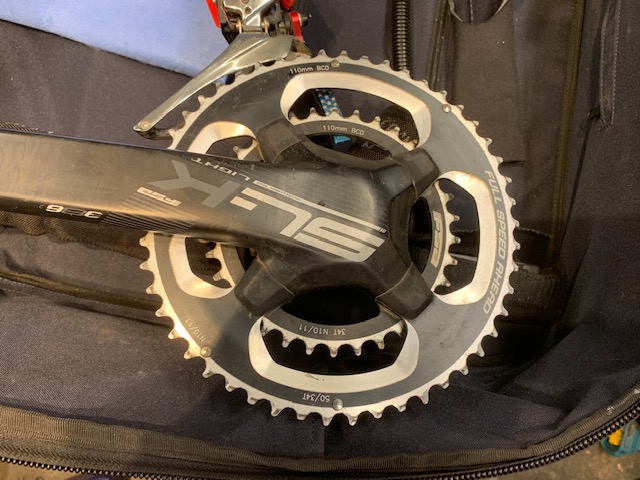
If you’ve ever tried to loosen your drive-side pedal and had the wrench slip, you know how sharp those teeth can be. They’ll flay open a knuckle and pack grease inside, they can shred the inside of your calf muscle, and they can tear the upholstery in your rental car (thankfully you didn’t decline the extra coverage, right? Right.).
Even hardshell cases with rigid plastic interiors can get beat up by your outer chainring, not to mention a fabric-lined softcase. Packing material, foam sheets, saddles, clothing, and more can rub against the chainring inside the case and get pretty hammered. In a worst-case scenario, a chainring tooth can also be bent, requiring a frantic scramble in a new city, sometimes late at night before a race.
Cycling can be meditative, particularly if you are as slow as Yours Truly. My glacial pace while riding allows me to consider many things, such as work or family topics, design ideas, thoughts on travel destinations, wondering why I am being passed by sloths, and so forth. I had occasionally mulled on the Chainring Issue, and for a time, thought I had found a simple and inexpensive solution: Wire looming.
Wire looming is a flexible, corrugated tube, split on one side, and is used to bundle small wires together. It is commonly used in automotive wiring, and occasionally in audio-visual wire racks or computer server racks to corral the wires into a more manageable bundle. I simply wrapped it around the chainring, added a wire-wrap to hold it in place, and I had a lightweight, easy solution to protect the chainring.
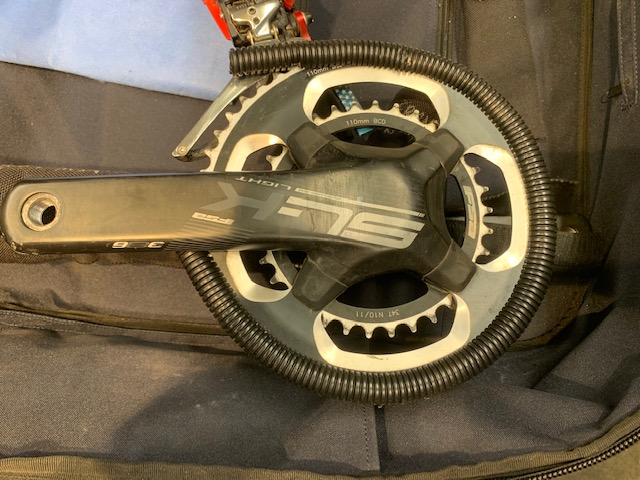
It actually worked pretty well, but the thin plastic did not resist the teeth for long. Additionally, the wire wraps, just thin Velcro-like strips, didn’t really hold it in place very well.
So, I headed back out for a long pondering (ponderous?) ride. And, after many miles of pedaling at speeds that make the speed of moss growth seem relatavistic, I had nothing.
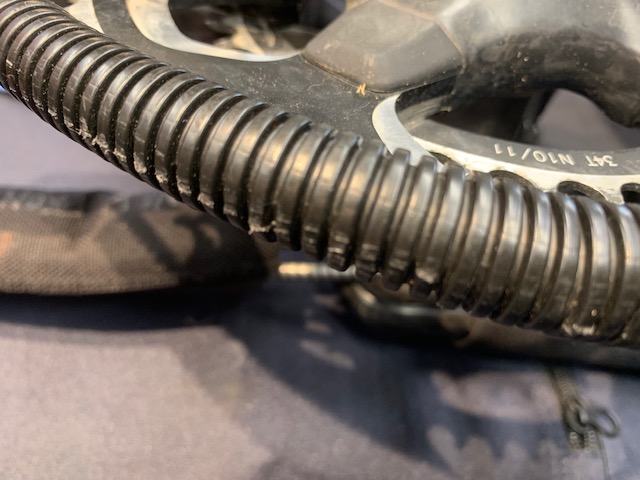
On returning from a trip, I noted that my wire looming had been pretty much trashed. While unpacking my bike, I ran down my mental list of things I wanted to address in my packing system, and the chainring protection came back up to the forefront. Rooting around in my basement, I found a sheet of Kydex, left over from another project.
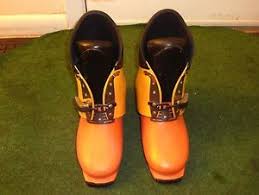
Kydex is a thermoplastic, easy to shape and form with an oven or heat gun. Recently, it has become popular as a material for making custom holsters, but to me, it’s the Scott skiboot.
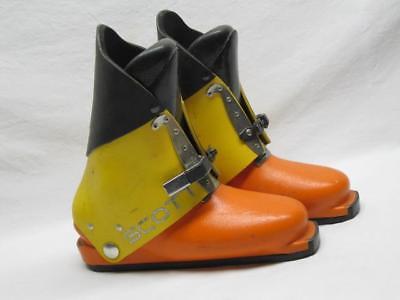
Scott Skiboots were an iconic fashion item in the ’70s, and consisted of a molded forefoot and hinged cuff. They were an early rear-entry boot, and putting them on could be a challenge, because you had to flex the cuff open and bring it forward over your lower leg to close it. You then seated a pair of small clips into a grill-like panel that set your forward lean, and a single buckle then closed the cuff. As a pre-teen, I found the cuffs to be hard to open, particularly when they were cold, and on many occasions, the cuff cut into my leg. I still have scars on one ankle.
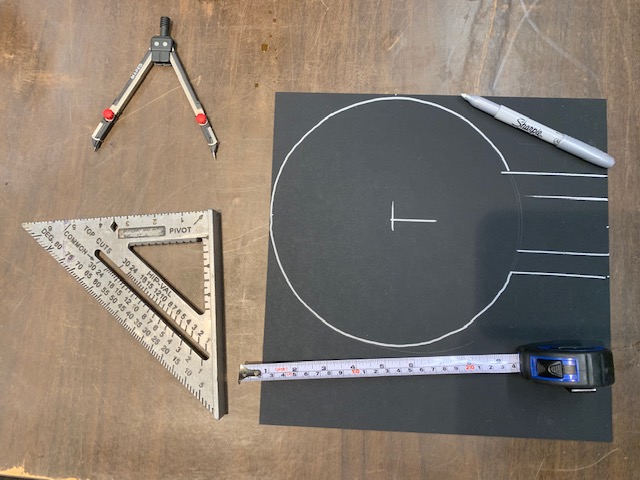
I took the Kydex and scribed a circle of 8-7/8″, which gave me about 3/8″ larger pattern than my 50-tooth chainring. I then scribed an axis, offset by 1-3/4″ for the crank arm, and cut it out with a pair of tin snips.
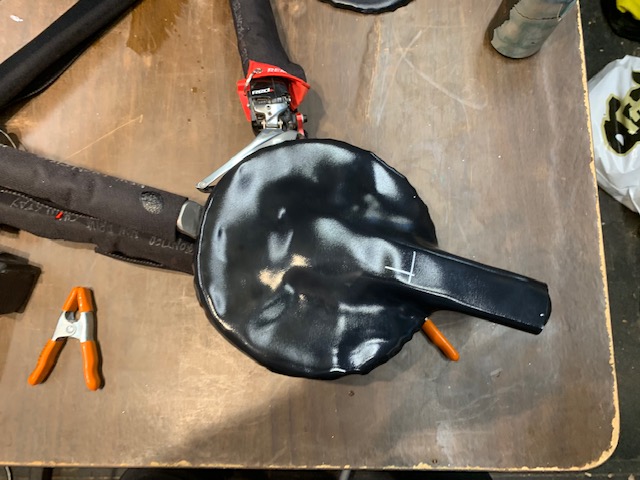
Using spring clamps, I centered the Kydex on the crank arm and ring, then with a heat gun, slowly started working the material into shape. Kydex does not require much heat to start moving, and it is not a conductor, so the heat did not go through the material into the carbon crank. Even after direct heat application, the carbon underneath was room temperature, so I was was not worried about damage.
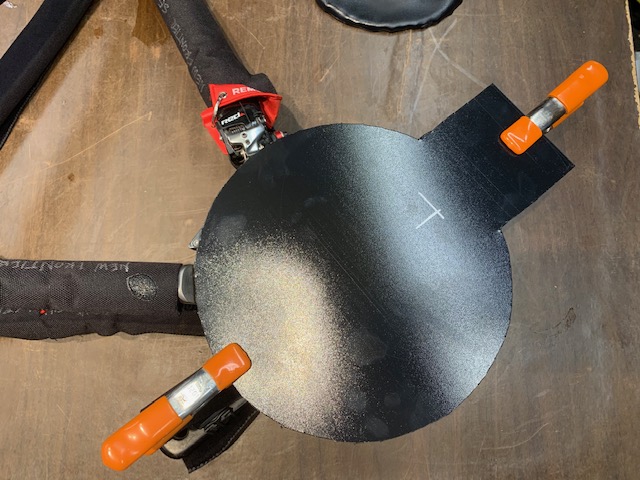
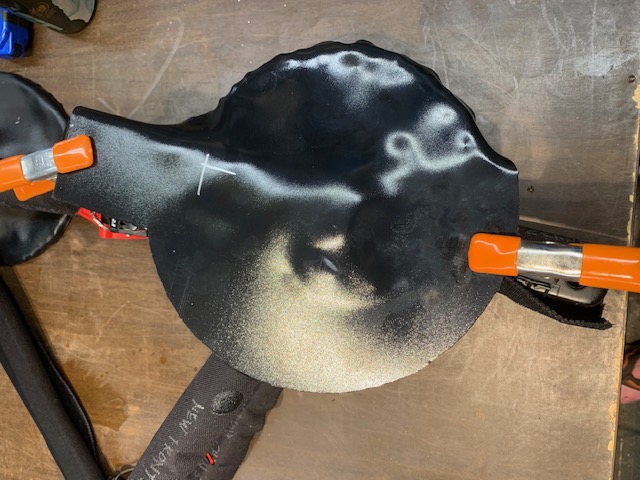
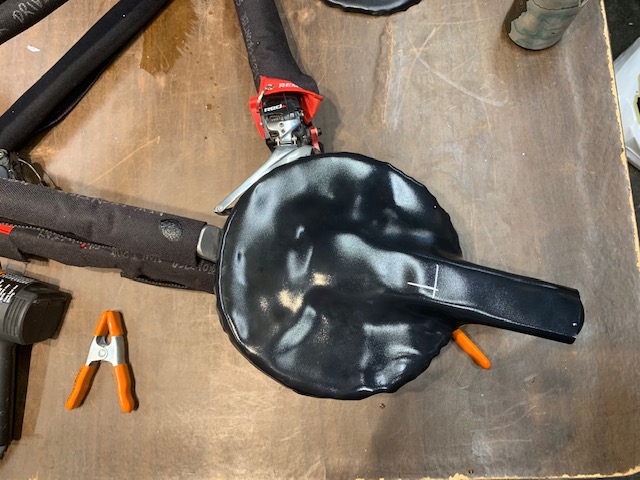
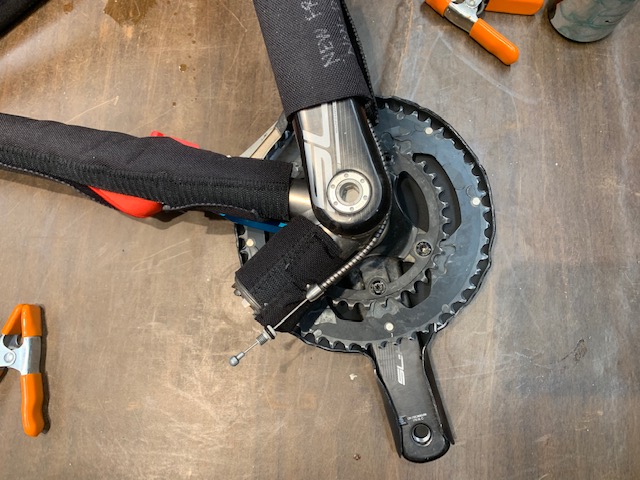
I worked in small patches, heating an inch or two at a time, pressing it into shape and blowing on it to cool it off. 20-30 seconds of heat, 20-30 seconds of forming and cooling, then on to the next part. Patience and working in small areas were the key, and after an hour or so, I had a cover that not only covered all the teeth with about a 1/4″ edge, but also snapped into place on the crank arm.
Kydex is pretty inexpensive on Amazon, sort of like everything else. I was able to use material left over from another project (no, not a holster). The work was easy, I didn’t burn myself or the carbon cranks, and it was a pleasant way to spend an hour in my basement, when I should have been doing some other household chores.
I have a list of other small projects like this I want to complete, but as I age, I become forgetful. I guess it’s time to go for a ride and see if I can remember anything on the list.