My reader (I know you’re out there, Eddie) knows I like to travel with my bike, and that I kind of have a thing for travel cases. I’ve designed and built my own, plus have owned many different versions, all in search of the perfect one. Over the years I’ve had an old 1970s vintage case that was literally an outline of a bike, hiding nothing, a road-case style version made of plywood and aluminum extrusions, a Sunlite that looked like a Sampsonite, a Serfas, a BuxumBox, CoMotion CoPilots, a soft case I designed, and my cases for coupled bikes (located elsewhere on this site).
On a recent trip to Spain for some autumn cycling I had the opportunity to check out an Orucase B2. I’ve kept an eye on Orucase, partly because I like the stuff they design, and partly because when I designed my own soft case in about 2016, it was very similar to their original design (and Gavilan’s, but those are no longer made). At the time, I was unaware of Post Carry, but it is similar in form factor. My bikes are all coupled now, and I’m super happy with my hardshell cases, but this trip needed a bag for a non-coupled frame.
My friend’s Orucase B2 impressed me on many levels. It showed me the holes in my own soft case design, expanded on the 2016-era materials I used, and on the whole, presented a solution that was larger than my coupled case, but not by much. It shows the evolution of the fundamental design- one that requires removal of the fork, but while that can seem daunting, in reality it’s pretty easy for anyone who can change an inner tube.
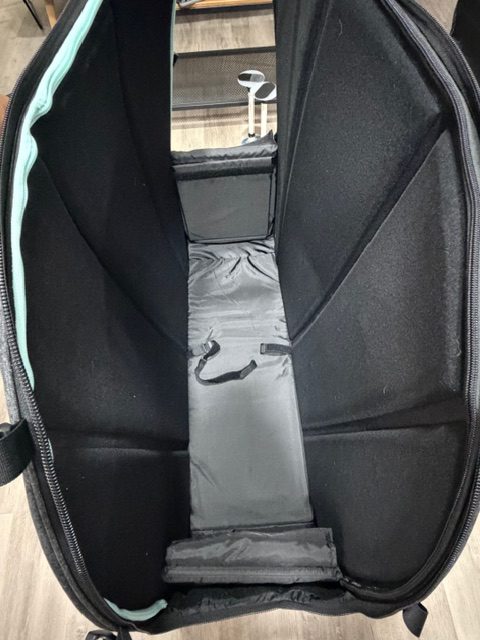
The case itself is made of tough fabric, smoother than Cordura-style pack cloth, but durable and tear-resistant. It’s a grey color, which hides dirt and grime well. Travel is rarely clean, and if it is, you’re doing it wrong. At 36″ long x 30″ high by approx 10″ wide, it’s not much larger than my 28x28x11 coupled bike cases. The inside is soft and slightly fuzzy (more on this later), and a clever folding panel design allows it to be broken down to a very low profile form that will fit under most beds, assuming the monsters make a bit of room. Ask nicely and they might comply.
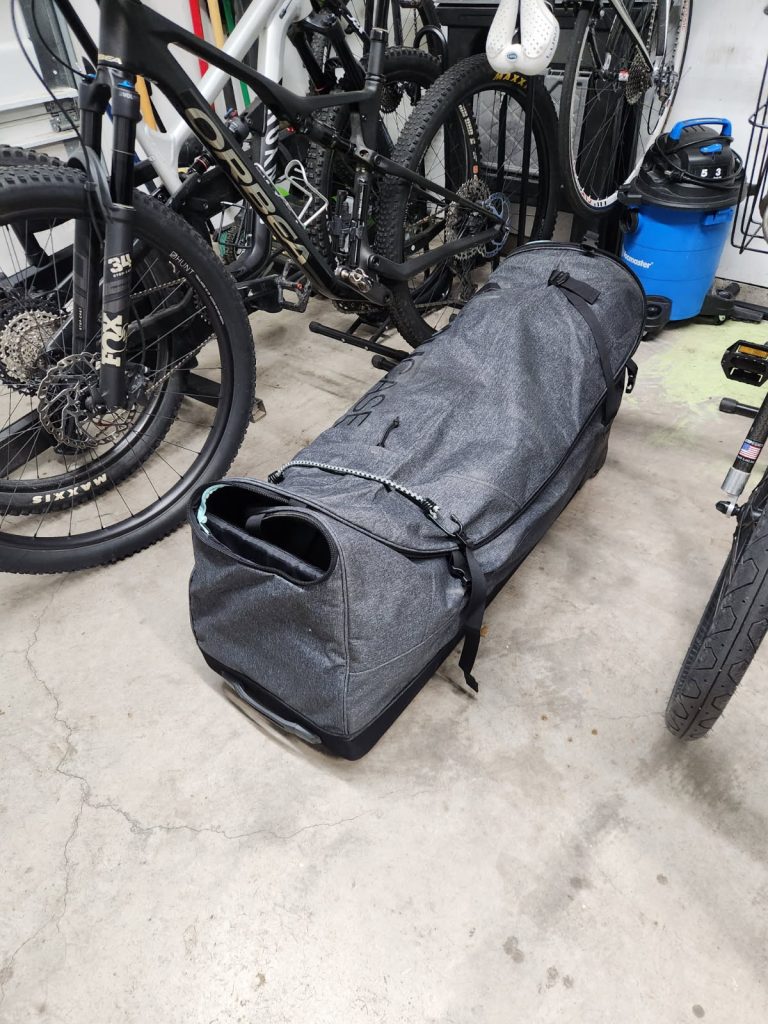
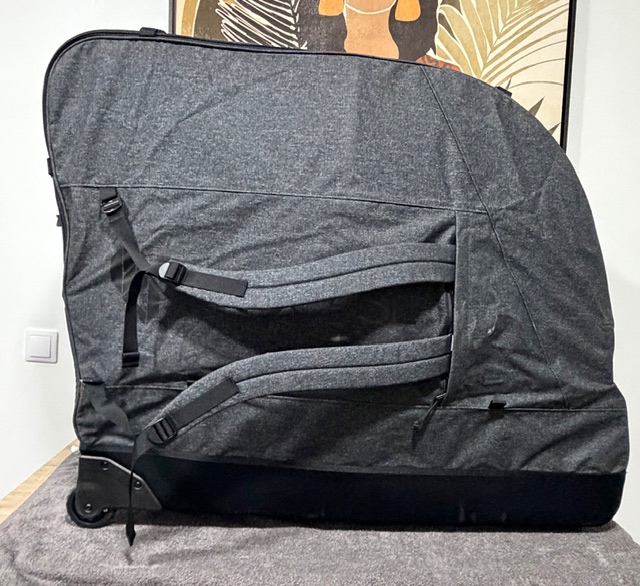
It has a hidden pair of backpack straps, for more schelppability. On one end is a pair of wheels, and when you pick it up by the lower handle on the other end, it balances almost perfectly, so the weight in your hand is minimal.
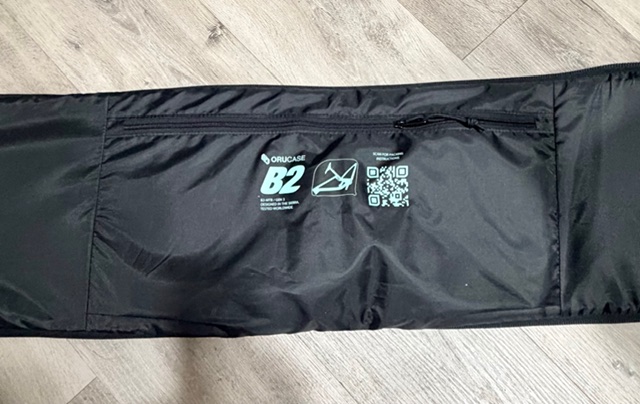
My buddy added a single buckle strap in the center of the interior, and a there are a couple of pockets on the ends. There is also a pocket on the “lid”, a flap that zips closed over the top. These are plenty large enough to hold pedals, axles, chain, etc.
Orucase also sells a pad kit separately that can be trimmed to fit the frame. Wheel bags finish the package.
Packing is pretty straightforward. I always remove the rear derailleur and hanger. This is one of many reasons I’m a huge SRAM fan. Packing methods are kind of like religion: everyone has theirs, and yours is wrong. Here’s mine, and it’s pretty much Gospel.
Handlebars come off. This can happen by pulling the stem off the steerer or by removing the faceplate. On this bike, the hoses run through the headset, and are quite short and tight. This bike has Zeno V2 couplers, which work remarkably well but are hard to grab.
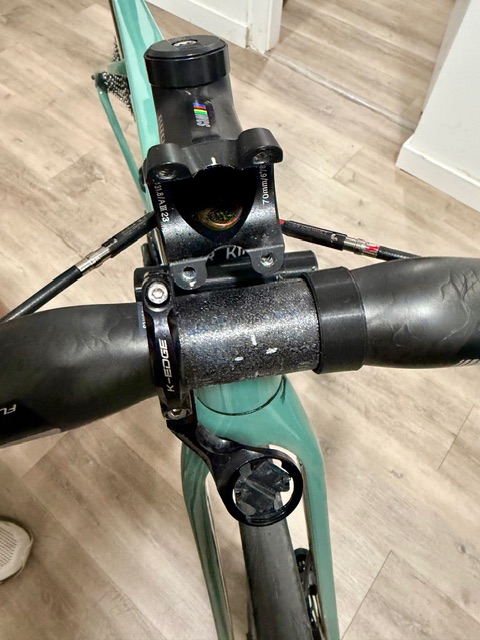
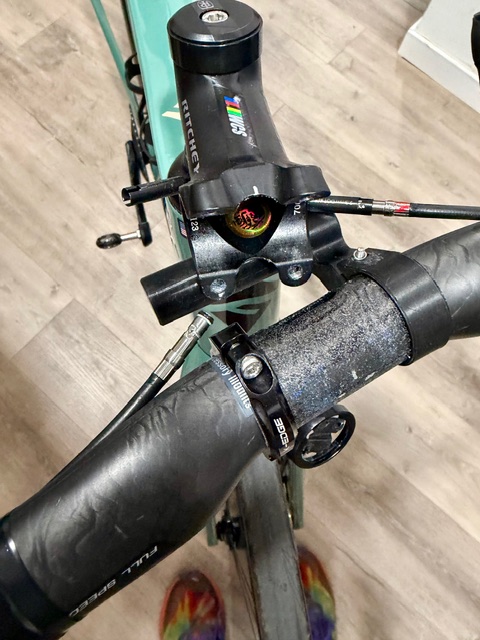
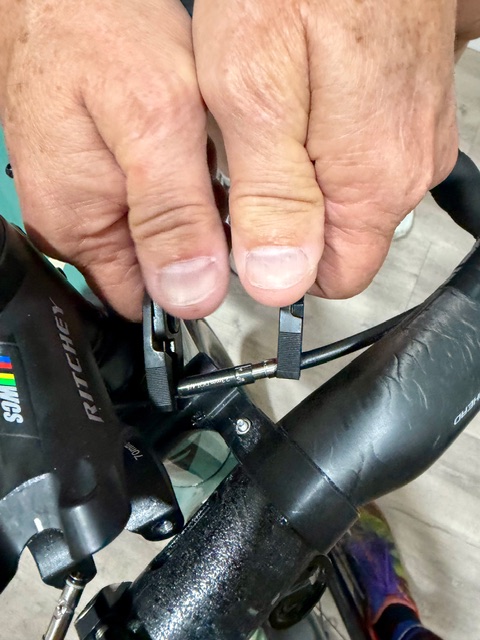
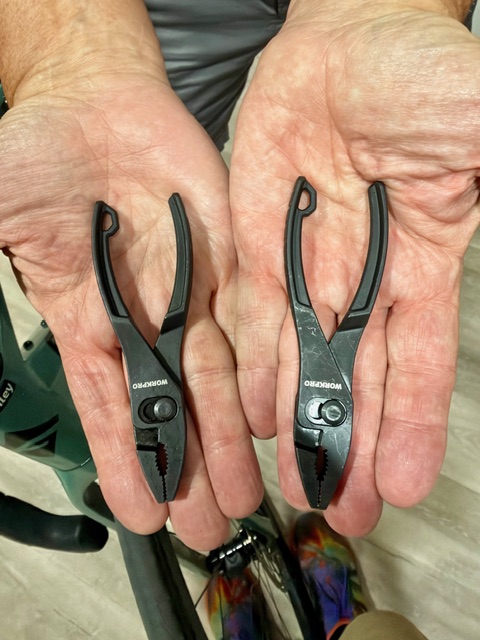
Using a pair of 4” Workpro pliers helps a lot. These are compact, light, and well-designed. Grab the couplers by the crimp, gently so you don’t crush the coupler, and the 90-degree rotation is easy.
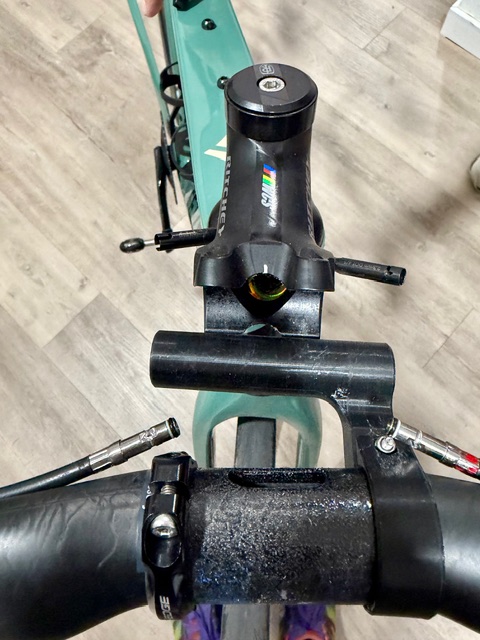 After de-coupling, the headset top race comes out with the hose guide, and the fork is removed. I use a Velcro strap through the head tube to hold the headset bearings in place.
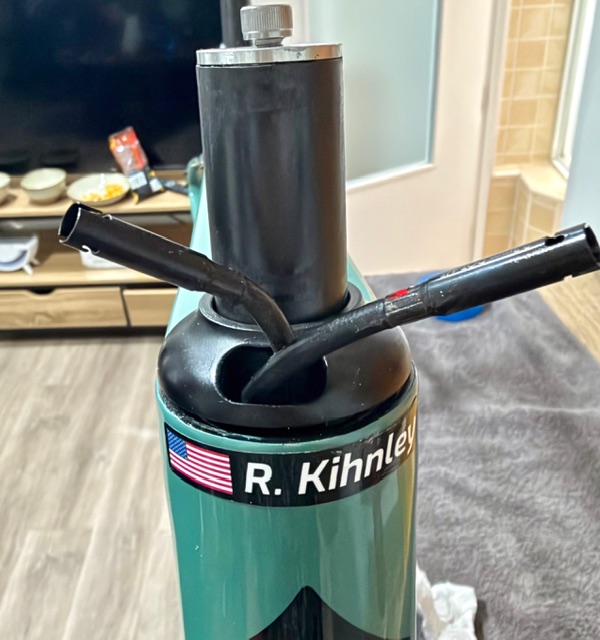
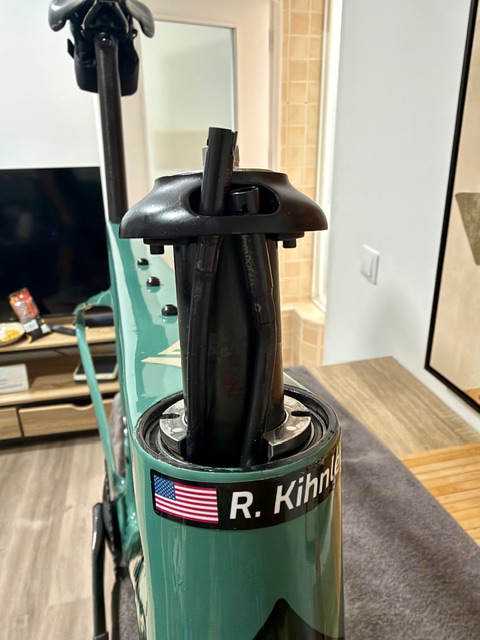
Orucase has an axle spacer, that goes in the fork and is set to 100mm. I have a separate spacer from BikeFlights, which is a very cool design and works on almost all axles from 100-157mm. Mine came from MADE, but check with them for availability searately from their box kits..
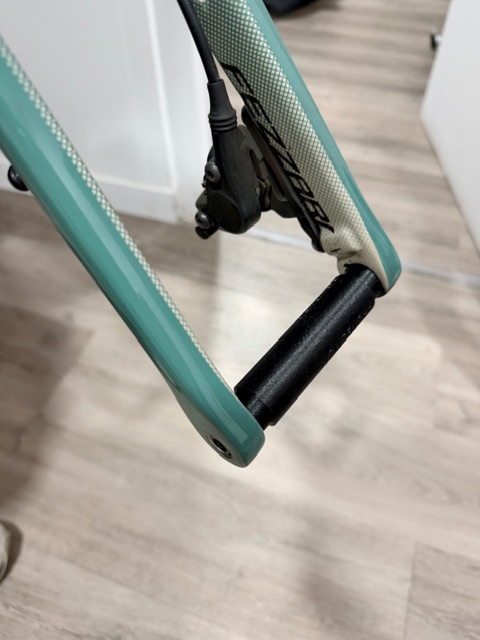
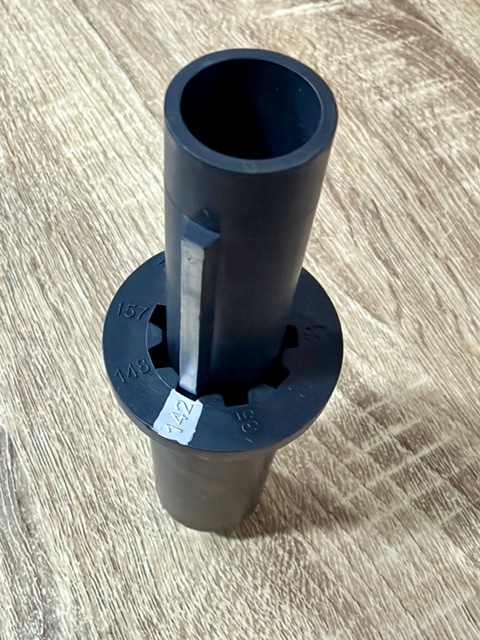
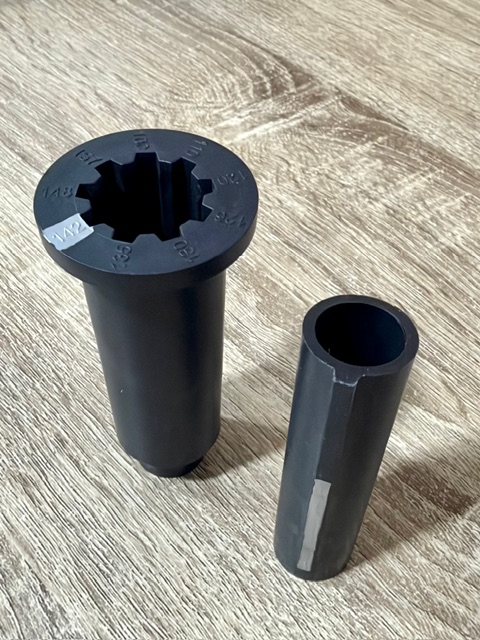
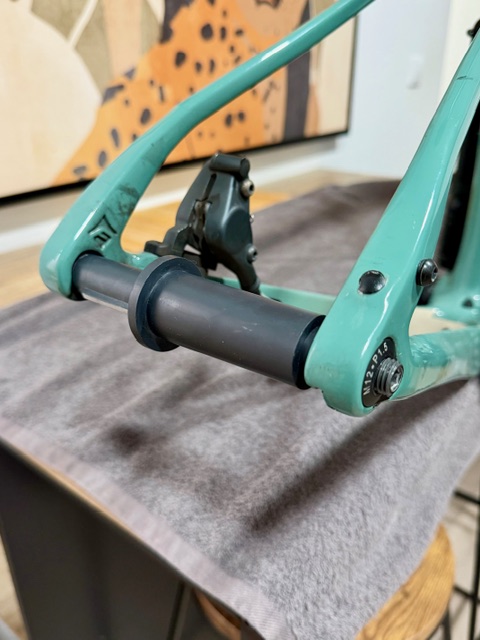 The frame pad kit is an excellent investment, and before you travel (pack early, pack often. How many times have I said don’t pack the night before you fly?). Take your time to fit each pad to your frame, and label with a paint pen or silver Sharpie. You’ll thank yourself for careful diligence here.
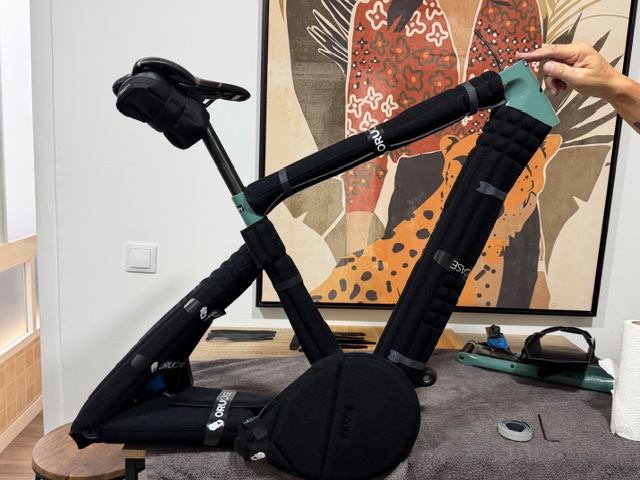
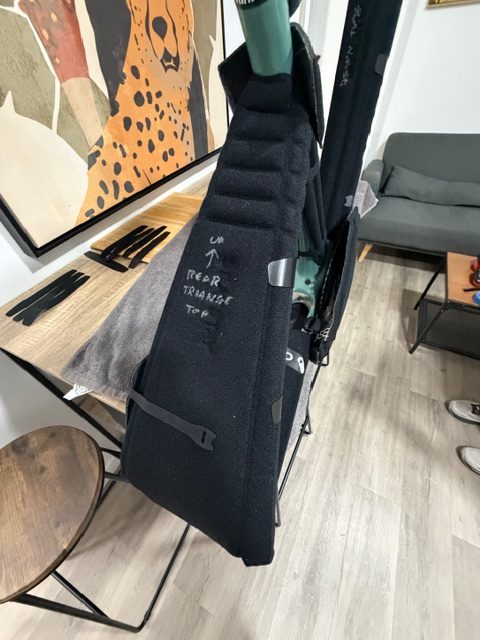
The fork, wrapped, gets firmly strapped to the frame.
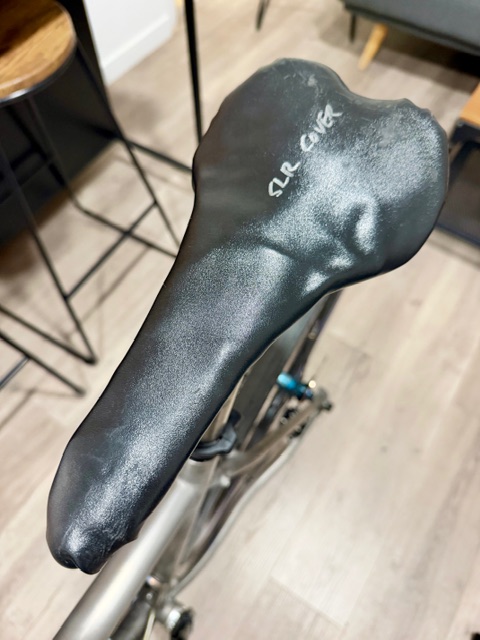
Not included is a saddle cover, but you can make one with some Kydex, a heatgun, a bit of patience, and maybe a beer or two.
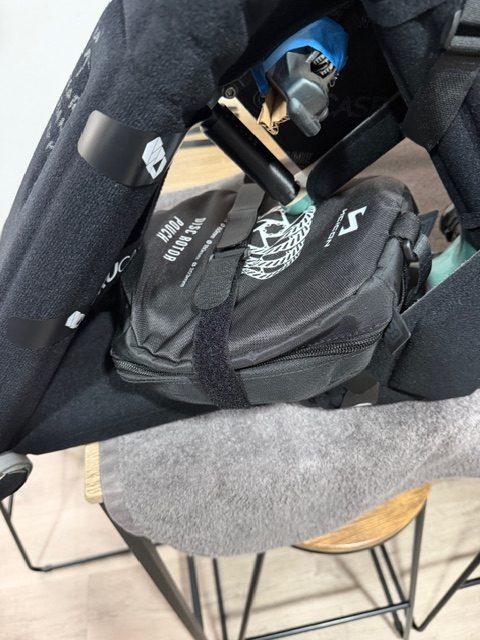
Disc rotors go into separate packing, in this case, a SciCon bag. They somehow seem to have constant sales yet remain in business. Shop on Black Friday for lots of goodies, I’m a huge fan of the Rain Bag. People will tell you that you can leave your rotors on your wheels for travel. These people are not your friends. They probably work for Big Rotor and want you to keep replacing yours.
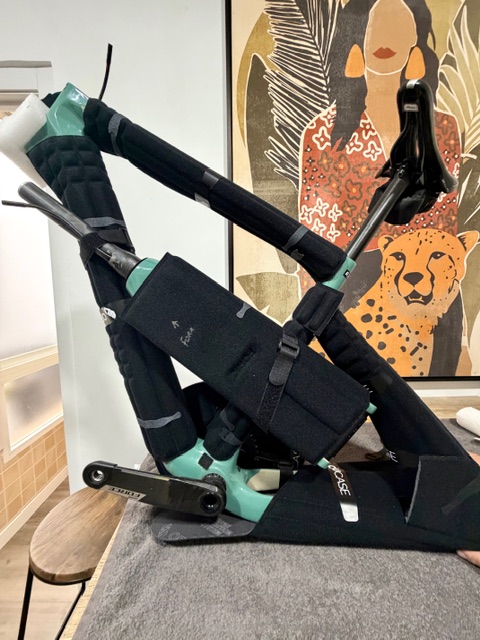
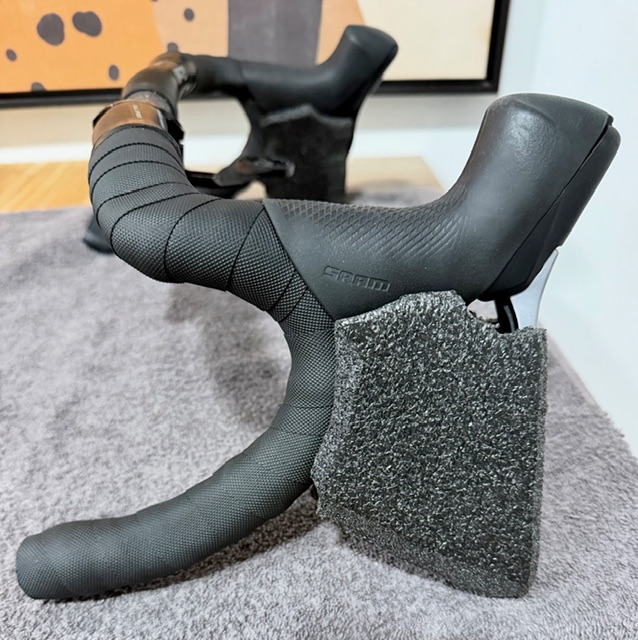
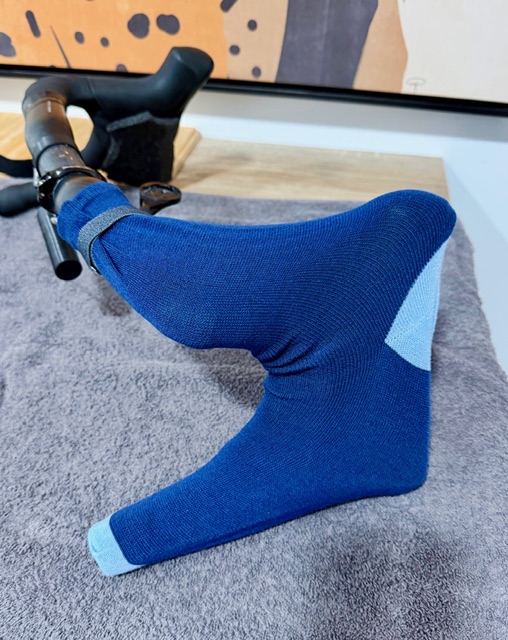
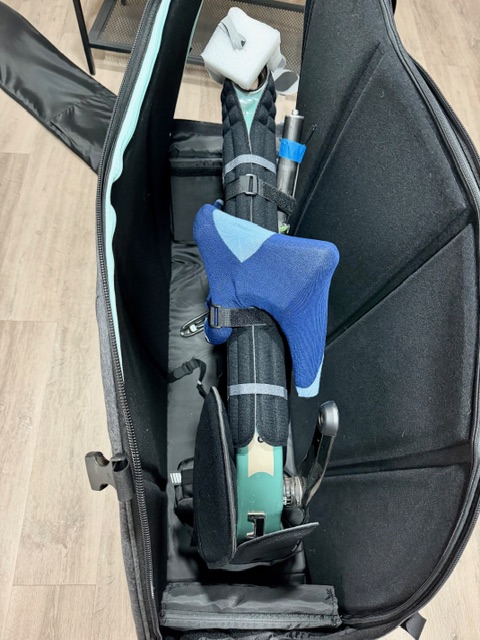
My method for packing handlebars is a bit unique. I carve filler blocks out of leftover packing foam to fit inside the levers and wrap the blades. These are followed by a long sock, which is held in place with a hook-and-loop strap, thus protecting the bar tape. Using the Orucase straps, the bars are anchored to the frame.
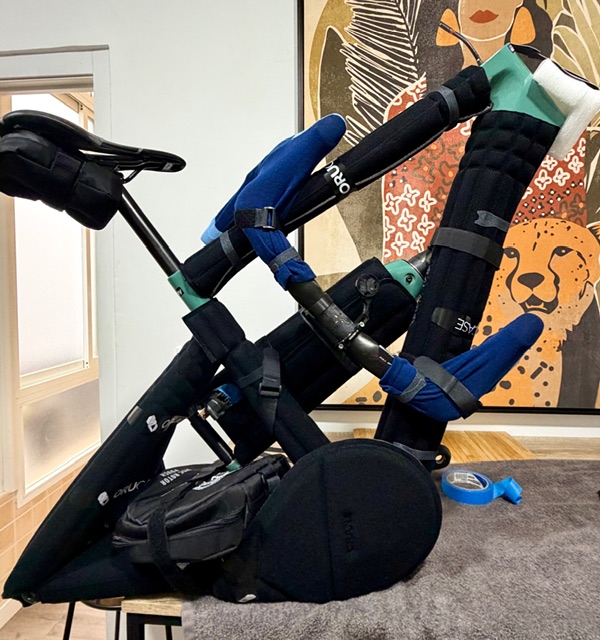
The whole shebang is then dropped into the case. In this instance, the bike fit better upside-down, with the saddle rotated. Once the frame is strapped down, the wheel bags get dropped in on the sides.
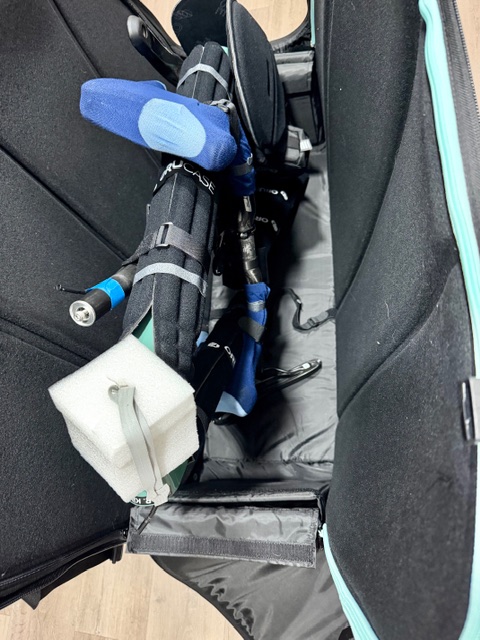
The end pockets then get filled with pouches (not included in the Orucase or padding kit). Ditty bags are a dime-a-dozen, so pick yours and use them.
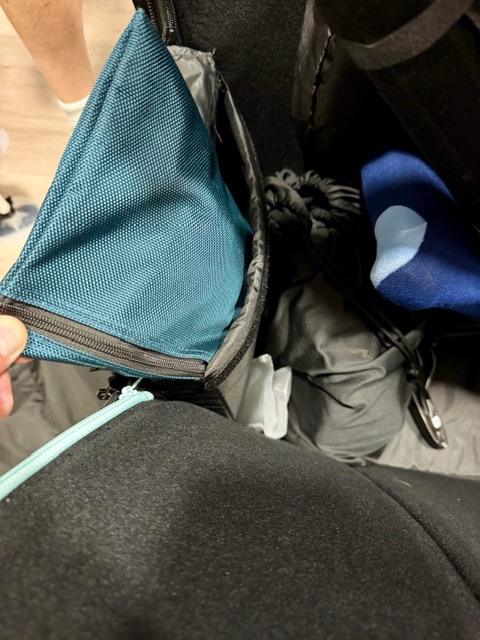
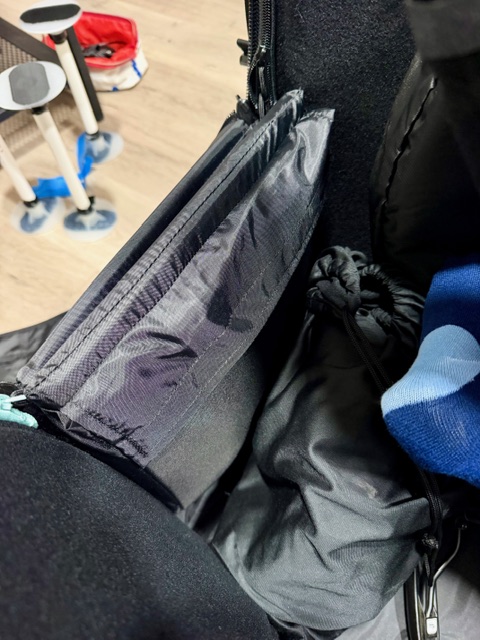
There’s room for a helmet and other stuff in the case, but don’t be tempted by trying to fill the empty space with all your crap. This won’t work out well in the end for you or the TSA agent. You want them to peek inside and send it along, and if it’s full of all your travel accessories, it won’t make anyone happy.
One thing I added, because I had them, was stiffener bars from another case. These are available as a kit, or you can order the ‘flanges’ from CMH Designs, hopefully Chris doesn’t mind that I said he can make some out of TPU, then you add your own ½” PVC pipe or conduit. Or, print your own, if you can. There, I justified a new purchase for your workshop.
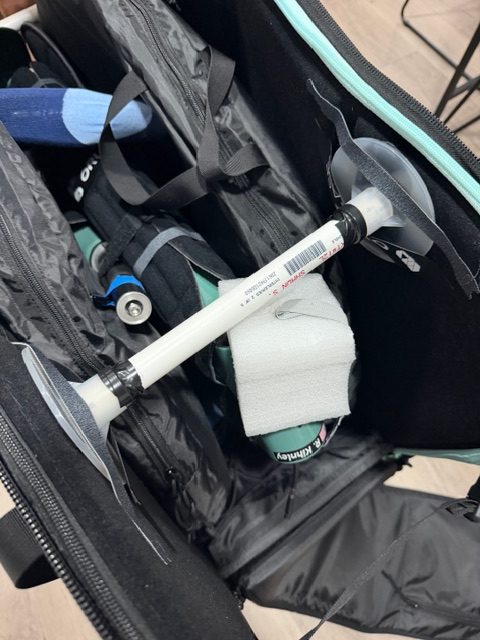
These stiffeners support the case, but more importantly, they support anything that gets put on top of it while it’s laying on its side. I once had a coupled frame get squished in a breakaway case: the seat tube of the rear triangle made a dent in the downtube of the front triangle. That frame is titanium; it was fine, but carbon would not have survived.
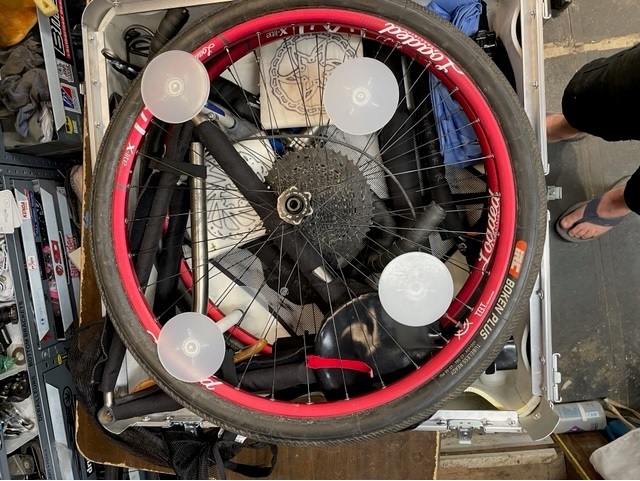
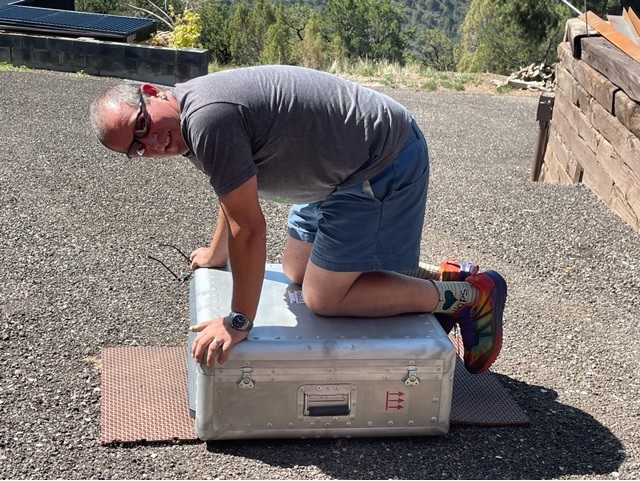
If I was to change one thing about this case’s design, it would be to have slots cut through the wheel bags (similar to how BuxumBox has slots in theirs) so that stiffeners could be used in more places. Basically, something as simple as a large button hole that would allow the ½” PVC pipe to go through the wheel bags and frame, then have the end caps installed, would do the trick. This is a relatively easy modification to an existing set of bags if you already own the B2 case.
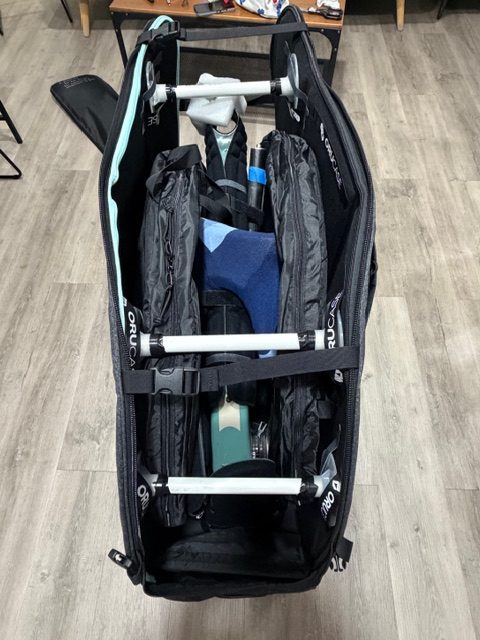
This bike packed in at 49lbs, squeaking below the heavy cutoff. Remember, bikes fly as suitcases on most airlines, but can get charged if overweight.
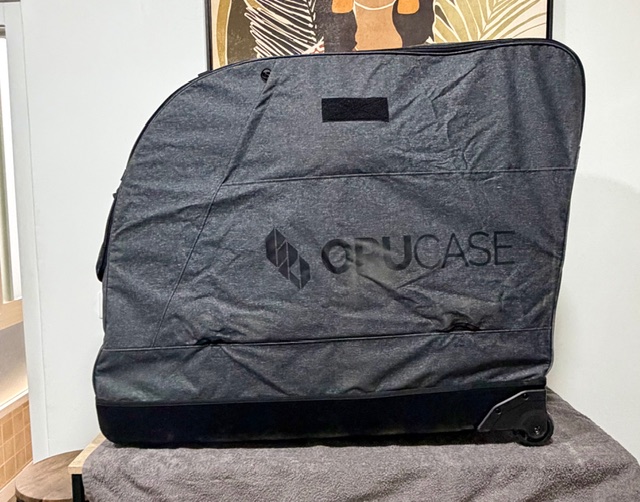
As I’ve said before, when you check this in at the counter, the bike becomes my problem, but only once as I put it on the plane and send it along. I’m never going to see it again, unless I’m working when you come home. For the rest of the trip, it’s your problem. You have to negotiate escalators, elevators, hotel rooms, buses, and taxis. On this latest trip I saw some people with EVOC or SciCon cases (they blend). While they take minimal disassembly to pack a bike, they also more than fill a taxi. My hardshell coupled bike case will fit 2 in a Prius taxi in Yerp, but not in a Corrolla wagon. Mrs. MAMIL and I once needed an Uber XL, which showed up as a Ford Land Yacht passenger van, just for our 2 fairly small cases since we struggled with every taxi at the train station and had to call for backup. If you’re tugging an EVOC, it might be one-person-per-taxi for you and your companions. Or call an Uber U-Haul. Your choice.
Taxiing, walking, and getting on the AVE trains with an Orucase B2 and coupled case was overall not an issue, although we had to walk though all the train cars to find space for both bikes. If we had an EVOC/SciCon along, we would have needed an additional boxcar. Rolling through city streets, over tiled sidewalks and cobbles, the Orucase was fine, and a couple of twisty staircases into our lodging were easy to navigate.
So, the upshot is this: in the absence of a coupled frame, this case is about the best you can get for easy packing (probably easier than a coupled bike due to the puzzle factor), ease of motion while traveling,and good protection. Yes, it added a step or two over a case that only requires removing the front wheel and maybe bars, but you also don’t need a separate freightliner to follow your taxi. If I didn’t have metal coupled frames all around the house (they seem to multiply when left in a darkened basement, that’s just how they reproduce. I didn’t order any more of them. Really.), this would be my primary travel case. It’s well designed, durable, light, and as far as quality cases go, reasonably priced. If you’re an Escape Collective member, there’s even a discount. Go sign up, the savings will offset your membership.
So, if the case issue has been holding you back from packing your bike and finding new frontiers, you just lost one more reason. Pack your bike and get your ass out to somewhere new. You’re running out of excuses, and if you don’t do it this year, you’ll be one year older when you do.*
*thanks, Warren.