
Disc brakes have become the norm for drop bar bikes, relegating rim brakes to the Collector’s Item category. I’m not saying they’re bad, I’m saying that my rim brake bikes are becoming classics, the sort of thing you take out on a sunny Sunday for a cruise on terrain where stopping quickly is not a priority.
While there are cable-actuated disc brakes that are pretty good, such as Paul Klampers, Juintech/Yokozuna, and TRP, my preferred shifting system, SRAM AXS, is moving away from cable brake actuation in favor of hydraulic-only. I’ve covered disc brake options and details here.
Shimano still makes electronic shifting with cable brakes for drop bars, but the definite trend is towards electronic shifting and hydraulic brakes. Since wireless shift kits make packing a bike really easy, particularly for a coupled frame, the challenge becomes dealing with the disc brakes.
Coupled hoses, such as Zeno, make this really easy. I have some Formula ProLock coupled hoses, but they are now out of production. The Zenos are available in both DOT and Mineral Oil, and I have found that the Gen 1 work very well. At the time of this writing, I am waiting for the G2 to be available. While the Formula system has worked well, the oldest sets of hoses are starting to leak, presumably because DOT fluid is abusive on O-rings.
Regardless of the system used, disc brakes need bleeding for regular maintenance. This should certainly be done as part of a full checkout prior to travel, along with checking chain wear, shift tuning, tires, wheels, etc. before packing. Making sure your bike is in perfect running order before the trip is a major part of enjoying your explorations.
That said, shit happens. There are 2 common problems that can arise, and you should be comfortable fixing both. One is no braking power, the other is too much. Fortunately, both are easy to fix in just a few minutes.
On our last trip, 5 days and 200 miles in, Mrs. MAMIL reported a mushy brake. Being a bike tech nerd, I had naturally checked the brakes both before and after travelling to our destination, and everything was in working order. Now, inexplicably, her front brake lever went all the way to the bar. So, without further ado, I dug out the tool kit.
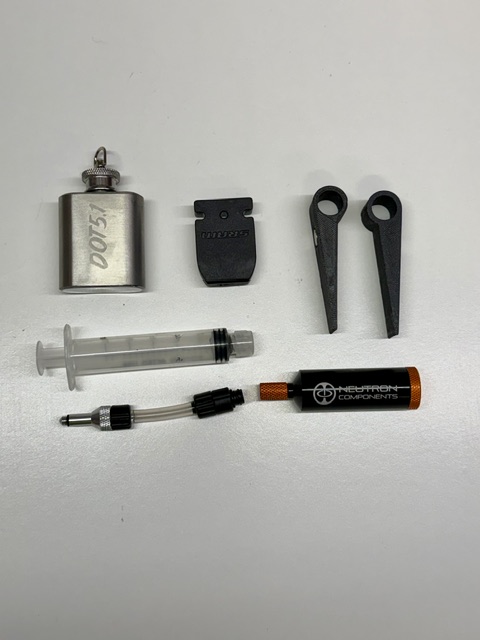
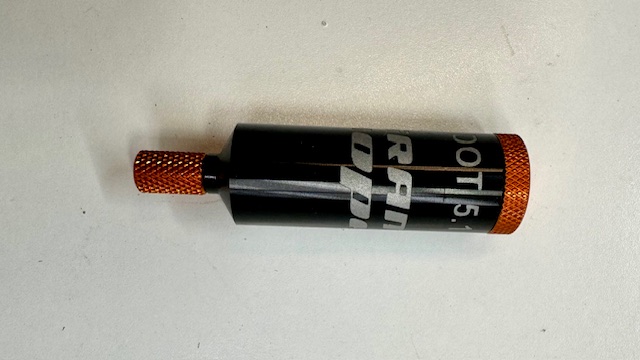
Since I created that post about the tool kit, I have added a 10ml syringe with Luer Lock tip and a hose with a caliper fitting, and a 1oz stainless flask. Between the Neutron bleed bottle and the flask, I have almost 2oz, which is plenty for a bleed.
This is a very abbreviated version of a proper bleed, but in this instance it’s intended to keep you rolling, not perform a complete brake service.
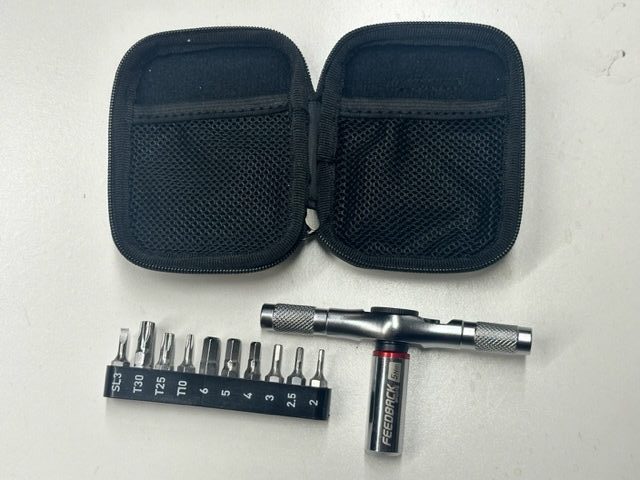
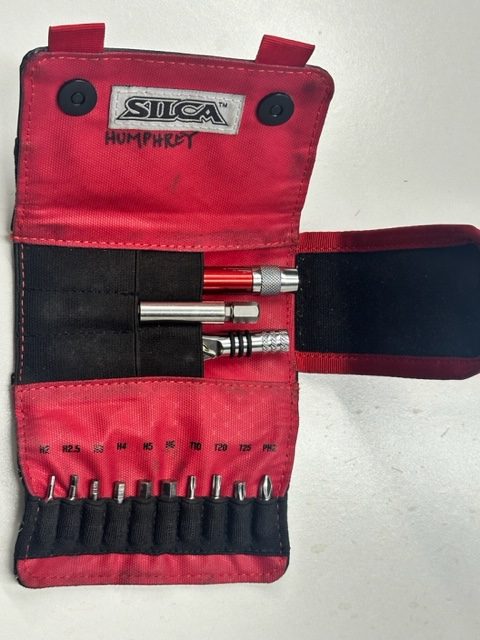
If it’s just a topoff, then simply make sure the bike is level and stable, then connect the Neutron bottle to the bleed port (SRAM uses a T10, Shimano uses 2.5mm hex, both of which are included in the Feedback and Silca kits mentioned here).
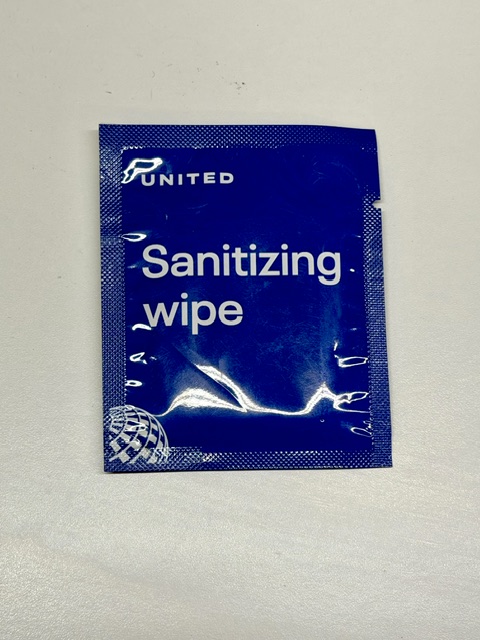
Pump the lever and you will see bubbles come up, keep pumping until it stops. Since the reservoir is open, you should not feel any tension change on the lever. When bubbles stop, cap the bleed cup and remove it. In SRAM levers, you can see if the fluid is at the top or not. If it is, replace the bolt and wipe up any spills. United alcohol wipes are really handy for this, if you fly that airline you can usually grab several for future use. Delta’s wipes have Purell, which is good for killing nasty bugs but bad for cleaning up brake fluid.
If this doesn’t solve the problem, it’s time to bust out the syringe and bleed fitting. If you’re doing this out in the toolies, it can be a bit of a pain, but take your time and it will work out.
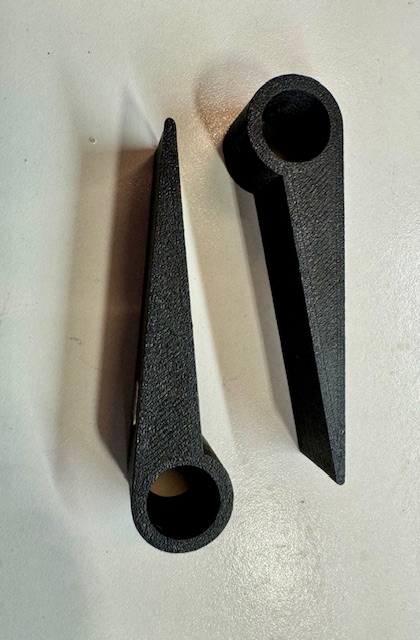
Stabilize the bike, remove the wheel and brake pads, and install a bleed block. 10ml is plenty of fluid for this, so fill the syringe and connect it to the caliper bleed port. Put the bleed cup back on the caliper, with the lid either all the way off or loosely so air can get out. Use the syringe to draw a bit of fluid out of the cup to see if any bubbles come out, then with the plunger upwards so there’s no air at the fitting, push fluid back through. Be careful not to overfill the cup or draw so much back you pull air in.
Once you are satisfied that you have the air bubbles out, remove the syringe, replace the plug, put the remaining fluid back in the flask, and then remove the bleed cup. Ideally you should see fluid at the top of the bleed port on the caliper. Replace the plug and squeeze the lever a few times, if it feels good then remove the bleed block, clean everything up, and replace the pads and wheel.
Ideally, this will have solved the problem, and if it’s not a total fix, hopefully you have enough braking to get to a town with a bike shop, and with luck, that shop can help you without scheduling a repair a couple of weeks out.
At the opposite end of the spectrum of brake problems is a stuck piston. Riding in the rain can pick up enough road grit to make it difficult for the pistons to retract, which can lead to brake drag. On another trip, my rear brake got really dirty and the pistons basically stuck, grinding away the pads.

This is an easier fix, but also involves removing the wheel and pads. I hung my bike by the saddle nose on a swingset in a park, which worked great because it put the brake caliper at eye level. I used a couple of paper napkins from a nearby cafe and cleaned the inside of the caliper and sides of the pistons before pressing them back in. Either a plastic tire lever or some CMH mini pad spreaders witll do the trick.
Since the pads were toasted, I took one of the pairs of spare pads (I always travel with 2 sets), popped them in, replaced the wheel, and was ready to go in less than 10 minutes.
I also carry hose fittings (barbs, olives, washers, etc) which would allow a full hose repalcement. Shops will have standard Shimano and SRAM fittings, but I use Hope RX4+ brakes and can’t assume that a shop will have Hope parts. Also, bike nerd.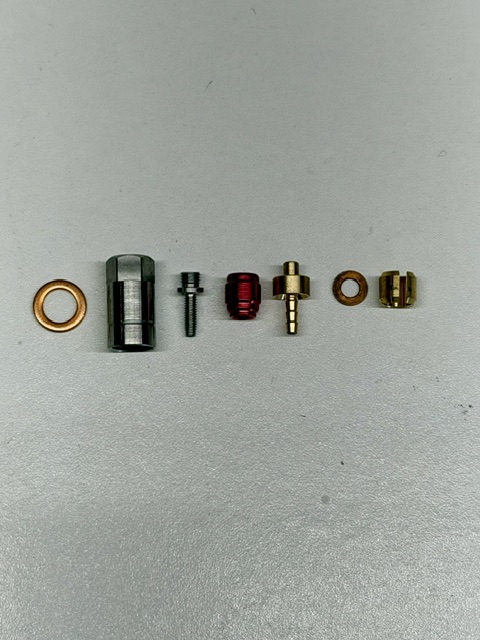
The upshot here is that these issues are easy to fix, whether roadside or in a hotel room. You can usually find a bike shop in most towns or cities, but they may not have the time or be willing to help you as a walk-in. Being familiar with the solution, as well as carrying the tools and spares, can make a brake problem into a minor annoyance, fixed in a few minutes, instead of a trip-scrambling issue. As will all things for making bike travel easier, prep ahead of time, practice, and take the stuff that you need.