In 2021, bike parts and bikes suddenly became as scarce as hen’s teeth. MAMILs the world over scrambled to find parts for bike projects, lead times were measured in eons, and any somewhat functional part suddenly tripled in price, regardless of age or actual functionality.
My son, who is an aspiring racer, needed a race bike in the midst of this mess. There’s a principle in bike racing that is important to remember as bike prices start to push $20,000: don’t race what you can’t afford to crash. My car is worth substantially less than $20K, and I can’t afford to crash it, so we searched high and low for a frameset. In theory, the Specialized Allez Sprint is ideal: aluminum, durable, fast, light, stiff, sweet paint. Also $1,600 for a frameset and sold out world wide.
eBay is awash with generic carbon frames, many of dubious provenance, but Tideace seems to have a track record and doesn’t have a terrible reputation. A friend who regularly crushes Cat 1 races said he raced a Tideace mountain frame for a year and loved it. These frames are sold direct from Haidelibike.com as well, in some cases for less than they show up on eBay.
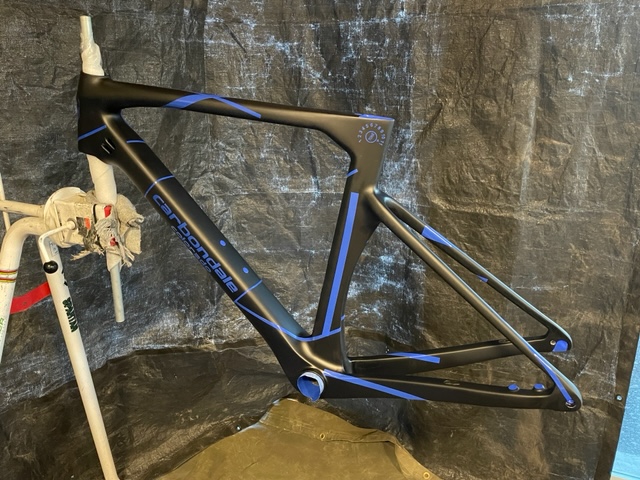
I contacted them, and they had the model we were searching for in stock: a 2018-design disc brake somewhat aero frameset. In fact, it looked very similar to the Allez Sprint, except it was 1) in stock, 2) plastic, and 3) about 1/4 of the price of the Spesh. Although they offer it in colors, all that was available was black, which was fine with us.
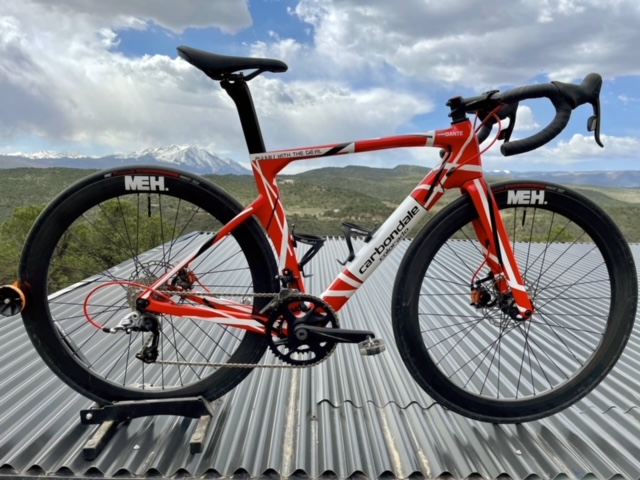
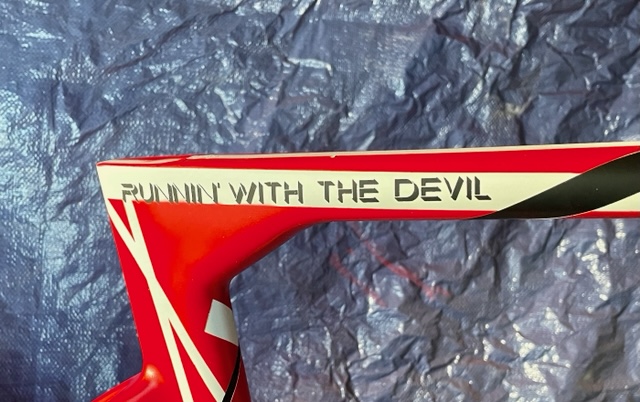
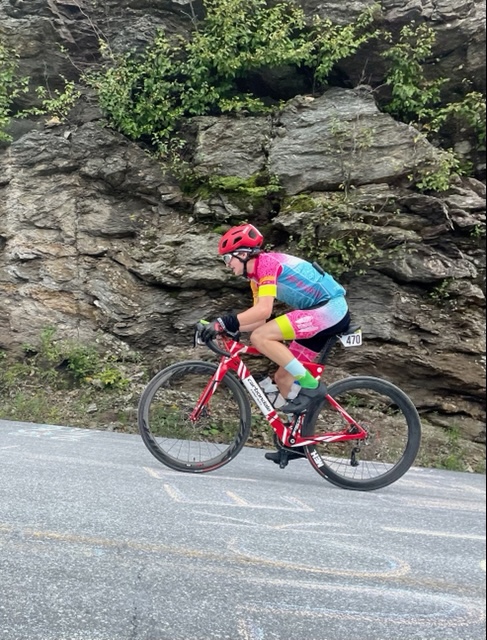
We didn’t really want a black bike, so we spent some time thinking up a paint schemes. I told my son to think of a song he liked, and being a young man with good taste, he picked Van Halen’s Runnin’ With the Devil. This led to only one possible design: it had to look like FrankenStrat.
Enter Spray.bike, a bike-specific spray paint with a cunning name that removes ambiguity. It claims to be powder coat in a can, and on their website are some very cool hipster-ish paint jobs on fixies with itty-bitty handlebars. They also offer clear coats and primers, so I decided to order up, having never painted carbon fiber before.
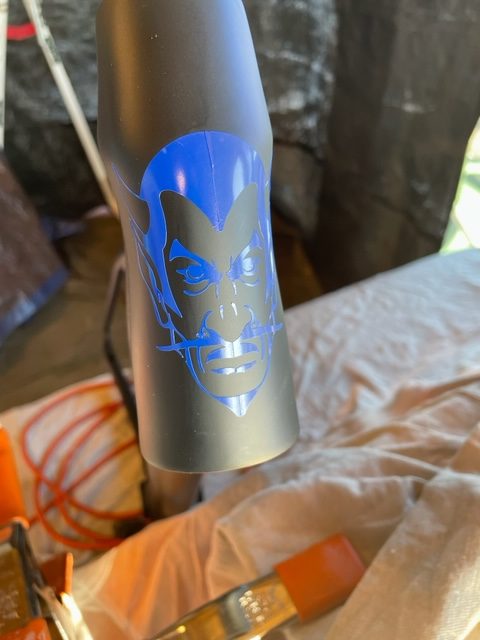
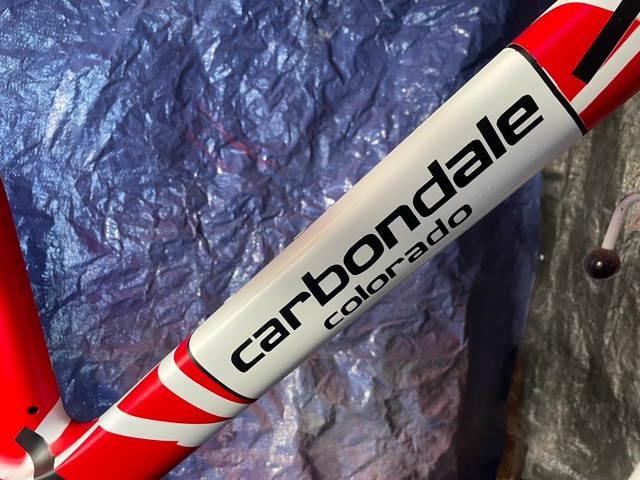
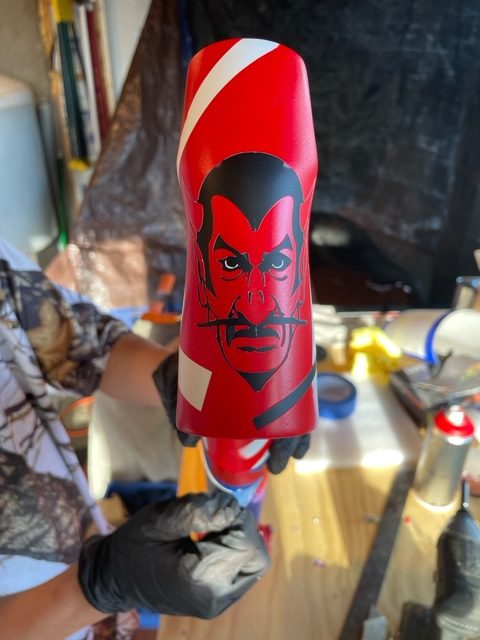
I ordered up a can each of red, white, primer, and clearcoat. I got crazy and bought the clear coat with multi-color sparkles. I also sat down with my vector graphics program and vinyl cutter to make some masking. Van Halen’s first album used a cool drop-shadow font, so finding a match to that was the first order of business. Next up was taking the mascot from my son’s school and tweaking it, and finally, messing with the Cannondale logo to turn it into the name of our hometown. These efforts also gave my son a chance to spend some time in a vector program learning how to edit objects.
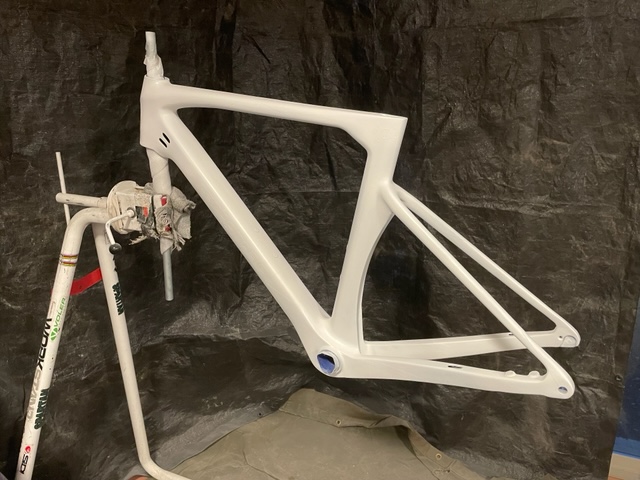
We built a mini paint studio in a storage area, draping tarps from the walls and across the floor. My old workstand became a painting frame which allowed 360-degree access to the frame. Spray.bike’s carbon primer went first, after a thorough cleaning of the frame. We did 2 coats of primer, then allowed it to dry overnight. Then we cut masking for axles, bottle bosses, and the seatpost, and applied some of our cut vinyl text and stripes. Included in our scheme was a volume knob, labeled “Tone” (as per EVH), but with the numbers going to 11 (as per Nigel Tufnel).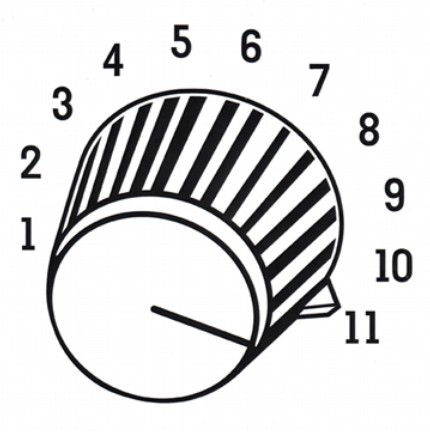

The first color was white, because it’s better to start with lighter colors and work darker, rather than the other way around. The challenge in this process is to think backwards through your colors. The Spray.bike paints dry quickly in the air, so you need to hold the can about 4″ away as you work. There’s a fine balance between getting too close and dripping versus too far away and letting the particles dry before hitting the frame. It’s also pretty thick, which left discernable edges along our masking.
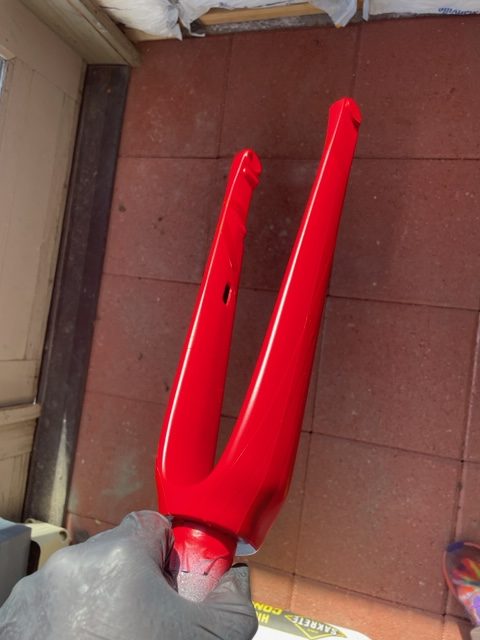
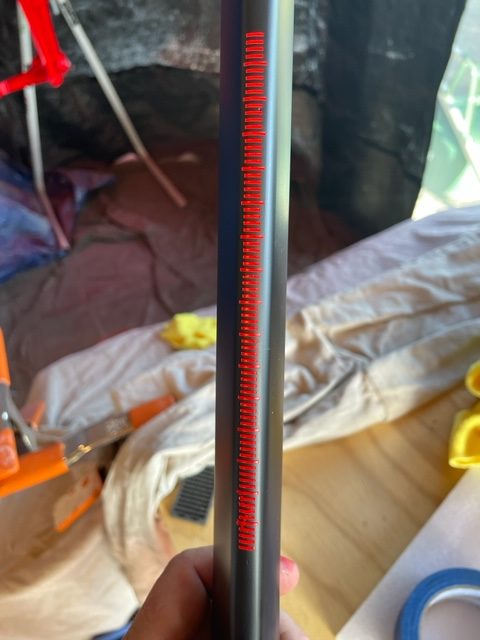
Along with the frame, we also masked and painted the seatpost and fork, using the same procedures. The first coat was left to dry overnight, then another layer of masking was applied.
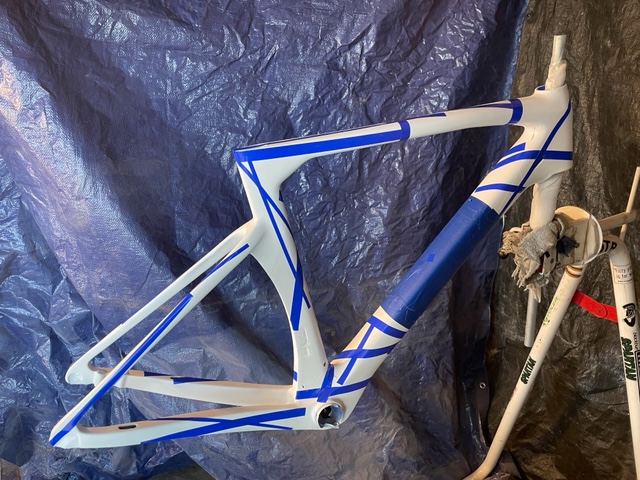
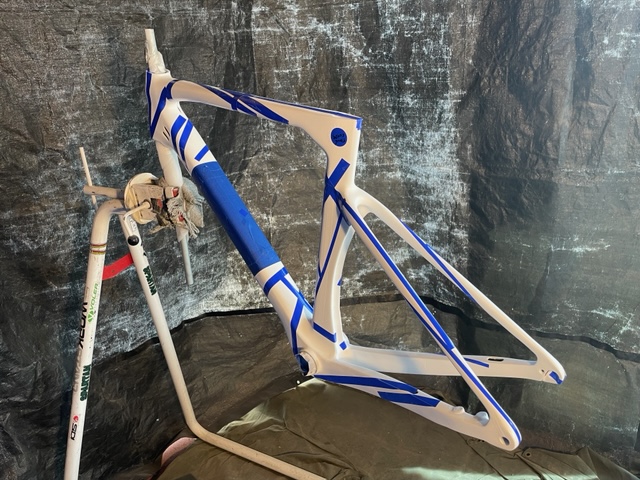
I specifically used a vinyl mask that was a different color than what we were painting so that we would be able to see what was completely covered. The first layer had dried a bit loose, I should have held the can closer, and should have used compressed air to blow dry particles off before the second mask. The new vinyl did not adhere well in some sections.
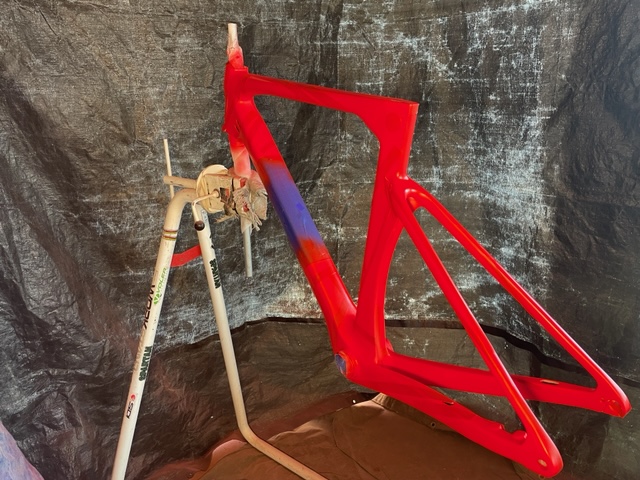
Another overnight dry time, and it was time for the big reveal. Using an X-Acto knife and pin vise with a pick, we carefully lifted the layers of masking off the frame. In general, since we had never done this before, we were pretty pleased with the results.
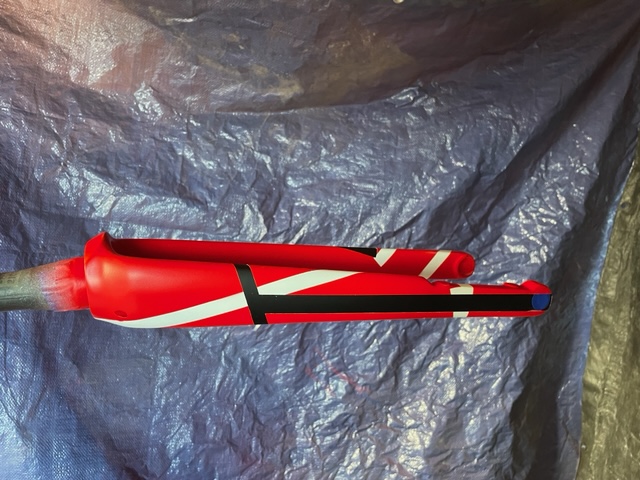
The final step was to do 3 topcoats of clear sealant. The glitter in the sealcoat also added a fun sparkle in the sunshine.
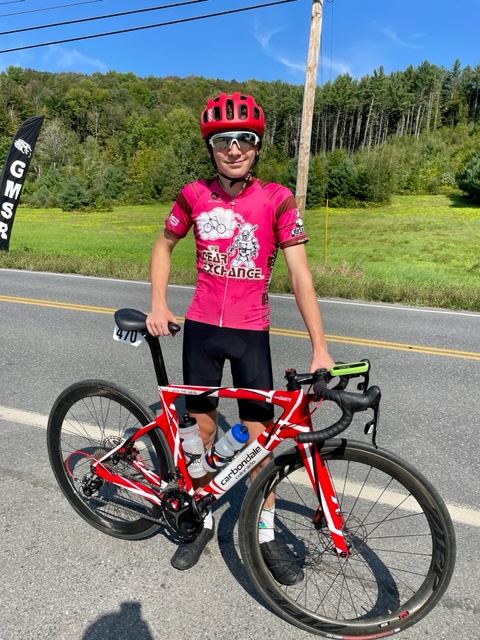
Overall, it was a fun painting project, and possibly the most difficult part was waiting overnight between coats. After everything had dried, we built up the bike, naturally made of cobbled-together parts, which seemed appropriate for an EVH tribute.
After a season of racing, the bike has collected smudges, scrapes, chips, and dirt, but rather than detracting, it has just added to the the overall finish. Eddie’s guitar was hardly pristine after all, so this bike follows suit. The Spray.bike paint is somewhat fussy, and I can’t really say if it is better or worse than a Krylon or Rustoleum designed for plastics. If we had gone for a perfect paint job we might have been disappointed, but in this case, the chips are part of the spirit of the bike.
According to my son, the bike rides great, and he has no complaints. From a build standpoint, the press-fit bottom bracket sucks, but that’s not an issue with this frame per se, it’s a problem with press-fit sucking out loud. Or creaking out loud, as a point of fact.
I also had to very carefully drill out the fork in order to get the brake line through it, the layup was a bit sloppy. I could thread a cable through, but not the housing. Using a 10″ 1/4 drill bit and being extremely careful, I was able to chase the hole and get the housing through the fork leg. Running internal cables through the downtube was easier, but definitely made me happy all of my own bikes are externally-routed. At least nothing went through the stem and steerer.
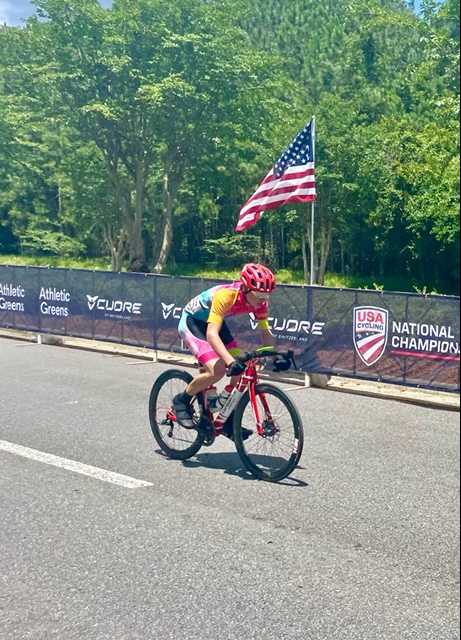
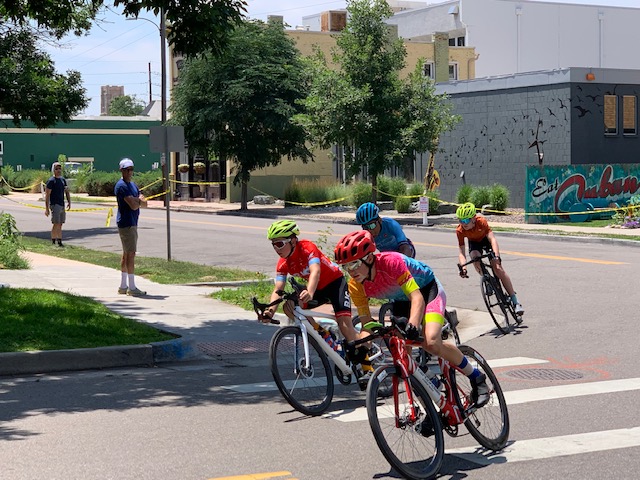
The bike has now won many races and competed in some stage races and national championships. It has traveled across the country twice with no damage. It’s not light (about 19lbs), but isn’t built up as a featherweight. Yokozuna brakes work really well but aren’t light, Rival 22 is no feather, and 40mm Light Bicycle rims on American Classic hubs won’t float up a mountain. Alloy bars weigh more than carbon but can survive a crit, so this bike is not a weight-weenie’s dream. It is however, durable and affordable.
He did crash it once, in a pile-up caused by cones being in the roadway. He said he aimed for another guy and used him as a cushion, suffering little more than a shift lever slightly rotated on the bars. The landing pad apparently let out a squeaking noise, but few complaints beyond that.
It has now spent a winter on the rollers, and once the snow melts and the roads dry a bit, it will come out of its hibernation and be released into the wild again. He has not grown a lot since we built it, so the frame will fit for another season at least. We would not hesitate to buy another, as the value of the frameset is actually quite good. Any frame and fork that ships for under $500 and survives racing and travel is OK in my book, particularly since so many bikes and parts are still not going to ship until 2023.
I’m not sold on Spray.bike, when we do another frame I will use the primer and clear coat, but I think I would like to experiment with other paints. Of course there are air compressors in my shop (MAMIL, duh, I collect every interesting tool) and spray cups aren’t crazy expensive. Using an HVLP or automotive setup I can probably make a serious mess out of things.
I just have to schedule it for when Mrs. MAMIL is out of town.