Tailfin appeared on the cycling scene a few years ago with a snazzy carbon fiber rack that fit onto snazzy carbon fiber bikes that didn’t have rack mounts. It was slender, strong, light, and elegantly designed. The original Tailfin was very well received by the cycling cogniscenti, and the company added panniers and other accessories.
In summer 2018, they offered a Kickstarter for the AeroPack, which was conceived as a combination rack and bag for long-distance racers. Unlike other offerings on the market, it had some clever ideas: top loading, integrated rack, quick connections to the bike, and so forth. MAMILs are similar to crows: easily distracted by bright and shiny objects, and I could hardly resist my corvid urge to step up for a new toy.
Kickstarter is fraught with risk, and although I have only bought a handful of items off their site, I’ve had pretty good luck. A few were duds, not much more than a polished turd, but Tailfin set a high bar with regular updates on the product development, images of prototypes and testing, and interestingly, stories of failures and the changes that they led to.
The original concept was well-maintained throughout the Kickstarter campaign, and seeing the improvements through the testing process was pretty cool. They were not only good about updates, but they sought feedback and comments from the supporters. Even better, they replied via email to such comments. Tailfin already had a proven track record, and they set an example for other Kickstarter campaigns to follow.
The AeroPack arrived after a 10-day journey from the UK (7 of which were in the un-updated USPS hall of horrors). Upon delivery, I quickly scurried back to my nest, treasure tucked under my wing, to unbox and assemble the pack.
Tailfin emailed instructions to buyers, and one presumes that they will be in hardcopy form in future shipments. Overall, the instructions are fairly clear, but they don’t explain one baggie of bolts and spacers (presumably for attaching to rack mounts and skipping the axle mount), and they don’t make it super-clear what the axle collars do (and how they fit). As this is pretty early in the product’s lifespan, I assume the directions will be updated.
As part of the order process, you select an compatible axle (quick release or 12mm), then select your thread pitch. In the thru-axle version, there are 4 versions, so check your threading prior to ordering.
There are several combinations available: alloy or carbon yokes, detachable bags, yokes which can or cannot take side panniers. I opted for carbon, integrated, and pannier-able. You, dear reader, must make your own choices. It’s called “adulting”. It’s also called “draining the bank account”.
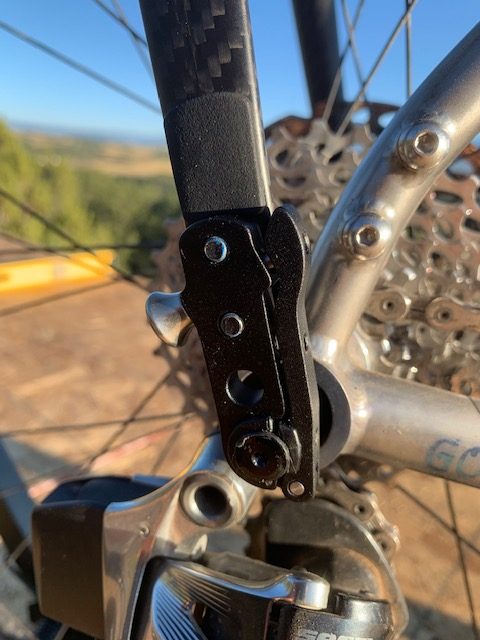
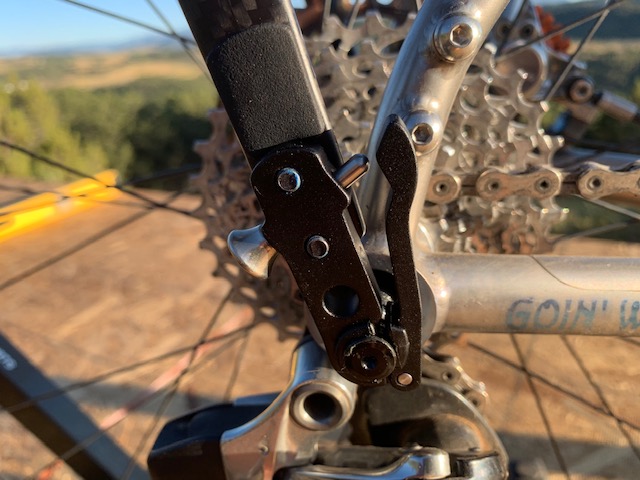
The axle has machined ends which work with the quick-release latches on the rack yoke. Included are 4 collars, 2 with tapered ends and 2 square. Each version has a thick and a thin collar, so you need to select the version that works with your dropout. The threaded section of the axle is quite long, and threaded into my dropout very smoothly. Due to the tapered connection, the axle uses a 5mm hex instead of the more standard 6mm on most axles.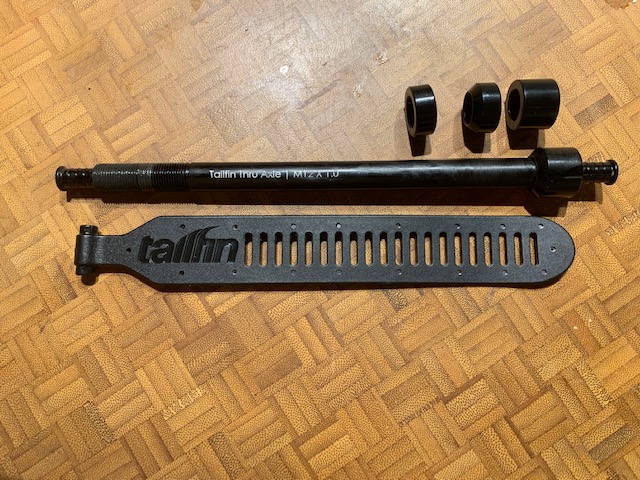
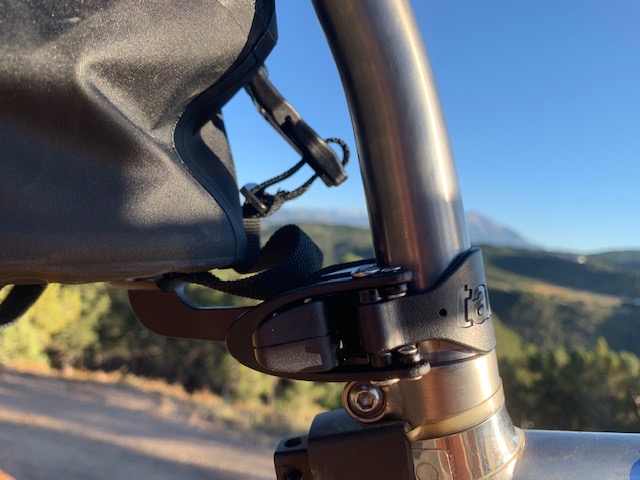
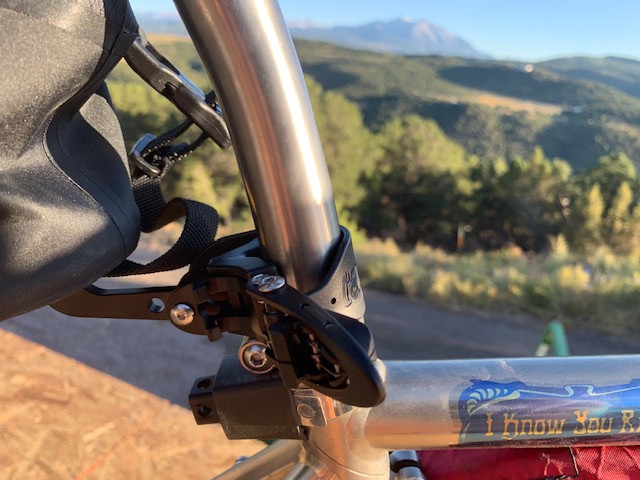
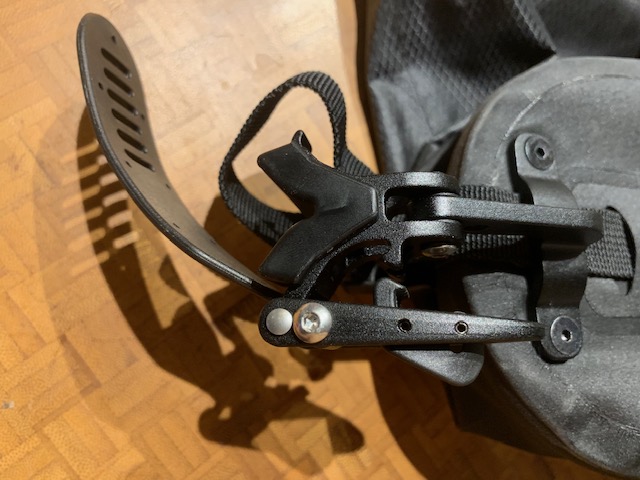
Assembling the bag and yoke is pretty easy, first you install the quick release latches onto the yoke, then add the yoke hinge, then connect the yoke and seatpost latch to the bag. It’s an easy assembly, with the bolts pre-loctited (like disc brake bolts). The bag and yoke together weigh 920 grams for the carbon yoke/integrated bag version.
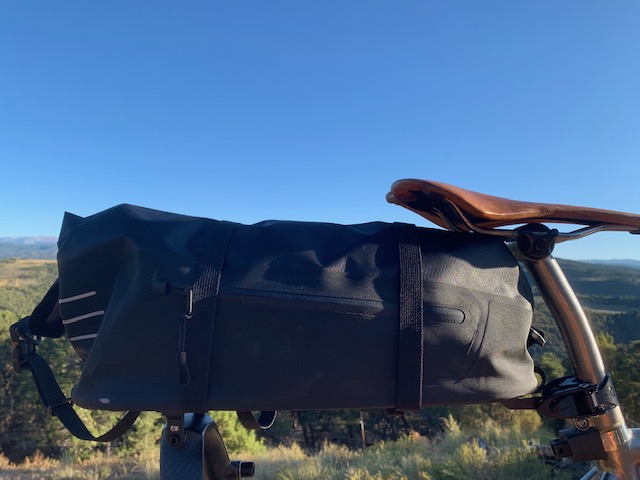
The bag is made of black waterproof fabric. It has a durable feel in the hand, and the upper half has a diamond ripstop pattern. There are cinch straps front and rear, as well as 2 transverse straps. The transverse straps pass through loops, allowing them to slide around the bag to find the correct buckle position. On the back corners are lash points, which can also hold clip-on tail lights. Small, reflective hashmarks are on the back of the bag, but it’s hard to say how well they work as they are pretty small.
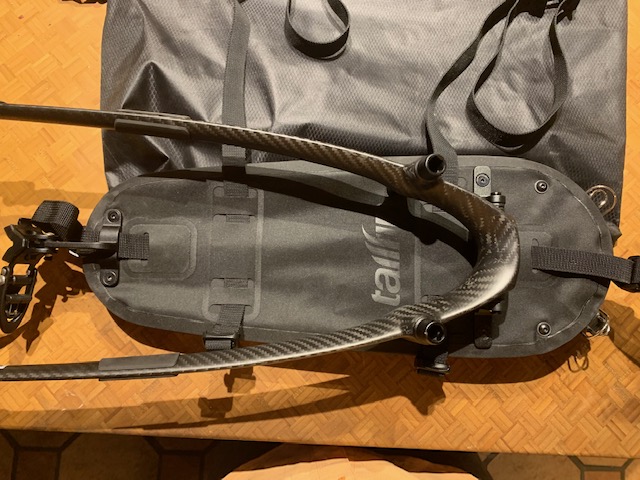
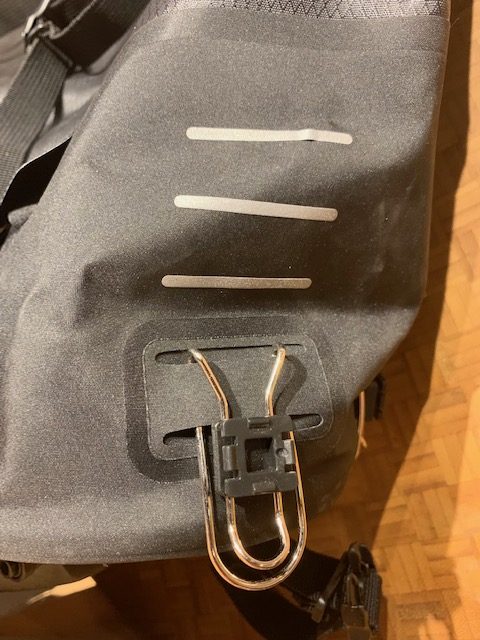
Unlike many other rear bags on the market, or like seatpost-mount flare bags, this has a wide roll-top for easier access. The bag is 20 liters, which is a unit which is both entirely accurate for measuring volume, and simultaneously useless in telling you how big it is. I measure it at 5″ wide at the front, 6-1/2″ at the back, 17″ long, 15″ deep (to the top edge of the bag). There are two zippers on the side, one has a small pocket, the other accesses the interior of the bag.
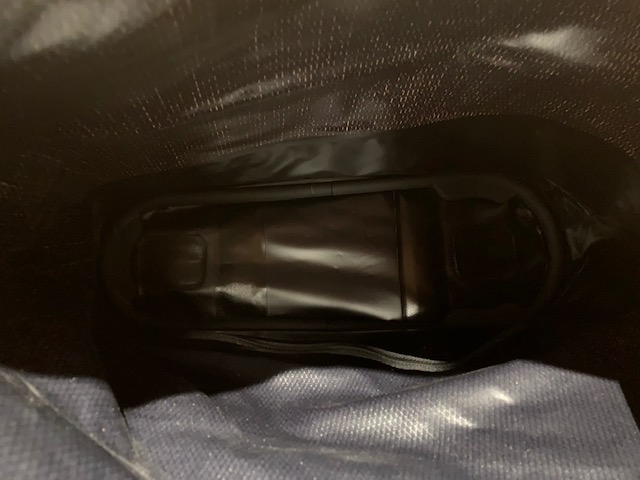
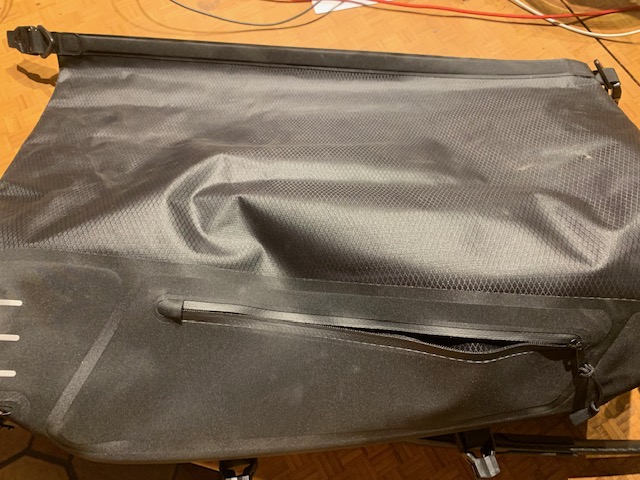
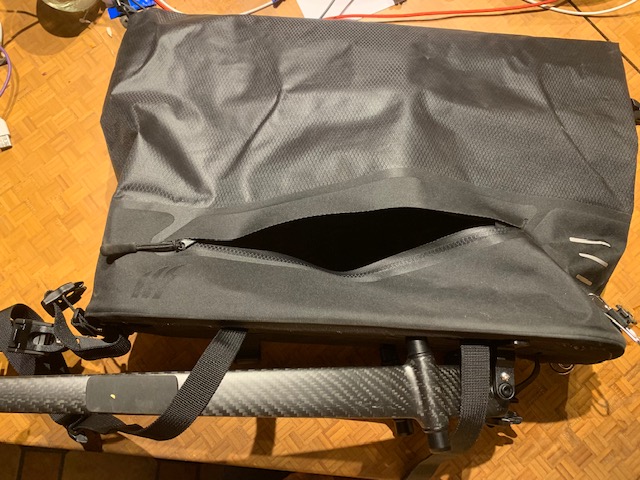
The bag is slightly shorter at the front (4″), and taller at the back (5-1/2″). Depending on how far your seatpost is extended, you may have trouble fitting it under your saddle. I had to remove my Silca saddle bag in order to clear the Aeropack.
The buckle system is simple and well-designed. On the ends of the yoke are clips which open up with a simple pull of a stud and close with a subtle click. At the seatpost, a buckle and strap are simple, quick, and easy to operate. The buckle has a locking latch so it won’t pop open, and the kit ships with a longer strap. For my 27.2mm seatpost, the smaller strap was plenty large. Removing or installing the AeroPack is fast and easy, only a few seconds either way.
Ride quality
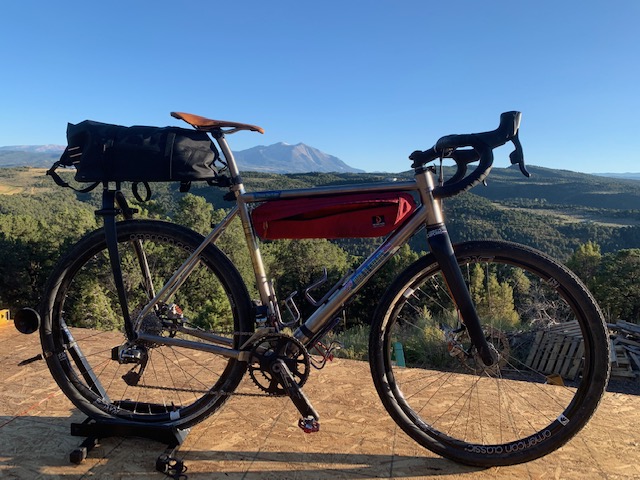
I tested the AeroPack on a one-day event called the Hardscrabble Humper, an unsupported, free, unorganized gravel thingy in Eagle, Colorado. As it’s a one-day event, I really didn’t need the AeroPack, but my son was along, which means I’m pretty much the Team Car. I loaded it with enough food for a 12-year-old on a 45-mile, 4800′ dirt road and single-track route. Which is to say, I was truly a Moveable Feast.
My kid is at the age where growing not only happens often, but you can watch it happen before your eyes. At breakfast, his pants cuffs drag on the floor, and by the time he heads out for the bus, he’s wearing pedal-pushers. He goes through life like Pac-Man, eating everything in sight. Not only is this expensive, but the constant wakawakwakawakawaka sound he makes gets annoying. The only respite is the Game Over music as he heads to bed.
Over 45 miles of rough gravel roads, singletrack, and high altitude (over 10,500′), the only time I was aware of the pack was when I stopped to retrieve food for the kid. It was rock solid, with nary a wiggle or rattle on a course better suited to a 29er.
Suffice to say, it was exactly as it should be: unobtrusive.
Quibbles
OK, not really any major issues with the setup. I noticed that one corner of the bag’s fabric was a bit abraded from contact with the shipping carton, but I got presidential and used a Sharpie to color it back in. The instruction sheets need to be fleshed out and made more clear for the less mechanically-inclined MAMILs out there. I’d like to see more reflective stripes or fabric colors (also, one stripe was delaminating from the fabric, but this is pretty common with reflective stuff). I know basic black goes with everything, including being hit by a car.
Over the course of the ride, the thru-axle loosened by about 1/2 turn, not enough to create a problem, but enough to introduce some rattle and brake rub in the rear wheel. However, this is minor and is common on thru-axles, especially with new ones.
It might be cool if they added additional bottle mounts in future versions (or bolt-on collars for current ones), and maybe a longer reaching seatpost clamp to move it aftwards a bit as I occasionally felt it contact my impressive MAMILilain hamstrings. However, my substantial bulk aside, I was pretty much unaware of the Tailfin AeroPack’s presence.
I did not test the waterproofiness of the fabric, what with living in a high altitude desert and all, but the airtightness of the pack was evident whenever I rolled the top closed. Opening the access zipper on the side was critical. It also was able to capture a hornet at lunch and deliver it alive and somewhat irritated to the bar at the end of the ride, much to the surprise of my son, who was the first to greet the hornet while searching for an orange in the depths of the pack.
Those items said, the Tailfin Aeropack is rock solid, well made, and will be a standard part of my travel kit. It’s also calling to me to be used for some credit-card touring (a recent camping trip reminded me that sleeping on the ground is best left to younger spines). As purchasing a single lightweight hipster-friendly bikepacking tent is worth several nights in well-appointed hotels with decent lobby bars, I am willing to forgo the rustic adventures in favor of good rides with an adequate amount of gear and a well-made bed. Just because I still own titanium cookware and an itty-bitty stove does not obligate me to use them and take up valuable space where my hot-tub trunks go (you can only call them swim trunks if you actually swim in them).
As I search out the multi-day rides, the Tailfin AeroPack will be a critical part of the kit, and I am looking forward to more adventures with it on the bike.
UPDATE FEBRUARY 2, 2020
Tailfin realized that the reflective stripes were delaminating on some of the first run packs and immediately sent out letters to the owners offering to replace the packs. I opted to keep mine. This underscores how good the company is at standing behind their products.
Also, because my fatbike had rack mounts on the seat stays, I was able to make some simple adapters and use the Aeropack. I got lucky, to be sure, but it’s worth checking out mounting options on your frame(s) beyond just the axle mount.
2 Replies to “Tailfin AeroPack Review”
Comments are closed.